18
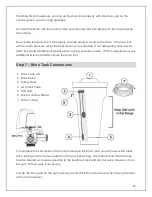
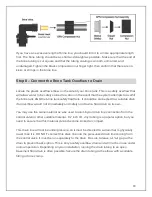
If you have an excessive length of brine line, you should trim it to a more appropriate length
first. The brine tubing should be as short and straight as possible. Make sure that the end of
the brine tubing is cut square and that the tubing coating is smooth, unmarred, and
undamaged. Tighten the black compression nut finger tight, then confirm that there are no
kinks or crimps in the brine line.
Step 8 – Connect the Brine Tank Overflow to Drain
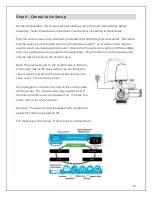
Locate the plastic overflow elbow on the side of your brine tank. This is a safety overflow that
will allow water to be safely carried to a drain in the event that the system attempts to overfill
the brine tank AND the brine tank safety float fails. It should be connected to a suitable drain
if an overflow would not immediately and safely run down a floor drain on its own.
You may use the same material as was used to plumb your drain line connection from the
control valve or other suitable material. 1/2 inch I.D. vinyl tubing is a popular option, but you
need to ensure that this material cannot become kinked or crimped.
This drain line will not be under pressure, so it must be directed to a drain that is physically
lower than it is. DO NOT connect this drain line into the pressurized drain line coming from
the control valve. It must be run separately to the drain. Be sure to leave a 1” air gap at the
drain to prevent back-siphon. This is only a safety overflow drain and will not be in use under
normal operation. Depending on your installation, running the drain tubing to an open
basement floor drain is often possible. Secure the drain tubing to the elbow with a suitable
fitting or hose clamp.

