4
Assembly
Step 1
Step 2
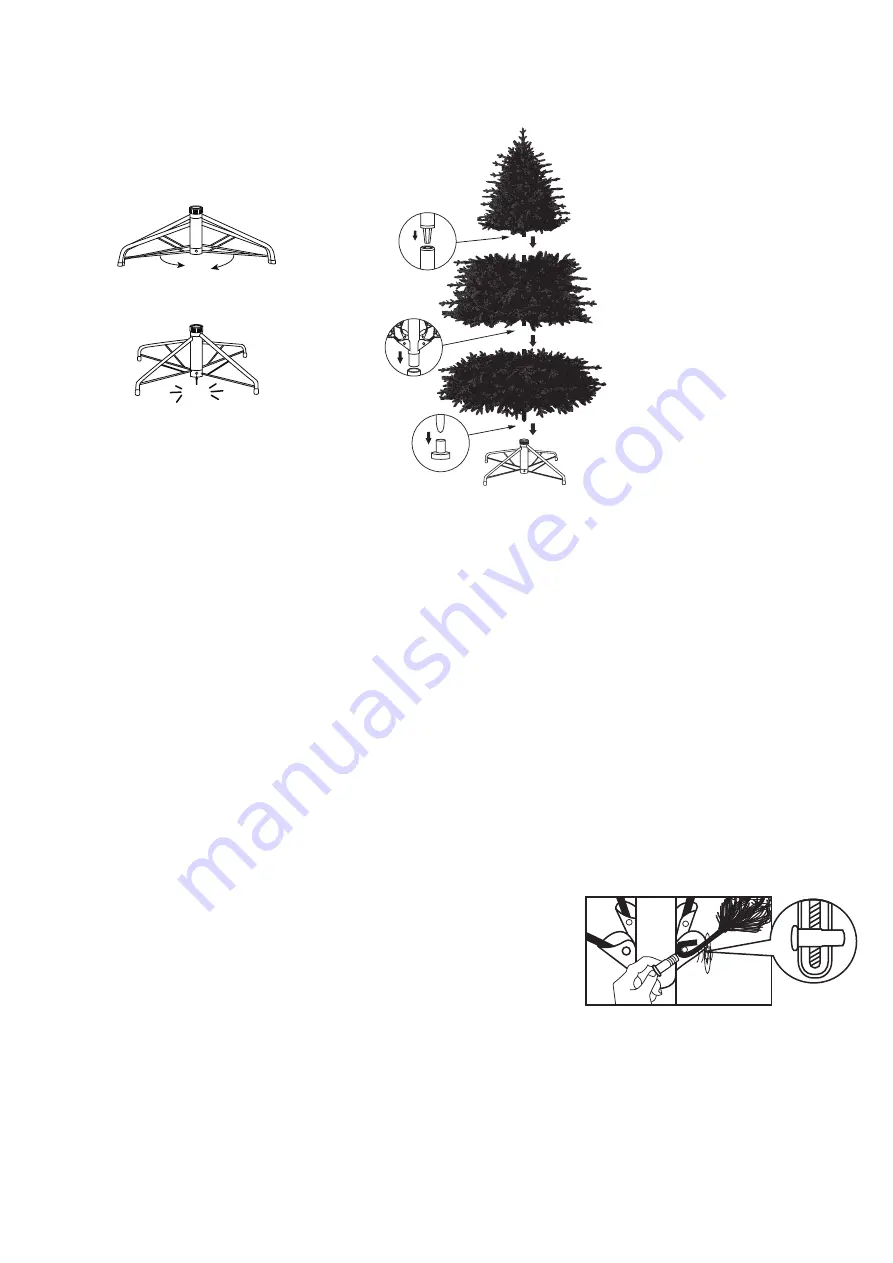
Pull apart the legs of the stand so that
they are snapped into an x-shape. Place
the tree stand on a level surface.
Assemble the tree from the bottom to the top. Remove
protective cap and insert the pole of 'section 1' into the
assembled stand. Insert the pole of 'section 2' into 'section 1'.
Insert the pole of the 'tree top' into 'section 2'. Ensure that
all poles are firmly secure.
Click
Spare parts
Each tree includes hinge pins/washers.
If extra parts are needed, please contact your local store.
1. Remove all decorations.
2. Disassemble the tree from the top to the bottom. Start with the 'tree top' and gently lift straight up to remove it from the section below,
then fold all branches toward the pole.
3. In case of difficulty separating the tree pole (trunk), apply a small amount of lubricant at the joint and rotate the upper pole in both
directions. Lift the upper pole up again.
4. Continue by gently lifting each section(s) straight up from the section below and fold all branches toward the pole, until the bottom
section is removed from the tree stand.
5. Carefully place all tree sections into the box and tape it shut.
6. When not in use, please store your tree in a cool, dry place away from sunlight. Exposing your tree to excessive heat or humidity may
damage your tree.
Disassembly and storage
Before using or re-using the tree, inspect the product carefully. If there are any damaged parts or exposed sharp points, please dispose of
the tree.
Care and use
Troubleshooting
Problem: Loose hinge pins
1. Extra hinge pins are included for repairing the hinges.
Place the branch into the slot of the bracket.
2. Insert a new hinge pin through the hole and secure
using the retainer washer.
3


