3
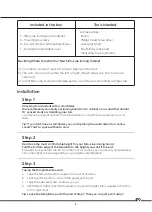
Taping the template to the wall.
a. Tape the template bottom edge to the wall at the floor.
b. Starting at the bottom, smooth the paper up the wall.
c. Tape the sides every few inches as you go.
d. (OPTIONAL) Check that the standard ironing board height line is parallel to
the floor with a spirit level.
Tip: Leave the template up until the end of Step 7. Then you can just pull it away!
Step 3
Installation
If you find that something is missing, please do not assemble. Contact our Customer Service on
021 680 8000
.
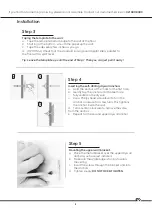
Inserting the self-drilling drywall anchors.
a. Hold the anchor at the mark for the first hole.
b. Gently tap the anchor until the teeth are
fully seated in the drywall.
c. Use a Phillips head screwdriver to turn the
anchor clockwise for a few turns. This tightens
the anchor inside the wall.
d. Turn counter-clockwise to remove the screw
from the anchor.
e. Repeat for the second upper drywall anchor.
Step 4
1
2
3
Mounting the upper wall bracket.
a. Place the metal bracket over the upper drywall
anchors you have just installed.
b. Make sure the angle edge is facing towards
the ceiling.
c. Insert the screws through the bracket and into
the anchors.
d. Tighten snugly.
DO NOT OVER-TIGHTEN.
Step 5

