6
G
B
INSTRUCTIONS
FOR
USE:
IMPORTANT - Preparing the appliance for use
T
he
S
hiatsu Massager comes
w
ith a scre
w
located on the back of the unit to protect the massage mechanism
during shipment,
w
hich must be removed before the first use to allo
w
the shiatsu feature to function.
U
se the
provided
A
llen key.
T
hen, properly dispose of the scre
w
.
WARNING
Error:
all remote control LED
S
flash for a fe
w
seconds.
Cause:
massager overloaded.
Solution:
ensure the allen key bolt/scre
w
has been removed from back of the massage cushion (using the
allen key included).
S
hould the condition continue after this please contact your HoMedics service centre.
Failure to remove screw may cause permanent damage to the appliance.
Strapping System
T
his massage cushion incorporates a uni
q
ue strapping system
w
hich allo
w
s you to fasten it to almost any
chair.
J
ust slip the straps over the seat or chair and ad
j
ust fastening straps to secure.
Y
our massager
w
on
’
t slip
or slide a
w
ay.
Using on soft arm chairs and sofas:
A
s
w
ell as the strapping system to secure the cushion to the back of most chairs; the massager also has an
ad
j
ustable seat
w
hich enables use on most soft arm chairs and sofas.
S
imply ad
j
ust the strap length using the
buckle under the seat to achieve the desired angle to fit your chair/sofa and the cushion can be used
effectively at virtually any angle – no matter ho
w
soft your seat. (
NOTE:
do not use lying do
w
n)
Headrest and back flap
T
his massage cushion incorporates a removable headrest to add comfort to the massage e
x
perience as
w
ell
as removable
w
ashable back flap in suede finish fabric – this is used to soften the massage if too intense.
T
he flap is easily removed as secured by hook and eye fastening.
T
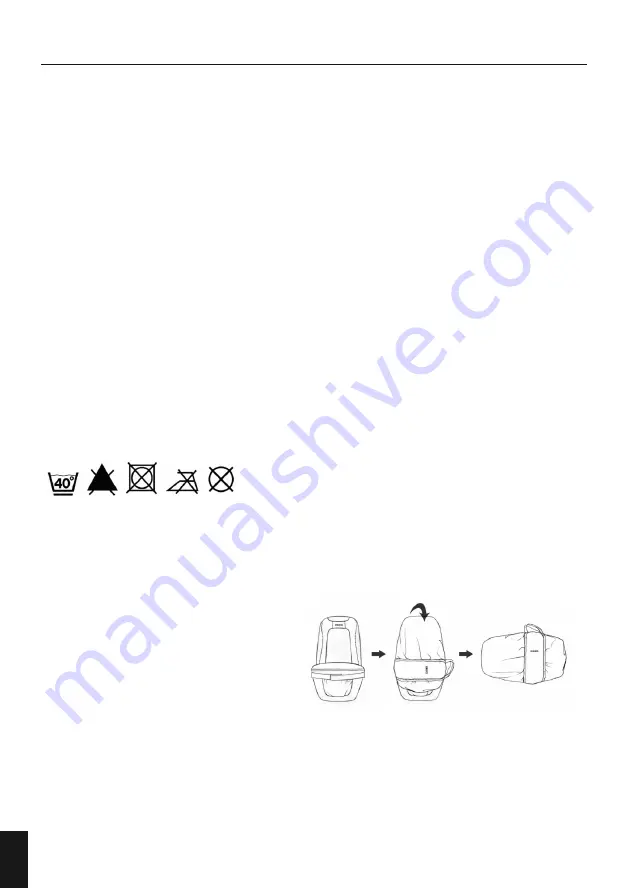
o clean back flap only simply follo
w
the
w
ash instructions:
Carry Bag Instructions
• Make sure the cushion is unplugged and the cord is properly secured in the pocket bet
w
een the cushion
and seat.
•
W
ith cushion sitting upright in the chair, remove the bag from the compartment on the cushion (see
F
ig.
A)
.
• Loosen the seat ad
j
ustments straps and fold the seat back
w
ards until flush against the back of the cushion.
•
U
nzip the bag and slide it over the cushion
from the top do
w
n (see
F
ig.
B)
.
•
Z
ip the bag and carry the cushion by the
handles on the side of the bag (see
F
ig.
C)
.
F
ig.
A
F
ig.
B
F
ig.
C
Note: Do not use this product for more than 15 mins at a time.
IB-BMSC5000HEU-0614-01_Layout 1 17/06/2014 14:39 Page 6


