background image

2


I

  GB

PRODUCT FEATURES:

•  2 light settings lets you choose constant glow or gentle blinking.

•   Auto-Timer lets you choose how long you have the light on – 15, 30, 

60 minutes or continuously.

•  Uses 4 AAA batteries (included).

•  Easy carry handle for portable use.

INSTRUCTIONS FOR USE:

How to install batteries:

1.   Locate the battery cover (Fig. 2). Use a flat head screw driver to 

loosen the screw.

2.   Open the battery compartment door and the exhausted batteries (if 

applicable).

3.   Install 4 new “AAA” batteries following the diagram inside the 

battery compartment.

  Note: We recommend using Alkaline batteries for longer battery life.

4.   Replace the battery compartment door and tighten the screw to 

secure.


Note:

 It is time to change the batteries when the light becomes 

faint or stops.

Turning On Light

1.  Unpack the product.

2.  Make sure batteries are properly installed.

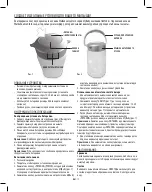
3.   Press the POWER button located on top of the unit, in the centre of 

the MyBaby logo (Fig. 1). This will turn on the constant light option.

4.   Press the centre of the MyBaby logo again and the light mode 

moves to a soft blinking light (replicating fireflies in a jar).

5.  Pressing the power button again, turns off the unit.

Using The Auto-Timer

1.   When the power is on and unit is glowing you may set a timer so 

the unit will automatically turn off.

2.   Toggle through the TIMER button (Fig. 1) until the corresponding 

LED illuminates next to the time of your choice, 15, 30, or 60 

minutes. The unit will automatically shut off after the selected time 

and the Power LED (Fig. 1) will turn off as well.

3.   Once the timer is set if you choose to use a different light option, 

you may do so by pressing the Power button (located in the center 

of the MyBaby logo) (Fig. 1) 


Note:

 If you are on the soft blinking light option pressing the power, 

button again will turn off the unit and turn off the timer. Pressing 

the power button again will start the lantern with no timer active.

4.   If you choose to use the light continuously again, toggle through the 

TIMER button until the green LED light is not illuminated on any of 

the time choices.


 Note:

 Do not select the TIMER button if you wish to have the lantern 

glowing continuously. 

MAINTENANCE:

To Store

You may leave the unit on display, or you can store it in its box or a 

cool, dry place. Batteries should be removed prior to storage.

To Clean

Wipe off dust with a damp cloth. NEVER use liquids or abrasive cleaner 

to clean. Do not immerse in water.

CREATE THE PERFECT ENVIRONMENT FOR YOUR BABY

Thank you for purchasing the MyBaby by HoMedics Walkabout Lantern. MyBaby by HoMedics Walkabout Lantern 

will create the ideal environment to comfort your child’s fear of the dark.

EASY CARRY HANDLE

BATTERY DOOR

S

TIMER LEDs

TIMER 

BUTTON

POWER/LIGHT

Fig  1  

Fig 2  

Summary of Contents for MyBaby

Page 1: ...F I 1 MYB N450 EU instruction manual YEARguarantee...

Page 2: ...will automatically turn off 2 Toggle through the TIMER button Fig 1 until the corresponding LED illuminates next to the time of your choice 15 30 or 60 minutes The unit will automatically shut off aft...

Page 3: ...i re active il est possible de r gler le minuteur pour que l unit s teigne automatiquement 2 Parcourir les options du MINUTEUR Fig 1 jusqu ce que le voyant correspondant la dur e de votre choix s allu...

Page 4: ...r t sanft gl ht k nnen Sie den Timer einstellen damit es sich automatisch ausschaltet 2 Schalten Sie durch den TIMER Abb 1 bis die entsprechende LED neben der Zeit Ihrer Wahl bei 15 30 oder 60 Minuten...

Page 5: ...programar el temporizador para que la unidad se apague autom ticamente 2 Vaya presionando el bot n TIMER temporizador Fig 1 hasta que se ilumine el piloto LED correspondiente al tiempo deseado 15 30 o...

Page 6: ...i spenga automaticamente 2 Premere il pulsante TIMER Fig 1 fino all accensione del LED corrispondente alla durata di propria scelta 15 30 o 60 minuti L unit si spegner automaticamente al termine del t...

Page 7: ...unidade estiver a emitir luz pode definir um temporizador para desligar a unidade automaticamente 2 Alterne pelo bot o do TEMPORIZADOR Fig 1 at que o LED correspondente se acenda ao lado da hora da s...

Page 8: ...eit kun je de timer activeren zodat het apparaat automatisch wordt uitgeschakeld 2 Wissel tussen de standen met de TIMER knop Fig 1 tot het bijbehorende ledlampje oplicht naast de gewenste tijd 15 30...

Page 9: ...k at enheten automatisk sl r seg av 2 Trykk deg gjennom TIMER knappen Fig 1 inntil LED lyset ved ditt valg lyser opp 15 30 eller 60 minutter Enheten vil automatisk sl s av etter valgt tid og Power LED...

Page 10: ...aattisesti 2 Paina TIMER AJASTIN painiketta kuva 1 kunnes haluamaasi aikaa vastaava merkkivalo syttyy 15 30 tai 60 minuuttia Laite sammuu automaattisesti valitun ajan kuluttua ja virran merkkivalo kuv...

Page 11: ...atiskt 2 V xla med knappen TIMER Fig 1 tills motsvarande lysdiod t nds bredvid ditt nskade val 15 30 eller 60 minuter Apparaten kommer att sl s av automatiskt efter den valda tiden och lysdioden f r s...

Page 12: ...knappen Fig 1 indtil der lyser en LED lampe ud for dit valg 15 30 eller 60 minutter Enheden vil automatisk slukke efter det valgte tidsrum og LED lampen ud for str mmen Fig 1 vil ogs slukke 3 N r tim...

Page 13: ...elt t k vet en a k sz l k automatikusan kikapcsol 2 Az ID Z T gombbal 1 bra v lassza ki a k v nt id tartamot a kiv lasztott rt k melletti LED vil g t 15 30 vagy 60 perc A kiv lasztott id letelt t k ve...

Page 14: ...stiskn te tla tko TIMER ASOVA obr 1 dokud se nerozsv t p slu n indik tor LED vedle po adovan ho asu 15 30 nebo 60 minut Po uplynut vybran ho asu se p stroj automaticky vypne a indik tor LED Power Nap...

Page 15: ...2 TIMER ZAMANLAYICI d mesine basarak ek 1 15 30 ya da 60 dakika se eneklerinden istedi iniz s renin ilgili LED yanana kadar se enekler aras nda ge i yap n Se ili s re tamamland ktan cihaz otomatik ol...

Page 16: ...I EL 2 15 30 60 4 AAA 1 2 2 3 4 AAA 4 1 2 3 POWER MyBaby 1 4 MyBaby 5 1 2 TIMER 1 LED 15 30 60 LED 1 3 Power MyBaby 1 4 TIMER LED TIMER MyBaby by HoMedics Walkabout Lantern Walkabout Lantern S LED 1...

Page 17: ...RU I 17 2 15 30 60 4 AA 1 2 2 3 4 4 1 2 3 POWER MyBaby 1 4 MyBaby 5 1 2 1 15 30 60 1 3 MyBaby 1 4 Walkabout Lantern MyBaby HoMedics Walkabout Lantern S 1 2...

Page 18: ...a wieci si przy okresie czasu kt ry pragniesz wybra 15 30 albo 60 minut Urz dzenie automatycznie wy czy si po wybranym okresie czasu a kontrolka zasilania LED Rys 1 r wnie zga nie 3 Po ustawieniu time...

Page 19: ...aby sa pr stroj automaticky vypol 2 Postupne stl ajte tla idlo TIMER Obr 1 a pokia sa nerozsvieti pr slu n LED di da ved a asu pod a v ho v beru 15 30 alebo 60 min t Po uplynut zvolen ho asu sa pr str...

Page 20: ...IB MYB N450 EU 0218 01 FKA Brands Ltd Somerhill Business Park Tonbridge Kent TN11 0GP UK Customer Support 44 0 1732 378557 support homedics co uk...

Reviews: