background image

6

HOW TO USE

BEFORE TURNING THE UNIT ON

•   Take the air purifier out of the box and remove the clear protective plastic bag.
•  Place the air purifier on a firm, level surface.
•  Plug the power cord into a standard AC outlet.

POWER BUTTON AND FAN SPEED SETTINGS

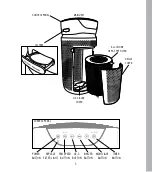
•   To turn the air purifier on, press the power   button.
•   This air purifier has 3 fan speed settings: low (1), medium (2), and high (3). The higher the fan speed  

setting, the faster the air will be purified. To select or change fan speed, press the fan speed   button 

until the desired setting is reached.

UV-C TECHNOLOGY WITH ON/OFF

The UV-C technology kills germs, viruses, and bacteria by penetrating its DNA, resulting in the microorganism's 

death or the inability to reproduce. Press the 

 button to turn the UV-C technology on. The blue LED will 

glow. Press the 

 button again to turn the UV-C technology off.

IONIZER SETTING WITH ON/OFF

Ion particles have a positive or negative charge that attaches to airborne particles, making them easier to be 

captured by the filtration system. Press the ionizer 

 button to turn the ionizer on. The blue light will glow to 

indicate the ionizer is in use. Press the ionizer 

 button again to turn the ionizer off.

NOTE

: Dust particles may accumulate on surfaces around the air purifier when the ionizer is in use. These 

dust particles can be vacuumed or wiped away with a soft, damp cloth.

NOTE

: You may hear occasional popping sounds when the ionizer is used. This is normal.

NOTE: 

The ionizer produces less ozone than the UL-established limits of 0.05 ppm. Ozone may be harmful  

around birds and small pets. To prevent ozone buildup, use the ionizer feature in a well-ventilated area. 

NIGHTLIGHT

The nightlight has 3 options. Press once to turn the blue nightlight on. Press again to turn the blue nightlight 

ring and the display lights off. Press a third time to turn the display lights on.

TIMER

Press the timer   button until the desired timer setting is lit on the display. The timer   button will cycle 

through the following settings: 2 hours, 4 hours, 8 hours, 12 hours, and off. To cancel the timer at any time, 

press the timer   button until all timer LEDs are off. The air purifier will run continuously when the timer 

function is off.

OIL TRAY

Use essential oil (not included) to deliver scent into the air. 

NOTE

: For use with the included HoMedics essential oil pads only. Do not add essential oils anywhere else in 

the unit as it may cause damage.

NOTE

: Do not leave a filled essential oil pad in the oil tray if it will be out of use for a long period of time.

Summary of Contents for TOTAL CLEAN AP-T20

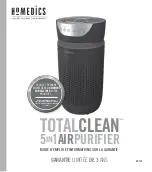
Page 1: ...INSTRUCTION MANUAL AND WARRANTY INFORMATION 3 YEAR LIMITED WARRANTY AP T20 5 1 IN TOTALCLEAN AIRPURIFIER TM ...

Page 2: ... has a polarized plug one blade is wider than the other To reduce the risk of shock this plug is intended to fit only one way in a polarized outlet If the plug does not fit fully in the outlet reverse the plug If it still does not fit contact a qualified electrician CAUTION DO NOT attempt to defeat this safety feature To do so could result in an electric shock hazard WARNING TO REDUCE THE RISK OF ...

Page 3: ...st in any manner Do not use on any soft surface like a bed where openings may become blocked Use this air purifier only for its intended use as described in this manual Any other use not recommended by the manufacturer may cause fire electric shock or injury to persons DO NOT use outdoors This product is intended for household use only SAVE THESE IMPORTANT INSTRUCTIONS FOR EASY REFERENCE ...

Page 4: ...n UV C technology kills germs viruses and bacteria IONIZER WITH ON OFF When on assists in the air purification process 3 SPEEDS Low medium and high BUILT IN TIMER Choose from 2 4 8 or 12 hours REPLACE FILTER INDICATOR Illuminates when it is time to replace the filter SUGGESTED ROOM SIZE 170 FT2 15 8 M2 Portable air purifiers will be more effective in rooms where all the doors and windows are close...

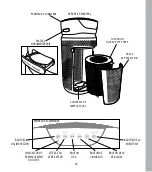
Page 5: ...ROL PANEL MAIN UNIT ALL IN ONE HEPA TYPE FILTER FAN SPEED BUTTON POWER BUTTON IONIZER BUTTON TIMER BUTTON NIGHTLIGHT BUTTON REPLACE FILTER LIGHT UV C BUTTON GRILLE COVER OIL TRAY CONTROL PANEL UV C BULB COVER ...

Page 6: ...to turn the ionizer off NOTE Dust particles may accumulate on surfaces around the air purifier when the ionizer is in use These dust particles can be vacuumed or wiped away with a soft damp cloth NOTE You may hear occasional popping sounds when the ionizer is used This is normal NOTE The ionizer produces less ozone than the UL established limits of 0 05 ppm Ozone may be harmful around birds and sm...

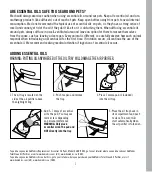
Page 7: ...ommend seeking medical attention if ingestion of essential oil occurs ADDING ESSENTIAL OILS WARNING PUTTING OIL ANYWHERE BUT THE OIL TRAY WILL DAMAGE THE AIR PURIFIER To purchase genuine HoMedics Replacement Essential Oil Pads Model UHE PAD1 go to your retailer where you purchased your HoMedics TotalClean AIr Purifier or visit www homedics com US www homedics ca CAN To purchase genuine HoMedics Es...

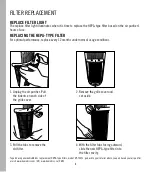
Page 8: ...le cover 2 Remove the grille cover and set aside FILTER REPLACEMENT REPLACE FILTER LIGHT The replace filter light illuminates when it is time to replace the HEPA type filter based on the air purifier s hours of use REPLACING THE HEPA TYPE FILTER For optimal performance replace every 12 months under normal usage conditions 3 Pull the tabs to remove the old filter 4 With the filter tabs facing outwa...

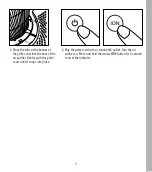
Page 9: ...ille cover into the base of the air purifier Gently push the grille cover until it snaps into place 6 Plug the power cord into a standard AC outlet Turn the air purifier on Press and hold the ionizer button for 3 seconds to reset the indicator ...

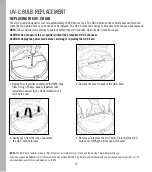
Page 10: ... cord before servicing or replacing the UV C bulb 1 Unplug the air purifier and remove the HEPA type filter Using a Phillips head screwdriver not included unscrew the 2 screws located on the UV C bulb cover 2 Remove the cover to expose the UV C bulb 3 Gently push from the sides and rotate the UV C bulb to remove 4 Remove and replace the UV C bulb Re install the UV C bulb cover HEPA type filter and...

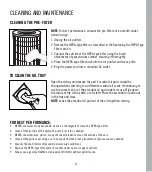
Page 11: ...o use the same scent set the essential oil pad aside for reuse Wipe down the inside of the oil tray with a soft cloth Place the essential oil pad back in the tray and close NOTE Leave the essential oil pad out of the oil tray when storing FOR BEST PERFORMANCE NEVER use water or any household cleaners or detergents to clean the HEPA type filter Clean off the outside of the unit with a soft dry clot...

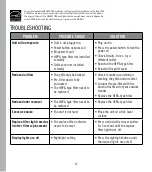
Page 12: ...odor removal The HEPA type filter needs to be replaced Replace the HEPA type filter Excessive noise The unit is not level Place the unit on a flat level surface Replace filter light remains lit after filter replacement The replace filter indicator needs to be reset Press and hold the ionizer button for 3 seconds until the replace filter light turns off Display lights are off Nightlight setting Pre...

Page 13: ...difications is not covered under this warranty THE WARRANTY PROVIDED HEREIN SHALL BE THE SOLE AND EXCLUSIVE WARRANTY THERE SHALL BE NO OTHER WARRANTIES EXPRESS OR IMPLIED INCLUDING ANY IMPLIED WARRANTY OF MERCHANTABILITY OR FITNESS OR ANY OTHER OBLIGATION ON THE PART OF THE COMPANY WITH RESPECT TO PRODUCTS COVERED BY THIS WARRANTY HOMEDICS SHALL HAVE NO LIABILITY FOR ANY INCIDENTAL CONSEQUENTIAL O...

Page 14: ...cernant ce produit nous aidera à créer les produits que vous voudrez à l avenir VEUILLEZ PRENDRE MAINTENANT UN MOMENT ENREGISTRER VOTRE PRODUIT À MODE D EMPLOI ET INFORMATIONS SUR LA GARANTIE AP T20 GARANTIE LIMITÉE DE 3 ANS 5 1 IN TOTALCLEAN AIRPURIFIER TM MC ...

Page 15: ...es conditions humides ou mouillées Vérifier le cordon d alimentation et les fiches prises du purificateur d air Des connexions murales défectueuses ou des fiches desserrées peuvent provoquer une surchauffe de la prise ou de la fiche S assurer que la fiche est fermement insérée dans la prise REMARQUE Cet appareil est muni d une fiche polarisée une lame est plus large que l autre Pour réduire le ris...

Page 16: ...lorsqu il est utilisé Éteindre l appareil et le débrancher avant de le déplacer Ne pas insérer ni permettre à des objets étrangers d entrer dans un orifice de ventilation ou d échappement car cela pourrait provoquer un choc électrique ou un incendie et endommager le purificateur d air Ne pas bloquer les entrées d air et les orifices d échappement de quelque manière que ce soit Ne pas utiliser sur ...

Page 17: ...a technologie UV C tue les microbes les virus et les bactéries IONISEUR AVEC FONCTION MARCHE ARRÊT Contribue à purifier l air lorsqu il est en marche 3 VITESSES Vitesses lente moyenne et haute MINUTERIE INTÉGRÉE Programmable sur 2 4 8 ou 12 heures INDICATEUR DE REMPLACEMENT DU FILTRE S allume lorsqu il est temps de remplacer le filtre SUPERFICIE DE PIÈCE RECOMMANDÉE 15 8 M2 170 PI2 Les purificateu...

Page 18: ... VITESSE DU VENTILATEUR BOUTON D ALIMENTATION BOUTON DE L IONISEUR BOUTON DE LA MINUTERIE BOUTON DE LA VEILLEUSE INDICATEUR DE REMPLACEMENT DU FILTRE TOUT EN UN FILTRE DE TYPE HEPA PLATEAU D AROMATHÉRAPIE PANNEAU DE COMMANDE COUVERCLE DE L AMPOULE UV C BOUTON UV C ...

Page 19: ...ur éteindre l ioniseur REMARQUE Des particules de poussières peuvent s accumuler sur les surfaces autour du purificateur d air lorsque l ioniseur est en cours d utilisation Ces particules de poussière peuvent être aspirées ou essuyées avec un chiffon doux et humide REMARQUE De petits bruits d explosion peuvent parfois se faire entendre lorsque l ioniseur est utilisé Ceci est normal REMARQUE L ioni...

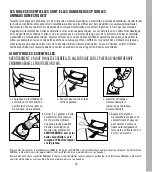
Page 20: ...cin en cas d ingestion d huiles essentielles AJOUT D HUILES ESSENTIELLES AVERTISSEMENT L AJOUT D HUILES ESSENTIELLES AILLEURS QUE SUR LE PLATEAU D AROMATHÉRAPIE ENDOMMAGERAIT LE PURIFICATEUR D AIR 1 Le plateau d aromathérapie est situé sur le côté droit du purificateur d air au dessus de l anneau de la veilleuse 2 Pousser pour ouvrir et faire sortir le plateau 4 Verser 5 à 7 gouttes d huile essent...

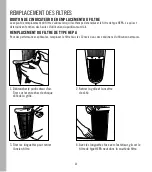
Page 21: ...icateur d air REMPLACEMENT DU FILTRE DE TYPE HEPA Pour des performances optimales remplacer le filtre tous les 12 mois dans des conditions d utilisation normales 1 Débrancher le purificateur d air Tirer sur les encoches de chaque côté de la grille 2 Retirer la grille et la mettre de côté 3 Tirer les languettes pour retirer l ancien filtre 4 Avec les languettes face vers l extérieur glisser le filt...

Page 22: ... ou www homedics ca au Canada 5 Placer les languettes situées en bas de la grille dans le socle du purificateur d air Appuyer délicatement sur la grille jusqu à ce qu elle s enclenche en position 6 Brancher le cordon d alimentation sur une prise secteur standard Mettre le purificateur d air en marche Appuyer sur le bouton de l ioniseur pendant 3 secondes pour réinitialiser l indicateur ...

Page 23: ...UV C 1 Débrancher le purificateur d air et retirer le filtre de type HEPA Utiliser un tournevis cruciforme non fourni et dévisser les deux vis situées sur le couvercle de l ampoule UV C 2 Retirer le couvercle pour exposer l ampoule UV C 3 Pousser délicatement sur les côtés et faire pivoter l ampoule UV C pour la retirer 4 Retirer l ampoule UV C et la remplacer Réinstaller le couvercle de l ampoule...

Page 24: ...d aromathérapie de côté pour le réutiliser Essuyer l intérieur du plateau d aromathérapie avec un chiffon doux Replacer le tampon d aromathérapie dans le plateau et pousser pour fermer REMARQUE Retirer le tampon d aromathérapie du plateau lorsque l appareil est remisé POUR UNE PERFORMANCE OPTIMALE NE JAMAIS utiliser d eau de produits nettoyants ou de détergents ménagers pour nettoyer le filtre de ...

Page 25: ...e remplacé Remplacer le filtre de type HEPA Bruit excessif L appareil n est pas à niveau Placer l appareil sur une surface plane et stable L indicateur de remplacement du filtre reste allumé après le remplacement du filtre L indicateur de remplacement du filtre doit être réinitialisé Appuyer pendant 3 secondes sur le bouton de l ioniseur jusqu à ce que le voyant de remplacement du filtre s éteigne...

Page 26: ...ons ne sont pas couverts par cette garantie LA GARANTIE FOURNIE PAR LES PRÉSENTES CONSTITUE LA GARANTIE UNIQUE ET EXCLUSIVE IL N EXISTE AUCUNE AUTRE GARANTIE EXPRESSE OU TACITE Y COMPRIS AUCUNE GARANTIE IMPLICITE DE QUALITÉ MARCHANDE OU D ADAPTATION À UN USAGE PARTICULIER NI AUCUNE AUTRE OBLIGATION DE LA PART DE LA SOCIÉTÉ À L ÉGARD DES PRODUITS COUVERTS PAR CETTE GARANTIE HOMEDICS NE SERA PAS RES...

Page 27: ...a este producto nos ayudará a desarrollar los productos que deseará para el futuro POR FAVOR TÓMESE UN MOMENTO AHORA REGISTRE SU PRODUCTO EN MANUAL DE INSTRUCCIONES E INFORMACIÓN SOBRE LA GARANTÍA AP T20 GARANTÍA LIMITADA DE 3 AÑOS 5 1 IN TOTALCLEAN AIRPURIFIER TM ...

Page 28: ...urificador de aire Conexiones defectuosas en el tomacorriente o enchufes sueltos pueden hacer que el tomacorriente o el enchufe se recalienten Asegúrese de que el enchufe queda sujeto firmemente en el tomacorriente NOTA Este aparato tiene una clavija polarizada una pata es más ancha que la otra Para reducir el riesgo de choque eléctrico este enchufe está diseñado para encajar sólo en un tomacorrie...

Page 29: ...ente antes de moverlo No inserte ni permita que objetos extraños ingresen a ninguna abertura de ventilación o escape ya que esto puede causar una descarga eléctrica un incendio o dañar el purificador de aire No bloquee las entradas o salidas de aire de ninguna manera No lo use sobre ninguna superficie blanda como una cama donde las aberturas puedan bloquearse Utilice este purificador de aire sólo ...

Page 30: ...NIZADOR CON ENCEDIDO APAGADO Cuando está encendido el ionizador asiste en el proceso de purificación de aire 3 VELOCIDADES Velocidades baja media y alta TEMPORIZADOR INCORPORADO Elija entre 2 4 8 o 12 horas INDICADOR DE REEMPLAZO DE FILTRO Se ilumina cuando es momento de reemplazar el filtro TAMAÑO DE HABITACIÓN SUGERIDO 15 8 m2 170 pies2 Los purificadores de aire portátiles serán más efectivos en...

Page 31: ...S ESENCIALES VELOCIDAD DEL VENTILADOR BOTÓN DE ENCENDIDO BOTÓN DEL IONIZADOR BOTÓN DE TEMPORIZADOR BOTÓN DE LUZ NOCTURNA BOTÓN DEL UV C LUZ DE REEMPLAZO DE FILTRO PANNEAU DE COMMANDE TODO EN UNO FILTRO HEPA TYPE PANEL DE CONTROL CUBIERTA DE LA LÁMPARA DE LUZ UV C ...

Page 32: ...dean el purificador de aire cuando el ionizador está en uso Estas partículas de polvo se pueden aspirar o limpiar utilizando un trapo suave y seco NOTA Es posible que escuche un chasquido ocasional durante el uso del ionizador Esto es normal NOTA El ionizador produce menos ozono que el límite establecido por UL de 0 05 ppm El ozono puede ser dañino para las aves y para pequeñas mascotas Para evita...

Page 33: ... del aceite esencial AGREGAR LOS ACEITES ESENCIALES ADVERTENCIA COLOCAR EL ACEITE EN UN LUGAR DIFERENTE DE LA CHAROLA PARA ACEITE DAÑARÁ EL PURIFICADOR 1 La charola para aceites está ubicada del lado derecho del purificador sobre el anillo de luz nocturna 2 Empuje para abrir y retirar la charola 4 Agregue 5 a 7 gotas de aceite en la almohadilla Puede utilizar más o menos en función de su preferenc...

Page 34: ...e REEMPLAZAR EL FILTRO TIPO HEPA Para un rendimiento óptimo reemplace cada 12 meses bajo condiciones de uso normal 1 Desconecte el purificador de aire Jale las muscas de cada lado de la cubierta de la rejilla 2 Retire la cubierta de la rejilla y póngala a un lado 3 Tire de las lengüetas para retirar el filtro viejo 4 Con las pestañas del filtro bocabajo deslice el nuevo filtro tipo HEPA en la cavi...

Page 35: ...ww homedics ca Canadá 6 Conecte el cable en un tomacorriente AC estándar Encienda el purificador de aire Presione y mantenga presionado el botón del ionizador durante 3 segundos para reiniciar el indicador 5 Coloque las pestañas en el fondo de la cubierta de la rejilla en la base del purificador de aire Presione suavemente la cubierta de la rejilla hasta que encaje en su lugar ...

Page 36: ...lámpara de luz UV C 1 Desconecte el purificador de aire y retire el filtro tipo HEPA Usando un destornillador Phillips no incluido retire los 2 tornillos ubicados sobre la cubierta de la lámpara de luz UV C 2 Retire la cubierta para dejar expuesta la lámpara de luz UV C 3 Presione suavemente la lámpara de luz UV C por los costados y gírela para retirarla 4 Retire y sustituya la lámpara de luz UV C...

Page 37: ...mohadilla que haya usado con ese aceite esencial para reutilizarla Limpie con un paño suave el interior de la charola para aceites esenciales Vuelva a colocar la almohadilla para aceites esenciales en la charola y ciérrela NOTA Saque la almohadilla de la charola para aceites cuando necesite almacenar la unidad PARA UN MEJOR DESEMPEÑO NUNCA utilice agua ni ningún limpiador o detergente domésticos p...

Page 38: ...EPA Reemplace el filtro tipo HEPA Ruido excesivo La unidad no está nivelada Coloque la unidad sobre una superficie plana y uniforme La luz de reemplazo del filtro permanece encendida después de reemplazar el filtro El indicador de reemplazo del filtro debe reiniciarse Oprima y sostenga el botón del ioniza dor durante 3 segundos hasta que se apague la luz de reemplazo del filtro Las luces de la pan...

Page 39: ...GARANTÍA PROPORCIONADA EN ESTE DOCUMENTO SERÁ LA GARANTÍA ÚNICA Y EXCLUSIVA NO HABRÁ NINGUNA OTRA GARANTÍA EXPLÍCITA O IMPLÍCITA INCLUYENDO CUALQUIER GARANTÍA IMPLÍCITA DE COMERCIABILIDAD O DE IDONEIDAD O CUALQUIER OTRA OBLIGACIÓN POR PARTE DE LA COMPAÑÍA CON RESPECTO A LOS PRODUCTOS CUBIERTOS POR ESTA GARANTÍA HOMEDICS NO SERÁ RESPONSABLE POR DAÑOS INCIDENTALES SECUNDARIOS O ESPECIALES EN NINGÚN ...

Page 40: ......

Reviews: