background image


Trial Use 

1.


Turn the shaft knob, and lift the machine arm 

2.


Put the mixing bowl and mixing bowl cover onto the base and lock it as the arrowheads denote. 

3.


Turn the shaft knob, then push the upper cover and the arm down. 

4.


Plug in the electrical cord and turn the switch to P, then try every speed for a few seconds. 

5.


After the trial turn the switch to speed 0. 

6.


Turn the shaft knob and lift the arm and take apart the mixing blade from the blade connector. 

7.


Take off the back cover from the upper housing. 

8.


Pour a cup of water into the blender jar, set the blender jar onto the machine and then repeat 
steps 4, 5 and 6.  

Cleaning 

1.


Before cleaning, ensure that switch knob is at the 0 position and the plug has been disconnected 
from the electrical socket. 

2.


After use allow the Homegear 3 in 1 to cool down before cleaning 

3.


When cleaning the interior and exterior of the Homegear 3 in 1 never use abrasive detergents or 
alcohol. 

4.


Whilst cleaning the Homegear 3 in 1 never submerge it in water. 

5.


The dough and mixing blade are not dishwasher safe. These accessories must be cleaned only in 
warm water and washing up liquid. 

6.


The plastic accessories, mixing bowl, egg beater, blender jar and blades inside can be cleaned 
with warm water and washing up liquid or in a dishwasher. Never use abrasive detergents

.  


Summary of Contents for DTHG-020B

Page 1: ...3 in 1 Mixer Grinder Blender...

Page 2: ...supply When the Homegear 3 in 1 is not in use always ensure that it is turned off and unplugged form the power supply Always ensure the Homegear 3 in 1 is turned off when the head is lifted up Never o...

Page 3: ...3 Mixing Bowl 10 Mixing Blade 4 Shaft Knob 11 Egg Beater 5 Sausage Holder 12 Dough Blade 6 Front Cover 13 Blender Jar 7 Sausage Tube Product Specifications Voltage frequency 230 240V 50 60Hz 800W Agi...

Page 4: ...Blender Parts List 1 Measuring Cup 4 Jar Base 2 Lid 5 Sealing Ring 3 Glass Jar 6 Blade Base...

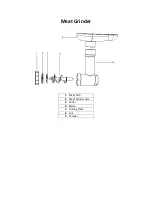
Page 5: ...Meat Grinder 1 Meat Dish 2 Meat Grinder Case 3 Roller 4 Blade 5 Cutting Plate 6 Nut 7 Tamper...

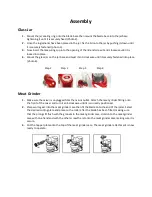
Page 6: ...Step 1 Step 2 Step 3 Step 4 Meat Grinder 1 Make sure the mixer is unplugged from the mains outlet Attach the meat grinder fitting onto the front of the mixer and turn it anti clockwise until it is cor...

Page 7: ...r axis chopper by turning to the left 2 Insert the grinder head in the engine by tilting it slightly to the right and then turning to the left to secure it in place 3 Place the drive screw in the head...

Page 8: ...the splashguard to change tools 4 Fix the dough blade egg whisk or mixer blade on the blade connector and rotate the blade connector clockwise until engages firmly 5 Turn the lifting handle in the dir...

Page 9: ...opening 2 Plug in the Homegear 3 in 1 and switch the speed to 4 6 3 Feed the meat into the hopper only using the food pusher to feed the meat in Sausage Maker 1 Place the sausage casing over the top o...

Page 10: ...the blender jar onto the machine and then repeat steps 4 5 and 6 Cleaning 1 Before cleaning ensure that switch knob is at the 0 position and the plug has been disconnected from the electrical socket...

Page 11: ...UK Europe www shop247 co uk Units 3 4 Lower Park Farm Storrage Lane Alvechurch Worcestershire B48 7ER United Kingdom Telephone 01527 598388...

Reviews: