background image


o


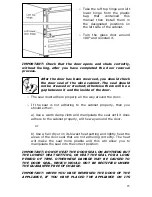
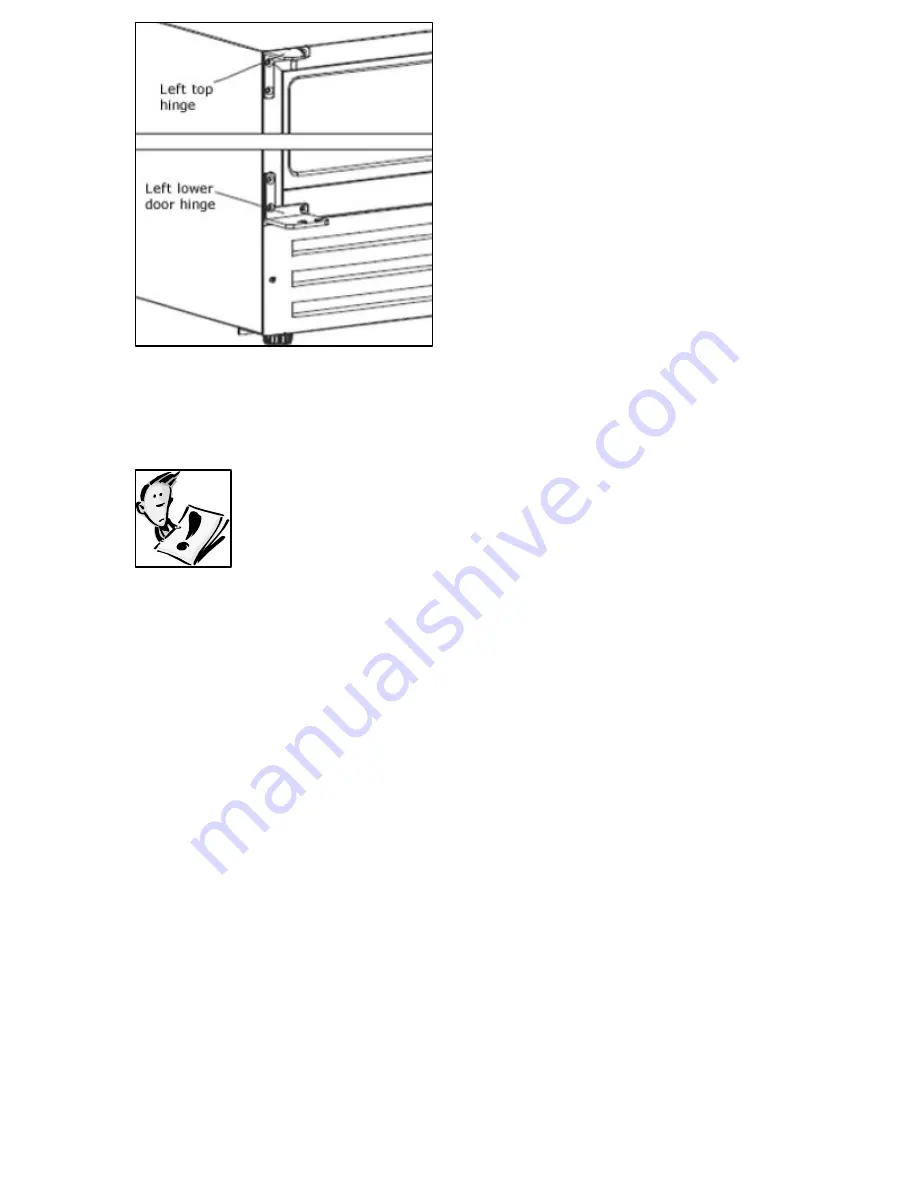
Take the left top hinge and left 
lower hinge from the plastic 
bag that contained this 
manual then install them in 
the designated positions on 
the left side of the cabinet.  


o


Turn the glass door around 
180° and reinstall it.  


IMPORTANT: Check that the door opens and shuts correctly, 
without fouling, after you have completed the door reversal 
process. 


After the door has been reversed, you should check 
the door seal of the wine cabinet. The seal should 
not be creased or crushed; otherwise there will be a 
gap between it and the inside of the door. 
 

o


The seal must adhere properly all the way around the door. 


o


If the seal is not adhering to the cabinet properly, then you 
should either:- 


a) Use a warm damp cloth and manipulate the seal until it does 
adhere to the cabinet properly, all the way around the door. 


or 

 
b) Use a hair dryer on its lowest heat setting and lightly heat the 
areas of the door seal that are not adhering correctly. The heat 
will make the seal more pliable and this will allow you to 
manipulate the seal into the correct position. 

 
IMPORTANT: DO NOT HEAT THE DOOR SEAL ON ANYTHING BUT 
THE LOWEST HEAT SETTING, OR HEAT THE SEAL FOR A LONG 
PERIOD OF TIME. OTHERWISE DAMAGE MAY BE CAUSED TO 
THE DOOR SEAL, WHICH WOULD NOT BE RECTIFIED UNDER 
THE GUARANTEE FREE OF CHARGE. 
 
IMPORTANT: WHEN YOU HAVE REVERSED THE DOOR OF THE 
APPLIANCE, IF YOU HAVE PLACED THE APPLIANCE ON ITS 


23

Summary of Contents for BYWC300SS

Page 1: ...nual contains important information including safety installation points which will enable you to get the most out of your appliance Please keep it in a safe place so that it is easily available for f...

Page 2: ...Changing between Fahrenheit and Celsius 11 The humidity control box optional 11 Loading the wine cabinet 11 12 Storing your wines 12 13 Wine storage problems 14 Cleaning and maintenance 15 17 Defrosti...

Page 3: ...ble off directly behind the appliance to prevent misuse This should be undertaken by a competent person Disable the door lock to make sure that children cannot get stuck inside the appliance o The pac...

Page 4: ...s caused o Altering the specification of the appliance must not be attempted for reasons of safety Before using your appliance o Check the appliance for any signs of transport damage If you notice any...

Page 5: ...er allow the back coils of the appliance to come into contact with the wall surface o Always ensure that the location where you are installing your appliance is free of stored items such as papers and...

Page 6: ...y 18 x 0 75 litre Bordeaux style wine bottles o Energy efficiency class B o Noise level 39 dB o Electronic push button control operation o LED display o Celsius and Fahrenheit option o 6 Adjustable wo...

Page 7: ...rating of your appliance you should check the rating plate The rating plate is located on the front left edge of the appliance The rating plate will indicate the ambient temperature range that your a...

Page 8: ...trol panel is located at the top of the appliance behind the glass door This means it is easy to set the temperature of the appliance and see what temperature the appliance is set to One cooling zone...

Page 9: ...instructions o After delivery wait for eight hours before connecting the appliance to your mains supply This will allow any refrigerant gasses that may have been disturbed during the transportation pr...

Page 10: ...o your mains supply Switching on the appliance and setting the temperature o To switch the appliance on press the ON OFF control button 1 for 5 seconds o The temperature setting for the appliance is a...

Page 11: ...wine storage o Fill the small plastic reservoir humidity box full with water and replace The humidity box is located on the top shelf and secured by runners o Check the water level regularly and refil...

Page 12: ...ius Temperature Fahrenheit Red wine 15 5 18 5 C 59 9 65 3 F White wine 10 15 C 50 59 F Sparkling wines champagne 7 2 9 5 C 45 49 1 F Rose wine 9 5 10 5 C 49 1 50 9 F Vintage wine 13 C 55 F Light red w...

Page 13: ...or two days for delicate whites or three days for rich reds as long as the bottle as been resealed You should make sure that the seal is firm by checking the stopper o Special stoppers that keep wine...

Page 14: ...l be drinkable if the leakage was recent however you should be aware that if the wine cools down again contraction can cause more air to be sucked into the bottle and result in further deterioration S...

Page 15: ...oroughly o When cleaning is complete dry your hands and then reconnect the plug to your mains supply Defrosting o Defrosting occurs automatically inside of the wine cabinet during operation The defros...

Page 16: ...way to the STOP position and push them back in several times to make sure the shelves are properly engaged Moving your wine cabinet If you need to move your wine cabinet to another location you should...

Page 17: ...sed for several months remove all items turn off the appliance and unplug the electricity cable Clean and dry the interior thoroughly To prevent odour and mould growth leave the door open slightly by...

Page 18: ...d to the terminal marked N neutral or coloured black The green and yellow wire must be connected to the terminal marked E earth or by the earth symbol or coloured green and yellow o When the connectio...

Page 19: ...ld be used to level the appliance o Be sure to leave enough space for the opening of the door to avoid damage to the appliance or personal injury o IMPORTANT The vent at the base of the appliance is f...

Page 20: ...ht may be adjusted to level the cabinet on uneven floor surfaces o We recommend that two people carry out this procedure o The height must be adjusted prior to building the appliance into the housing...

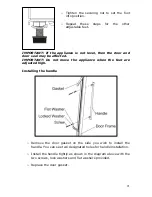
Page 21: ...ay be affected IMPORTANT Do not move the appliance when the feet are adjusted high Installing the handle o Remove the door gasket on the side you wish to install the handle You can see two designated...

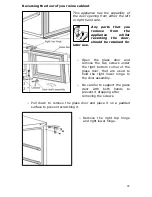
Page 22: ...r later use o Open the glass door and remove the two screws under the right bottom corner of the glass door that are used to hold the right lower hinge to the door assembly o Be careful to support the...

Page 23: ...round the door o If the seal is not adhering to the cabinet properly then you should either a Use a warm damp cloth and manipulate the seal until it does adhere to the cabinet properly all the way aro...

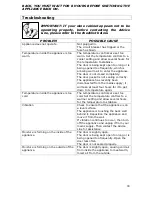
Page 24: ...ected from the mains supply it will take at least four hours for it to get down to temperature again Temperature inside the appliance is too cold The temperature controls are set too cold Set the temp...

Page 25: ...m any necessary repair If your appliance is installed in such a way that an engineer is concerned that damage will be caused to the appliance or your kitchen then he will not complete a repair This in...

Page 26: ...artments N A Temperature Rise Time N A Freezing Capacity N A Climate Class 3 N Noise Level 39 dB Installation Type Built in This appliance is intended to be used exclusively for the storage of wine 1...

Page 27: ...27...

Page 28: ...28 United Kingdom 6 Bennet Road Reading Berkshire RG2 0QX United Kingdom Advice Line 0118 933 6918...

Reviews: