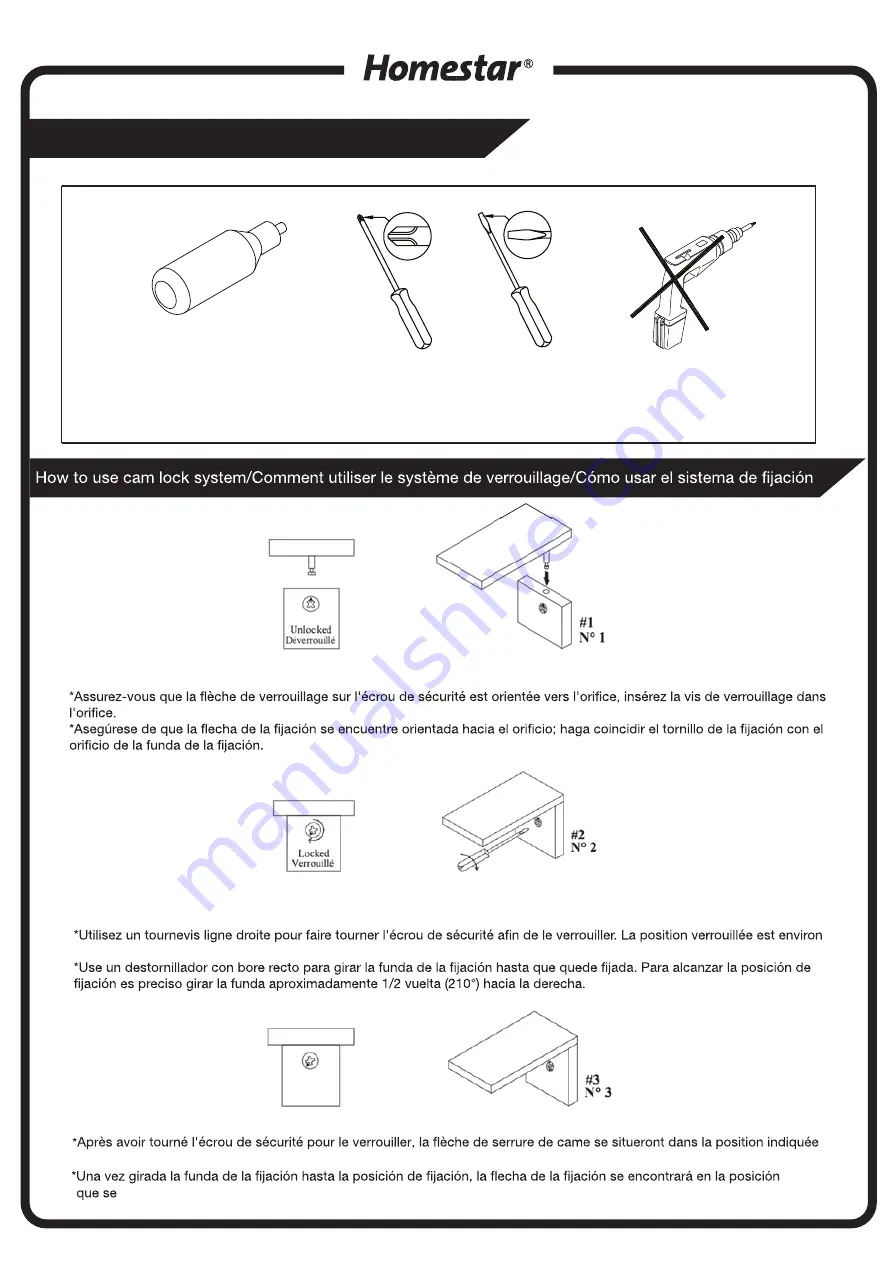
Necessary tools/Outils nécessaires/Herramientas necesarias
03
*Ensure that the cam lock arrow is pointed to the hole, align the cam lock screw to the hole of the cam lock case.
*Use a straight edge screwdriver to turn cam lock case until it is locked.Locked position is approximately 1/2 turn(210°)
clock-wise.
1/2 tour (210°) à la droite.
*After turnning the cam lock case to the locked position,the cam lock arrow will be located in the position shown above.
muestra en la ilustración anterior.
Glue not enclosed (We recommend to apply some glue into holes before inserting wood dowels.)
Colle non fournie (Nous vous recommandons d’appliquer quelques gouttes de colle dans les trous avant
d’y introduire les chevilles de bois.)
madera.)
Glue not included ( We recommend to apply some glue into holes before inserting wood dowels .)
Colle non inclus (Nous vous recommandons d’appliquer quelques gouttes de colle dans les trous avant d'introduire les
chevilles de bois.)
ci-dessus.
Cola, no incluido (Le recomendamos colocarunas gotas de cola en los orificios antes de insertar las clavijas de madera.)
Summary of Contents for Z1510470
Page 5: ...Step 1 Étape 1 Paso 1 Step 2 Étape 2 Paso 2 04 A x 2 B x 4 B A A A x 2 ...
Page 6: ...A C A Step 3 Étape 3 Paso 3 Step 4 Étape 4 Paso 4 05 C x 1 A x 7 ...
Page 7: ...C D A B Step 5 Étape 5 Paso 5 Step 6 Étape 6 Paso 6 06 C x 3 D x 3 D A x 2 B x 4 ...
Page 8: ...A E B C D E x 3 Step 7 Étape 7 Paso 7 Step 8 Étape 8 Paso 8 07 C x 4 D x 3 D A x 2 B x 6 ...
Page 9: ...C F G D Step 9 Étape 9 Paso 9 Step10 Étape10 Paso10 08 C x 6 D x 2 D F x 2 G x 6 ...
Page 10: ...H H I x 2 Step11 Étape11 Paso11 Step12 Étape12 Paso12 09 H x 12 I x 3 ...
Page 11: ...E Step13 Étape13 Paso13 Step14 Étape14 Paso14 10 E x 2 ...
Page 12: ...E B J K B x 4 Step15 Étape15 Paso15 Step16 Étape16 Paso16 11 E x 2 J x 2 K x 4 ...
Page 13: ...F G D C x 4 D x 2 C D Step17 Étape17 Paso17 Step18 Étape18 Paso18 12 F x 2 G x 6 ...
Page 14: ...L M L x 4 M x 4 90 2 1 L M Step19 Étape19 Paso19 Step20 Étape20 Paso20 13 ...


