6 of 7
AII12510-36 (1911)
© 2019 American Honda Motor Co., Inc. – All Rights Reserved.
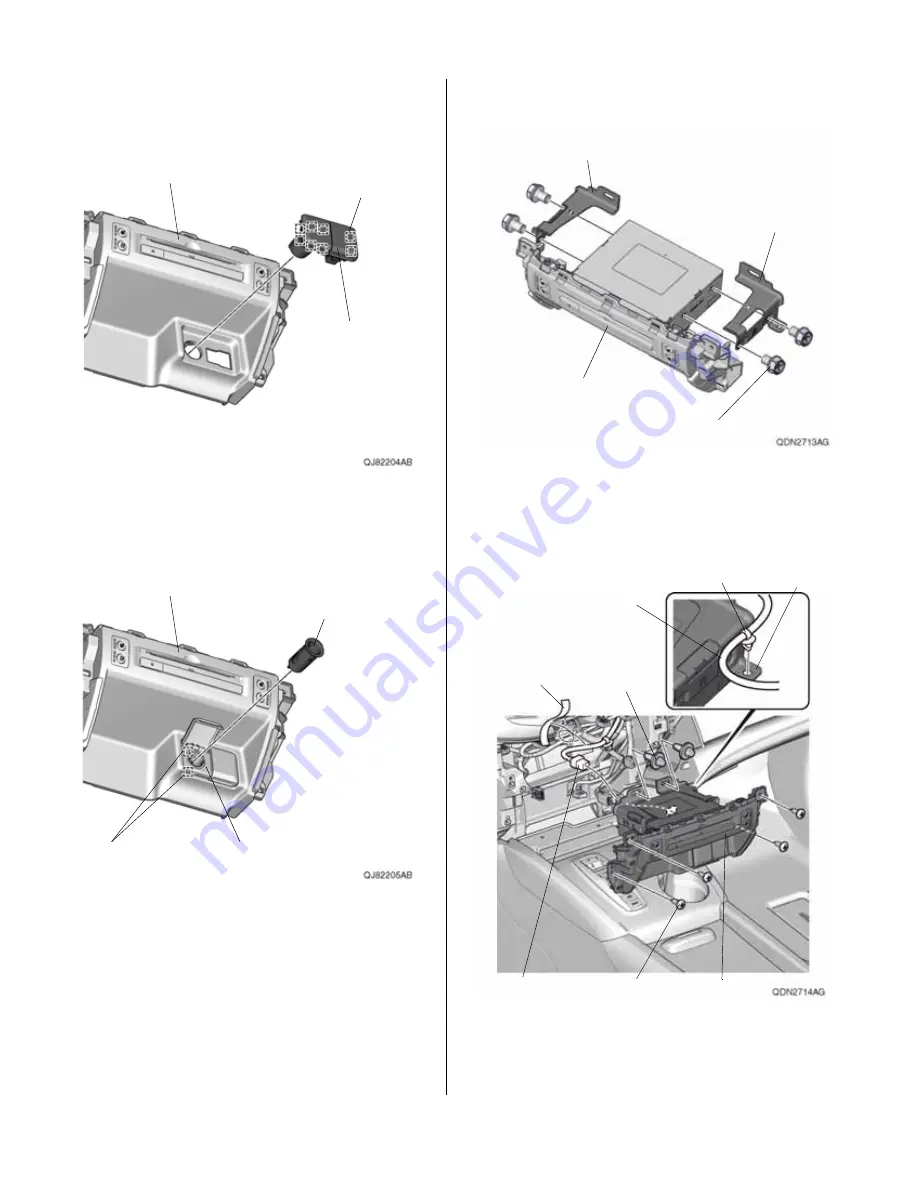
14. Install the accessory socket and 1 USB socket
holder or the accessory socket holder to the CD
player unit with eight retaining tabs.
CD PLAYER
UNIT
ACCESSORY
SOCKET AND 1 USB
SOCKET HOLDER OR
ACCESSORY
SOCKET HOLDER
8 RETAINING
TABS
15. Install the accessory socket removed in step 12 to
the accessory socket and 1 USB socket holder or the
accessory socket holder with two retaining tabs.
CD PLAYER
UNIT
ACCESSORY SOCKET AND
1 USB SOCKET HOLDER OR
ACCESSORY SOCKET HOLDER
ACCESSORY
SOCKET
2 RETAINING
TABS
16. Install the left and right brackets to the CD player unit
with four 5 x 7 mm flange bolts.
CD PLAYER
UNIT
4 FLANGE BOLTS,
5 x 7 mm
LEFT
BRACKET
RIGHT
BRACKET
17. Remove the tape to release the vehicle 16-pin
connector. Plug the vehicle 16-pin connector into the
CD player unit, and secure the vehicle harness to the
right bracket with clip on the vehicle harness.
CD PLAYER
UNIT
4 SELF-TAPPING
SCREWS
VEHICLE
16-PIN
CONNECTOR
TAPE
(Remove.)
2 BOLTS,
6 mm
RIGHT
BRACKET
CLIP
VEHICLE
HARNESS
18. Install the CD player unit to the dashboard with four
self-tapping screws removed in step 10 and the two
6 mm bolts supplied.


