© 2007 American Honda Motor Co., Inc. – All Rights Reserved.
AII 35365 (0708)
7 of 24
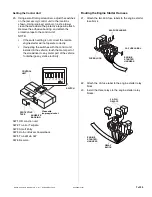
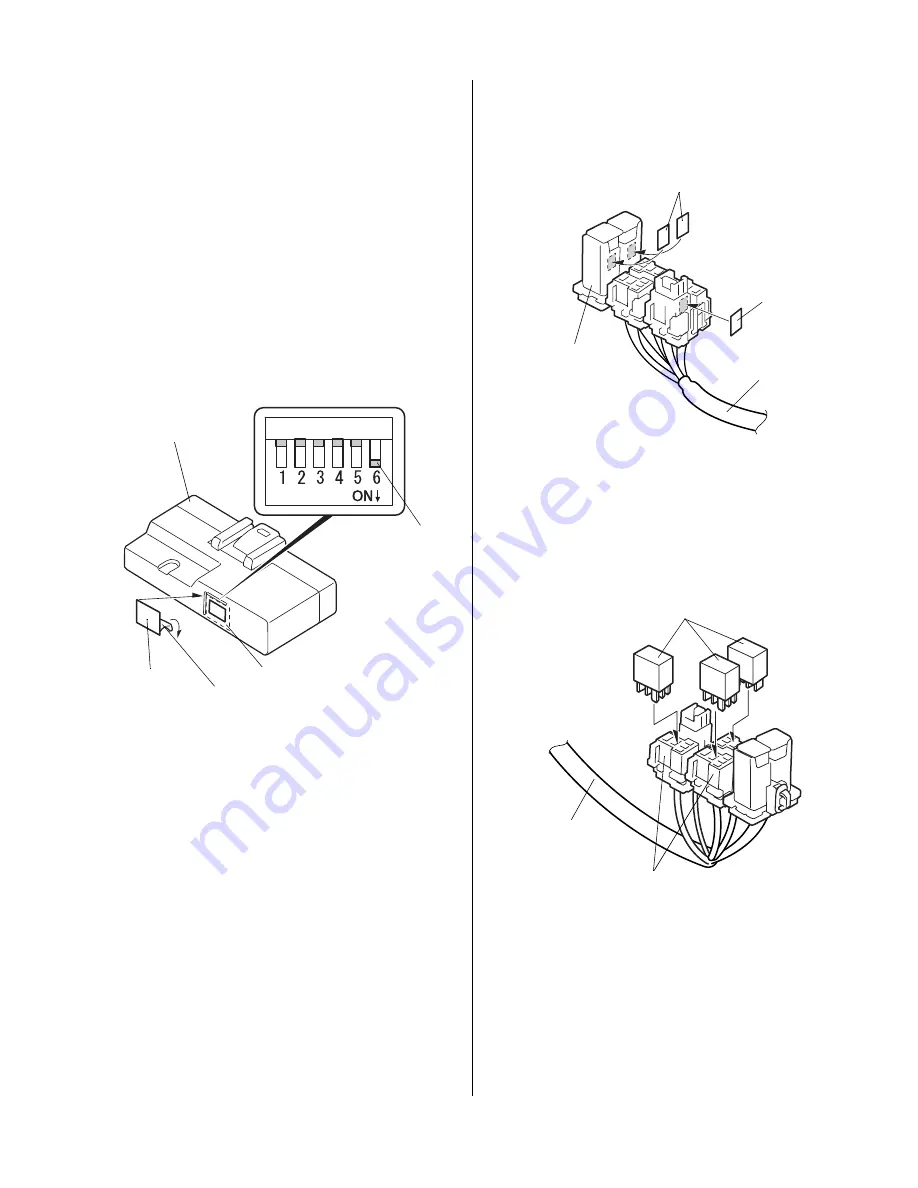
Setting the Control Unit
20. Using a small flat-tip screwdriver, adjust the switches
on the (accessory) control unit to the locations
shown. Using isopropyl alcohol on a shop towel,
clean the area where the protective tape will attach.
Remove the adhesive backing, and attach the
protective tape to the control unit.
NOTE:
•
If the switch setting is not correct the remote
engine starter will not operate correctly.
•
If adjusting the switches with the control unit
installed in the vehicle, touch the metal part of
the screwdriver to any metal part of the vehicle
to discharge any static electricity.
SW:1 RR Junction unit
SW:2 Trunk or Tailgate
SW:3 Smart Entry
SW:4 Horn or Buzzer Answerback
SW:5 Trunk Main SW
SW:6 Reserve
7111031Y
CONTROL
UNIT
SWITCH
PROTECTIVE
TAPE
ADHESIVE
BACKING
Clean with
isopropyl alcohol.
Routing the Engine Starter Harness
21. Attach the two 40A fuse labels to the engine starter
fuse block.
22. Attach the 3A fuse label to the engine starter relay
block.
23. Install the three relays to the engine starter relay
blocks.
732821BY
ENGINE
STARTER
HARNESS
FUSE BLOCK
3A FUSE LABEL
40A FUSE LABELS
6D1802BY
ENGINE
STARTER
HARNESS
RELAY
BLOCK
3 4-PIN
RELAYS


