background image

90

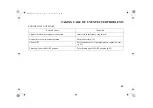
TAKING CARE OF UNEXPECTED PROBLEMS

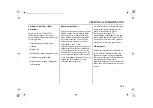
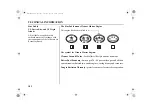
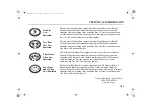
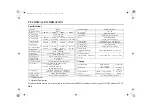
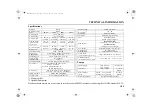
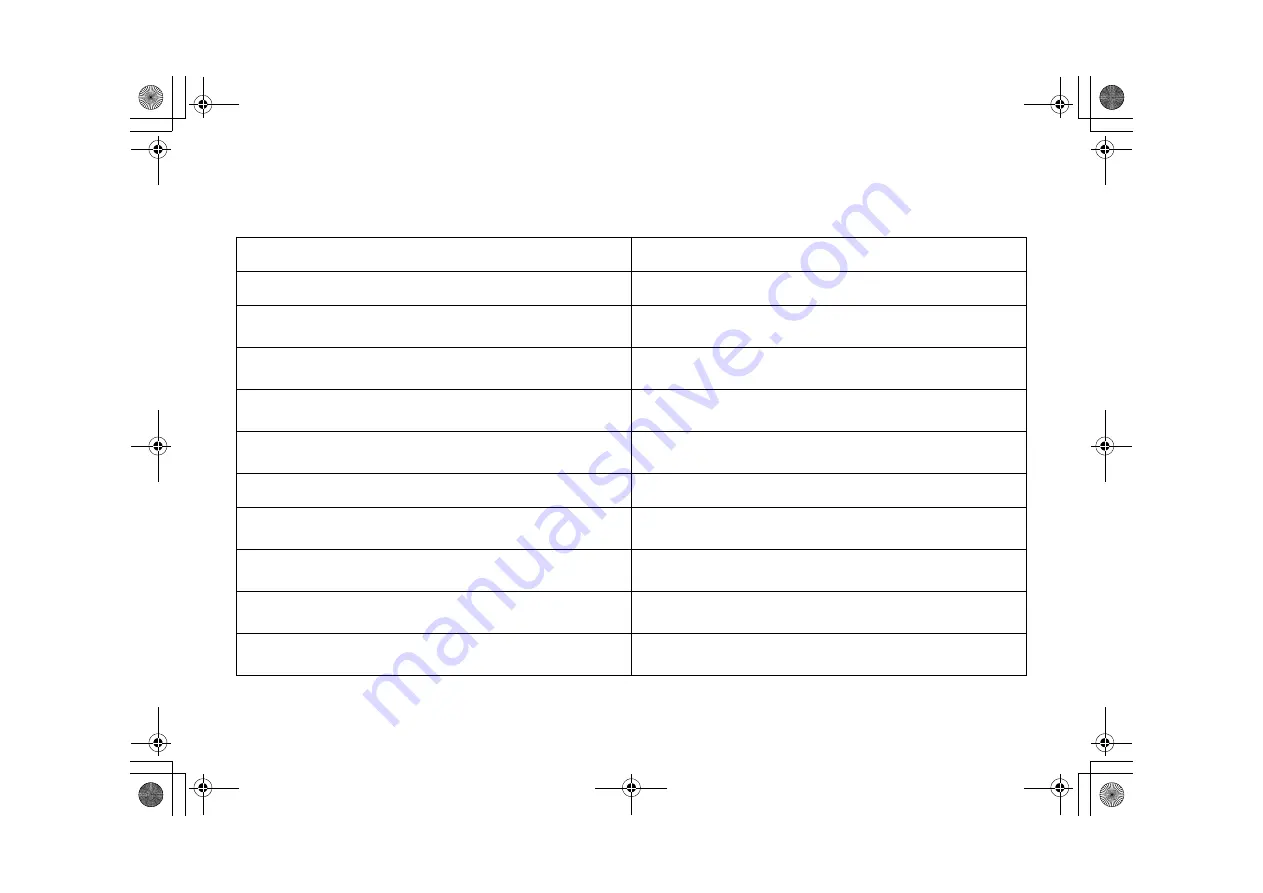
ENGINE WILL NOT START

Possible Cause

Correction

Out of fuel.

Refuel (p. 69).

Fuel valve lever is not turned to the appropriate position.

Turn the fuel valve lever to the appropriate position 

(p. 19).

Fuel vent closed (internal fuel tank).

Turn the internal fuel tank vent knob counterclockwise to 

the open position (p. 21).

When using the portable fuel tank (BF5D and BF6A), fuel 

vent closed (portable fuel tank).

Turn the portable fuel tank vent knob counterclockwise to 

the open position (p. 26).

When using the portable fuel tank (BF5D and BF6A), fuel 

hose not primed.

Squeeze priming bulb (p. 38).

Fuel filter or fuel tank filter restricted.

Replace restricted filters (p. 73 or 75).

Bad fuel; outboard motor stored without treating or 

draining gasoline, or refueled with bad gasoline.

Drain fuel tank and carburetor (p. 83). Refill with fresh 

gasoline (p. 69).

Spark plug faulty, fouled, or improperly gapped.

Adjust the spark plug electrode gap or replace spark plug 

(p. 68).

Spark plug wet with fuel (flooded engine).

Dry and reinstall spark plug. Start engine with choke and 

throttle open.

Carburetor malfunction, fuel pump failure, ignition 

malfunction, stuck valves, etc.

Take outboard motor to an authorized Honda Marine 

dealer, or refer to the shop manual.

31ZVC6000.book  Page 90  Tuesday, June 28, 2016  1:09 PM

Summary of Contents for BD6A

Page 1: ...0X31 ZVC 6000_BF4A BF5D BF6A Cover1 4 31ZVC600 00X31 ZVC 6000 XXX 20XX XX Printed in China 00X31 ZVC 6000 BF4A BF5D BF6A Cover indd 1 2011 10 18 19 26 06 2016 Honda Motor Co Ltd All Rights Reserved BF4A BF5D BF6A FM 6 Click to Save As ...

Page 2: ...o discontinue or change specifications or design at any time without notice and without incurring any obligation whatsoever No part of this publication may be reproduced without written permission The engine exhaust from this product contains chemicals known to the State of California to cause cancer birth defects or other reproductive harm California Proposition 65 This product contains or emits ...

Page 3: ...eceded by a symbol That information is intended to help you avoid damage to your outboard motor other property or the environment We suggest you read the warranty policy to fully understand its coverage and your responsibilities of ownership see page 110 When your outboard motor needs scheduled maintenance keep in mind that your Honda Marine dealer is specially trained in servicing Honda outboard ...

Page 4: ...ood judgment You will find important safety information in a variety of forms including Safety Labels on the outboard motor Safety Messages preceded by a safety alert symbol and one of three signal words DANGER WARNING or CAUTION These signal words mean Safety Headings such as IMPORTANT SAFETY INFORMATION Safety Section such as OUTBOARD MOTOR SAFETY Instructions how to use this outboard motor corr...

Page 5: ...e Adjusting Rod 22 Steering Friction Bolt 23 Tilt Lever 23 Handle Stopper 23 INSTRUMENTS 24 Fuel Gauge 24 INDICATORS 24 Oil Pressure Indicator 24 Cooling System Indicator 25 OTHER FEATURES 25 Rev Limiter 25 Anode 25 Fuel Hose Connector Cap and Fuel Hose Connector 26 Portable Fuel Tank 26 Fuel Filler Cap Vent Knob 26 Fuel Priming Bulb 27 INSTALLATION 28 POWER REQUIREMENTS 28 INSTALLATION POSITION 2...

Page 6: ...TION 54 MOORING BEACHING LAUNCHING 55 SERVICING YOUR OUTBOARD MOTOR 56 THE IMPORTANCE OF MAINTENANCE 56 MAINTENANCE SAFETY 57 TOOL KIT AND EMERGENCY STARTER ROPE 58 MAINTENANCE SCHEDULE 59 ENGINE COVER REMOVAL AND INSTALLATION 61 Engine Oil Level Check 62 Engine Oil Change 63 Engine Oil Recommendations 65 Gear Case Oil Change 65 Lubrication Points 67 Spark Plug Service 68 REFUELING 69 FUEL RECOMME...

Page 7: ...ipped type 94 Fuse Replacement 94 OIL PRESSURE INDICATOR GOES OFF AND ENGINE SPEED IS LIMITED 95 SUBMERGED OUTBOARD MOTOR 96 TECHNICAL INFORMATION 98 Serial Number Locations 98 Carburetor Modification for High Altitude Operation 99 Battery 99 Emission Control System Information 100 Star Label 102 Specifications 104 Specifications 105 Specifications 106 CONSUMER INFORMATION 107 Dealer Locator Infor...

Page 8: ...safeguards to protect people and property Know how to stop the engine quickly in case of emergency Understand the use of all controls Stop the engine immediately if anyone falls overboard and do not run the engine while the boat is near anyone in the water Always stop the engine if you must leave the controls for any reason Attach the emergency stop switch lanyard securely to the operator Always w...

Page 9: ...void spilling fuel Avoid overfilling the fuel tank After refueling tighten the filler cap securely If any fuel is spilled make sure the area is dry before starting the engine Carbon Monoxide Hazard Exhaust contains poisonous carbon monoxide a colorless odorless gas Breathing carbon monoxide can cause loss of consciousness and may lead to death If you run the engine in an area that is confined or e...

Page 10: ...8 OUTBOARD MOTOR SAFETY SAFETY LABEL LOCATIONS US Puerto Rico and US Virgin Islands Types 31ZVC6000 book Page 8 Tuesday June 28 2016 1 09 PM ...

Page 11: ...ment FUEL CAUTION PORTABLE FUEL TANK FUEL CAUTION CAUTION KEEP TOTALLY CLOSED WHEN NOT IN USE KEEP AWAY FROM HEAT SPARKS AND OPEN FLAME SECURE ABOVE DECK IN WELL VENTILATED AREA DO NOT USE FOR LONG TERM FUEL STORAGE DO NOT USE FUEL OIL MIXTURE GASOLINE FLAMMABLE DANGER DANGER HARMFUL OR FATAL IF SWALLOWED KEEP OUT OF REACH OF CHILDREN IF SWALLOWED DO NOT INDUCE VOMITING CALL A PHYSICIAN IMMEDIATEL...

Page 12: ...10 OUTBOARD MOTOR SAFETY Canadian Types 31ZVC6000 book Page 10 Tuesday June 28 2016 1 09 PM ...

Page 13: ...E FLAMMABLE DANGER GAZOLINE INFLAMMABLE DANGEREUX DANGER HARMFUL OR FATAL IF SWALLOWED KEEP OUT OF REACH OF CHILDREN IF SWALLOWED DO NOT INDUCE VOMITING CALL A PHYSICIAN IMMEDIATELY CAUTION KEEP TOTALLY CLOSED WHEN NOT IN USE KEEP AWAY FROM HEAT SPARKS AND OPEN FLAME SECURE ABOVE DECK IN WELL VENTILATED AREA DO NOT USE FOR LONG TERM FUEL STORAGE DO NOT USE FUEL OIL MIXTURE GASOLINE FLAMMABLE DANGE...

Page 14: ...area with the engine stopped Do not smoke or allow flames or sparks where the engine is refueled or where gasoline is stored Do not overfill the fuel tank After refueling make sure that the fuel filler cap is closed properly and securely Be careful not to spill any fuel while refueling Spilled fuel or fuel vapor may ignite If any fuel is spilled make sure that the area is dry before starting the e...

Page 15: ... children Gasoline is extremely flammable and is explosive under certain conditions Refuel in a well ventilated area with the engine stopped Do not smoke or allow flames or sparks where the engine is refueled or where gasoline is stored Do not overfill the fuel tank After refueling make sure that the fuel filler cap is closed properly and securely Be careful not to spill any fuel while refueling S...

Page 16: ...em N Without System Optional Equipment N A Throttle Type H Tiller Handle Type Shaft Length S Short Shaft L Long Shaft CONTROL AND FEATURE IDENTIFICATION CODES Refer to this chart for an explanation of the Type Codes used in this manual to identify control and feature applications Optional equipment Model BF4A BF5D BF6A Type SHNA SHNC LHNA LHNC SHNA SHNC LHNA LHNC SHNA SHC LHNA LHC Shaft Length S L...

Page 17: ...LATION PLATE TRANSOMANGLE ADJUSTING ROD COOLING SYSTEM INDICATOR ENGINE COVER OIL FILLER CAP DIPSTICK SPARK PLUG STARTER GRIP THROTTLE GRIP THROTTLE FRICTION KNOB HANDLE STOPPER STEERING FRICTION BOLT STERN BRACKET GEAR OIL LEVEL SCREW GEAR OIL DRAIN FILL SCREW EXHAUST PORT ANODE WASH SCREW FLUSH SCREW ENGINE OIL DRAIN BOLT ENGINE COVER LATCH TILT LEVER 31ZVC6000 book Page 15 Tuesday June 28 2016 ...

Page 18: ...BF5D and BF6A only CHOKE KNOB EMERGENCY STOP SWITCH CLIP EMERGENCY STOPSWITCH LANYARD BATTERY CHARGE CABLE equipped type Portable Fuel Tank Optional Equipment for BF5D and BF6A FUEL GAUGE VENT KNOB FUEL FILLER CAP PORTABLE FUEL TANK FUEL PRIMING BULB FUEL HOSE FUEL HOSE CONNECTOR FEMALE 31ZVC6000 book Page 16 Tuesday June 28 2016 1 09 PM ...

Page 19: ...itch lanyard system stops the engine if the operator falls away from the controls A spare emergency stop switch clip is supplied with the tool kit Choke Knob The choke knob opens and closes the choke valve in the carburetor The ON position enriches the fuel mixture for starting a cold engine The OFF position provides the correct fuel mixture for operation after starting and for restarting a warm e...

Page 20: ...rottle friction knob adjusts resistance to throttle grip rotation Turn the knob clockwise to increase friction for holding a throttle setting while cruising Turn the knob counterclockwise to decrease friction for easy throttle grip rotation INDEX MARK THROTTLE GRIP SLOW FAST USA model Canadian model FAST FAST SLOW SLOW THROTTLE FRICTION KNOB TO INCREASE FRICTION TO DECREASE FRICTION 31ZVC6000 book...

Page 21: ...rse position the recoil starter will not operate Fuel Valve Lever GEARSHIFT LEVER N neutral R reverse F forward USA model Canadian model N neutral R reverse F forward N neutral R reverse F forward FUEL VALVE LEVER ON BF4A or INTERNAL FUEL TANK POSITION BF5D and BF6A OFF BF4A or PORTABLE FUEL TANK POSITION BF5D and BF6A 31ZVC6000 book Page 19 Tuesday June 28 2016 1 09 PM ...

Page 22: ...l leakage BF5D and BF6A The fuel valve lever has internal fuel tank position and portable fuel tank position When using the internal fuel tank turn the fuel valve lever to the internal fuel tank position When not connecting the portable fuel tank fuel is shut off at the portable fuel tank position When using the portable fuel tank turn the fuel valve lever all the way to the portable fuel tank pos...

Page 23: ...k is supplied If the portable fuel tank is not connected fuel supply is shut off Set the fuel valve lever to the PORTABLE FUEL TANK position during transporting or storing the outboard motor Fuel Filler Cap Vent Knob Internal Fuel Tank The fuel filler cap is provided with a vent knob to seal the fuel tank Open the vent by turning the vent knob counterclockwise all the way before starting the engin...

Page 24: ...top switch clip is in the emergency stop switch Engine Cover Latch The engine cover latch fastens the engine cover to the outboard motor Do not remove the engine cover while the engine is running Transom Angle Adjusting Rod The transom angle adjusting rod adjusts the transom angle of the outboard motor when fully lowered Proper adjustment prevents the outboard motor from being adjusted too low p 5...

Page 25: ...tilt lever enables the outboard motor to be raised for shallow water operation beaching launching or mooring To tilt raise the outboard motor by pulling on the engine cover grip until the tilt mechanism engages at 18 34 or 58 p 54 and 55 Handle Stopper The tiller handle can be moved to the bottom direction by turning the handle stopper STEERING FRICTION BOLT TO DECREASE FRICTION TO INCREASE FRICTI...

Page 26: ...e indicator is lit oil pressure is OK If oil pressure becomes low the oil pressure indicator will go off and the engine protection system will limit engine speed Refer to TAKING CARE OF UNEXPECTED PROBLEMS p 95 Low oil pressure indicates that the engine oil level is low or that there is a problem with the engine lubrication system FUEL GAUGE OILPRESSURE INDICATOR 31ZVC6000 book Page 24 Tuesday Jun...

Page 27: ...mechanical damage from excessive engine speed The rev limiter may be activated during operation limiting engine speed if the outboard motor is tilted excessively or when propeller ventilation occurs during a sharp turn If the rev limiter is activated check the tilt angle of the outboard motor Improper propeller selection may also cause the rev limiter to activate Check to see if the correct propel...

Page 28: ...pacity of 3 2 US gal 12 L 2 6 Imp gal and has a fuel gauge built into the fuel tank connector Fuel Filler Cap Vent Knob Optional Equipment for BF5D and BF6A The fuel filler cap is provided with a vent knob to seal the portable fuel tank for carrying it to and from the boat Open the vent by turning the vent knob counterclockwise all the way before starting the engine Close the vent by turning the v...

Page 29: ... fuel tank to the outboard motor Before starting the engine hold the priming bulb up in the direction of the arrow then squeeze the priming bulb until it feels firm This will ensure that fuel is supplied to the engine INLET END portable fuel tank side PRIMING BULB OUTLET END outboard motor side UP 31ZVC6000 book Page 27 Tuesday June 28 2016 1 09 PM ...

Page 30: ...he boat INSTALLATION POSITION Install the outboard motor on the center of the boat transom The antiventilation plate of the outboard motor should be 0 2 in 0 50 mm below the bottom of the boat The correct dimensions differ according to the type of boat and the configuration of the bottom of the boat Follow the manufacturer s recommended installation height When the outboard motor is installed extr...

Page 31: ... to a specific model of boat If the transom needs to be modified to accommodate the outboard motor contact the boat manufacturer and follow their recommendations for corrective action ATTACHMENT Attach the stern bracket to the boat transom by tightening the clamp screws Attach a rope from the boat to the hole in the stern bracket This will help to prevent accidental loss of the outboard motor TRAN...

Page 32: ...e battery The battery should be kept in a corrosion resistant battery box that is securely mounted in a location away from the fuel tank and protected from water and direct sunlight Battery For complete information refer to the battery manufacturer s instructions Minimum Requirements 12V 28Ah 5HR CCA 265 The battery contains sulfuric acid electrolyte which is highly corrosive and poisonous Getting...

Page 33: ...ile being used on the positive battery terminal fitting Be careful to avoid connecting the battery in reverse polarity as this will damage the battery charging system in the outboard motor Do not disconnect the battery cables while the engine is running Disconnecting the cables while the engine is running will damage the outboard motor s electrical system Battery cable extension Extending the orig...

Page 34: ...the PFD equipped to an operator IS YOUR OUTBOARD MOTOR READY TO GO For your safety and to maximize the service life of your equipment it is very important to take a few moments before you operate the outboard motor to check its condition Be sure to take care of any problem you find or have your authorized Honda Marine dealer correct it before you operate the outboard motor Before beginning your pr...

Page 35: ... for proper operation p 17 39 Start the engine p 39 Make sure the engine stops by pulling the emergency stop switch clip from the emergency stop switch p 49 Maintenance Inspection Check the engine oil level p 61 Running the engine with a low oil level can cause engine damage Check to be sure the propeller and shear pin are undamaged p 77 Check that the anode is securely attached to the antiventila...

Page 36: ...ance and long service life First 15 minutes Run the outboard motor at trolling speed Use the minimum amount of throttle opening necessary to operate the boat at a safe trolling speed Next 45 minutes Run the outboard motor up to a maximum of 10 to 30 throttle opening Next 60 minutes Run the outboard motor up to maximum of 50 to 80 throttle opening Short bursts of full throttle are acceptable but do...

Page 37: ...ed position Then release the rod PRIMING THE CARBURETOR WITH GASOLINE When using the internal fuel tank When starting the engine for the first time or when starting the engine after the carburetor has been drained the carburetor must be primed with gasoline before the engine will start To prime the carburetor remove the emergency stop switch clip from the outboard motor and then pull the starter g...

Page 38: ...the fuel valve lever to the ON position BF4A or internal fuel tank position BF5D and BF6A p 19 VENT KNOB OPEN ON BF4A or INTERNAL FUEL TANK POSITION BF5D and BF6A FUEL VALVE LEVER BF4A BF5D and BF6A ON INTERNAL FUEL TANK POSITION N neutral GEARSHIFT LEVER USA model Canadian model N neutral N neutral 31ZVC6000 book Page 36 Tuesday June 28 2016 1 09 PM ...

Page 39: ...ce the possibility of a gasoline vapor explosion To ensure that the outboard motor will be able to draw fuel from the tank place the tank within 6 feet 2 m of the outboard motor and not more than 3 feet 1 m below the fuel connector on the outboard motor Secure the portable fuel tank in the boat so that it won t move around and become damaged STARTER GRIP Direction to pull FUEL HOSE standard equipm...

Page 40: ... FUEL PRIMING OPTIONAL EQUIPMENT for BF5D and BF6A When using the portable fuel tank Turn the portable fuel tank vent knob counterclockwise to the open position p 26 and turn the fuel valve lever to the portable fuel tank position p 19 Hold the priming bulb up in the direction of the arrow then squeeze the priming bulb several times until it feels firm indicating that fuel has reached the carburet...

Page 41: ...nnect the fuel line p 38 and prime the engine using the priming bulb p 38 1 Put the emergency stop switch clip in the emergency stop switch and attach the emergency stop switch lanyard securely to the operator or to the PFD Personal Flotation Device equipped to an operator The engine will not start or run unless the emergency stop switch clip is in the emergency stop switch The emergency stop swit...

Page 42: ...filler cap vent knob when using the portable fuel tank OPEN VENT KNOB FUEL VALVE LEVER ON BF4A or INTERNAL FUEL TANK POSITION BF5D and BF6A OFF BF4A or PORTABLE FUEL TANK POSITION BF5D and BF6A BF4A BF5D and BF6A ON OFF INTERNAL FUEL TANK POSITION PORTABLE FUEL TANK POSITION 31ZVC6000 book Page 40 Tuesday June 28 2016 1 09 PM ...

Page 43: ...turn the fuel valve lever to the portable fuel tank position BF5D and BF6A p 19 4 Check the position of the gearshift lever It must be in the N neutral position for starting The recoil starter will not operate if the gearshift lever is in the F forward or R reverse position N neutral GEARSHIFT LEVER Canadian model N neutral N neutral USA model 31ZVC6000 book Page 41 Tuesday June 28 2016 1 09 PM ...

Page 44: ...th the index mark for starting the engine 7 Pull the starter grip lightly until you feel resistance then pull briskly in the direction of the arrow as shown above Return the starter grip gently CHOKE KNOB OFF ON INDEX MARK THROTTLE GRIP Canadian model START POSITION START POSITION USA model STARTER GRIP Direction to pull 31ZVC6000 book Page 42 Tuesday June 28 2016 1 09 PM ...

Page 45: ...ors show any abnormal condition immediately stop the engine and determine the cause of the problem Refer to TAKING CARE OF UNEXPECTED PROBLEMS on p 92 and 95 EMERGENCY STARTING If the recoil starter is inoperative you can start the engine using the emergency starter rope that came with your outboard motor 1 Turn the internal fuel tank vent knob counterclockwise to the open position p 21 Always ope...

Page 46: ... fuel tank position BF5D and BF6A p 19 If you are using the portable fuel tank turn the fuel valve lever to the portable fuel tank position BF5D and BF6A p 19 BF4A BF5D and BF6A ON OFF INTERNAL FUEL TANK POSITION PORTABLE FUEL TANK POSITION N neutral GEARSHIFT LEVER 31ZVC6000 book Page 44 Tuesday June 28 2016 1 09 PM ...

Page 47: ...tle cables from the cover hook 6 Release the neutral start cable from the cover hook 7 Disconnect the neutral start cable from recoil case Canadian model N neutral N neutral USA model THROTTLE CABLES COVER HOOK COVER HOOK NEUTRAL START CABLE NEUTRAL START CABLE RECOIL CASE 31ZVC6000 book Page 45 Tuesday June 28 2016 1 09 PM ...

Page 48: ...the N neutral position The Neutral Starting System will not work in emergency starting Be sure to set the shift lever into N neutral position to prevent start in gear when starting the engine in emergency Sudden unexpected acceleration could result in serious injury or death 6 mm FLANGE BOLTS AND WASHERS WASHER 6 mm FLANGE BOLT WASHER 6 mm CAP NUT RECOIL CASE 6 mm CAP NUTS AND WASHERS 6 mm FLANGE ...

Page 49: ...tart a cold engine pull the choke knob to the ON position To restart a warm engine leave the choke knob in the OFF position 15 Align the START position with the index mark for starting the engine EMERGENCY STOP SWITCH EMERGENCYSTOP SWITCH CLIP EMERGENCY STOP SWITCH LANYARD CHOKE KNOB OFF ON INDEX MARK THROTTLE GRIP Canadian model START POSITION START POSITION USA model 31ZVC6000 book Page 47 Tuesd...

Page 50: ...g the warm up period check the oil pressure indicator p 24 and cooling system indicator p 24 19 Install the engine cover p 61 and lock it in place by locking the engine cover lock lever 20 If it was necessary to remove the emergency stop switch lanyard from you to perform the emergency starting procedure be sure the lanyard is attached securely to operator before operating the outboard motor 21 Ha...

Page 51: ...e emergency stop switch lanyard We suggest that you stop the engine this way occasionally to verify that the engine and emergency stop switch are operating properly Normal Engine Stopping EMERGENCY STOP SWITCH EMERGENCY STOP SWITCH LANYARD PULL EMERGENCY STOP SWITCH CLIP THROTTLE GRIP SLOW Canadian model SLOW USA model SLOW 31ZVC6000 book Page 49 Tuesday June 28 2016 1 09 PM ...

Page 52: ...kwise all the way p 21 If you are using a portable fuel tank close the internal fuel tank vent by turning the vent knob clockwise all the way p 21 and close the portable fuel tank vent by turning the vent knob clockwise all the way p 26 If you will be tilting up the outboard motor storing or transporting the outboard motor disconnect the fuel hose connectors from the outboard motor and portable fu...

Page 53: ...n the throttle grip in the FAST direction in R reverse and N neutral gears The recoil starter can be operated with the gearshift lever in the N neutral position only THROTTLE GRIP SLOW Canadian model SLOW USA model SLOW R reverse N neutral F forward GEARSHIFT LEVER USA model Canadian model N neutral R reverse F forward N neutral R reverse F forward 31ZVC6000 book Page 51 Tuesday June 28 2016 1 09 ...

Page 54: ... tiller handle opposite the direction you want the boat to turn Use the steering friction bolt to help hold a steady course while cruising Turn the bolt clockwise to increase steering friction for holding a steady course Turn the bolt counterclockwise to decrease friction for easy turning THROTTLE FRICTION KNOB TO DECREASE FRICTION TO INCREASE FRICTION RIGHT TURN LEFT TURN STEERING FRICTION BOLT T...

Page 55: ...eight distribution water conditions or propeller selection Under normal running conditions the boat will perform best when the antiventilation plate is level with the water surface When cruising into a high wind adjust the outboard motor down slightly to level the boat and improve stability With a tail wind adjust the outboard motor up slightly p 34 Excessive transom angle during operation can cau...

Page 56: ... damage it While the outboard motor is tilted proceed at a low speed and do not operate the outboard motor in reverse The outboard motor will rise suddenly if operated in reverse Monitor water flow from the cooling system indicator p 24 to be sure the outboard motor is not tilted so high that the water intakes are out of the water An excessive tilt angle during operation can cause propeller ventil...

Page 57: ...using the portable fuel tank BF5D and BF6A disconnect the fuel hose connectors from the outboard motor and portable fuel tank p 38 install fuel hose connector cap and close the portable fuel tank vent by turning the vent knob clockwise all the way p 26 4 Close the internal fuel tank vent by turning the vent knob clockwise all the way p 21 To raise the outboard motor out of the water while the boat...

Page 58: ...authorized Honda Marine dealer for recommendations applicable to your individual needs and use Remember that your authorized Honda Marine dealer knows your outboard motor best and is fully equipped to maintain and repair it To ensure the best quality and reliability use only new Honda Genuine parts or their equivalents for repair and replacement Maintenance replacement or repair of the emission co...

Page 59: ...system cool before touching Injury from moving parts Do not run the engine unless instructed to do so Read the instructions before you begin and make sure you have the tools and skills required To reduce the possibility of fire or explosion be careful when working around gasoline Use only a nonflammable solvent not gasoline to clean parts Keep cigarettes sparks and flames away from all fuel relate...

Page 60: ... is also supplied Keep these items on the boat so that they will always be available if you need them If your tool kit needs replacement it is not available as a kit and each item must be ordered individually EMERGENCY STARTER ROPE 10 12 mm WRENCH SHEAR PIN SPARK PLUG WRENCH COTTER PIN SPARE EMERGENCY STOP SWITCH CLIP GRIP FLAT SCREWDRIVER PLIERS TOOL BAG 31ZVC6000 book Page 58 Tuesday June 28 201...

Page 61: ...op manual for service procedures See Honda Publications on page 107 for ordering information 3 For professional commercial use log hours of operation to determine proper maintenance intervals 8 When there is 1 3 or more consumption please exchange Each use After use First month or 20 hrs Every 6 months or 100 hrs Every year or 200 hrs Refer to page Engine oil Check level o 62 Change o o 63 Gear ca...

Page 62: ...s or damage Replace the fuel line if there are signs of leaks cracks or damage 7 Upon starting check for unusual engine sounds and cooling water flowing freely from the check hole Each use After use First month or 20 hrs Every 6 months or 100 hrs Every year or 200 hrs Refer to page Fuel tank and tank filter Internal Clean o 2 Fuel tank and tank filter Portable Clean o 75 Thermostat Check o 2 Fuel ...

Page 63: ...ne cover while turning a starter grip to the upward To install lower the engine cover while turning a starter grip to the upward Hook the engine cover hook as shown and latch the engine cover latch ENGINE COVER LATCH UNLOCK ENGINE COVER STARTER GRIP ENGINE UNDER COVER ENGINE COVER HOOK ENGINE COVER STARTER GRIP ENGINE COVER HOOK ENGINE UNDER COVER 31ZVC6000 book Page 61 Tuesday June 28 2016 1 09 P...

Page 64: ...3 Insert the dipstick and screw it in then remove it and check the oil level shown on the dipstick 4 If the oil level is low add oil to reach the upper limit mark shown on the dipstick Use the oil recommended on p 65 Running the engine with a low oil level can cause engine damage 5 Install the oil filler cap dipstick and tighten it securely 6 Install the engine cover p 61 and lock it in place by l...

Page 65: ...ter condenses in the engine and mixes with the oil resulting in a milky appearance The engine oil deteriorates becomes less efficient as a lubricant and causes an engine malfunction Frequent starting and stopping without allowing the engine to warm up Unburned fuel mixes with the oil increasing the volume of oil Engine Oil Change An engine oil evacuation device may be used to remove the engine oil...

Page 66: ...e dispose of the used oil properly Put it in a sealed container and take it to a recycling center Do not discard it in a trash bin dump it on the ground or pour it down a drain 4 With the outboard motor in a vertical position fill to the upper limit mark on the dipstick with the recommended oil 5 Install the oil filler cap and tighten it securely 6 Install the engine cover p 61 and lock it in plac...

Page 67: ... available Honda recommends that you use API service category SG SH or SJ oil The SAE oil viscosity and service category are in the API label on the oil container Gear Case Oil Change Change the gear case oil with the engine stopped and the outboard motor in the vertical position 1 Place a suitable container below the oil drain hole to catch the used oil then remove the oil level screw and oil dra...

Page 68: ...ain hole until it flows out the oil level hole and then install the oil level screw Remove the pump adapter and install the oil drain fill screw GEAR OIL CAPACITY 3 US oz 0 10 L 0 09 Imp qt Outboard motor SAE 90 hypoid gear oil API Service category GL 4 OIL LEVEL SCREW TORQUE 2 6 lbf ft 3 5 N m 0 36 kgf m Avoid losing more than 1 fl oz 30 cm3 while reinstalling the drain fill screw OIL DRAIN SCREW...

Page 69: ...al 20 operating hours or one month after the date of purchase or the initial use then every 100 operating hours or 6 months refer to the maintenance schedule on page 59 To prevent corrosion apply anticorrosion oil to pivot surfaces where grease cannot penetrate SHIFT SHAFT TILLER HANDLE PIVOT CLAMP SCREWS TILT RELEASE LEVER AND REVERSE LOCK ROD PROPELLER SHAFT TRANSOM ANGLE ADJUSTING ROD SWIVEL CA...

Page 70: ...rovided in the tool kit 4 Inspect the spark plug Replace it if the electrode is worn or if the insulator is cracked or chipped 5 Measure the spark plug electrode gap with a wire type feeler gauge Correct the gap if necessary by carefully bending the side electrode The gap should be 0 024 0 028 in 0 6 0 7 mm SPARK PLUG WRENCH SPARK PLUG CAP New plug Plug needing replacement SIDE ELECTRODE SEALING W...

Page 71: ...at least one complete tank of fuel within a 30 day period we recommend adding Honda Marine Fuel Stabilizer or equivalent each time you refuel Internal Fuel Tank FUEL TANK CAPACITY 0 40 US gal 1 5 L 0 33 Imp gal With the engine stopped turn the internal fuel tank vent knob counterclockwise to the open position p 21 and then remove the fuel filler cap Refill the fuel tank if the fuel level is low Re...

Page 72: ...fuel gauge and refill the tank when necessary Remove the fuel tank from the boat for refueling 1 Turn the vent knob counterclockwise all the way to open the vent 2 Turn the fuel filler cap counterclockwise so that it touches the pressure relief tab Gasoline is highly flammable and explosive You can be burned or seriously injured when handling fuel Keep heat sparks and flames away Stop the engine a...

Page 73: ...d plastic Be careful not to spill fuel when filling your fuel tank Damage caused by spilled fuel is not covered under warranty Never refill the fuel tank inside a building where gasoline fumes may reach flames or sparks Keep gasoline away from appliance pilot lights barbecues electric appliances power tools etc Spilled fuel is not only a fire hazard it causes environmental damage Wipe up spills im...

Page 74: ... volume In addition methanol must contain cosolvents and corrosion inhibitors Use of fuels with content of ethanol or methanol greater than shown above may cause starting and or performance problems It may also damage metal rubber and plastic parts of the fuel system Engine damage or performance problems that result from using a fuel with percentages of ethanol or methanol greater than shown above...

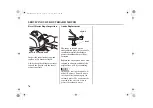
Page 75: ...val p 60 3 Turn the fuel valve lever to the OFF position BF4A or portable fuel tank position BF5D and BF6A p 19 4 When using the portable fuel tank BF5D and BF6A turn the portable fuel tank vent knob counterclockwise to the open position p 26 disconnect the fuel hose connectors from the outboard motor and portable fuel tank p 38 install fuel hose connector cap and close the portable fuel tank vent...

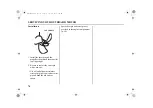
Page 76: ...hose clamps 10 Remove the fuel hose clips used to close the fuel hoses 11 When using the internal fuel tank prime the carburetor with gasoline p 35 When using the portable fuel tank connect the fuel line p 37 and prime the engine using the priming bulb p 38 12 Check for fuel leaks Repair any fuel leaks if necessary 13 Install the engine cover p 61 and lock it in place by locking the engine cover l...

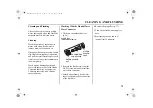
Page 77: ...l tank filter from the tank 2 Clean the filter in nonflammable solvent Inspect the fuel tank filter and the connector gasket Replace them if damaged 3 Reinstall the filter and hose connector in the fuel tank Tighten the four 5 mm screws securely Gasoline is highly flammable and explosive You can be burned or seriously injured when handling fuel Stop the engine and keep heat sparks and flame away H...

Page 78: ...plate It is made of a sacrificial material that helps to protect the outboard motor from corrosion Replace the anode when it has been reduced to about two thirds of the original size or if it is crumbling Painting or coating the anode will defeat its purpose and will lead to rust and corrosion damage to the outboard motor The anode must be exposed to the water in order to protect the outboard moto...

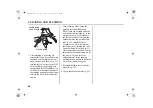
Page 79: ...mergency stop switch to prevent any possibility of the engine being started while you are working with the propeller The propeller blades may have sharp edges so wear heavy gloves to protect your hands Operating the outboard motor at higher altitudes will reduce available power This may require decreasing the propeller pitch to maintain correct engine RPM Removal 1 Remove the cotter pin the propel...

Page 80: ...ler cap finger tight 2 Be sure to replace the cotter pin with a new one Use a Honda Genuine stainless steel cotter pin or equivalent cotter pin and bend the pin ends as shown Spare shear pin and cotter pin are provided in the engine compartment p 58 COTTER PIN 31ZVC6000 book Page 78 Tuesday June 28 2016 1 09 PM ...

Page 81: ...paint and coat areas that may rust with Honda Corrosion Inhibitor or equivalent Lubricate controls with a silicone spray lubricant Flushing With the Honda Water Hose Connector 1 Tilt down the outboard motor p 54 2 Remove the flush screw from the WASH screw hole and install the water hose connector 3 Attach a hose from a fresh water faucet to the water hose connector of the flush kit 4 Remove the p...

Page 82: ...e portable fuel tank vent knob counterclockwise to the open position p 26 disconnect the fuel hose connectors from the outboard motor and portable fuel tank p 38 install fuel hose connector cap close the internal fuel tank vent by turning the vent knob clockwise all the way p 21 close the portable fuel tank vent by turning the vent knob clockwise all the way p 26 and leave the outboard motor in th...

Page 83: ...e internal fuel tank vent by turning the vent knob clockwise all the way p 21 turn the fuel valve lever to the OFF position BF4A or portable fuel tank position BF5D and BF6A p 19 and leave the outboard motor in the running position for one minute to drain the water from inside the engine After flushing when using the portable fuel tank BF5D and BF6A turn the portable fuel tank vent knob counterclo...

Page 84: ...storage temperatures accelerate fuel deterioration Fuel deterioration problems may occur in less than 15 days if the gasoline was not fresh when you filled the fuel tank You can extend fuel storage life by adding a gasoline stabilizer that is formulated for that purpose or you can avoid fuel deterioration problems by draining all the fuel from the fuel tank and carburetor The Distributor s Limited...

Page 85: ...filler cap and drain the gasoline from the internal fuel tank into a suitable container 3 Install the fuel filler cap 4 Turn the fuel valve lever to the OFF position BF4A or portable fuel tank position BF5D and BF6A p 19 5 Unlock and remove the engine cover p 61 6 Disconnect the drain tube from the air guide then connect it to the carburetor drain port as shown 7 With the outboard motor in a verti...

Page 86: ...ght When using the internal fuel tank When starting the engine after draining the gasoline prime the carburetor with gasoline p 35 Engine Oil Change the engine oil p 63 Engine Cylinder 1 Remove the spark plug p 68 and remove the emergency stop switch clip from the emergency stop switch 2 Pour 1 2 teaspoons 5 10 cm3 of clean engine oil into the cylinder 3 Pull the starter grip several times to dist...

Page 87: ...e or lever to move the boat can damage the outboard motor If your internal fuel tank and portable fuel tank contains gasoline store it away from any appliance that operates with a flame such as a furnace water heater or clothes dryer Also avoid any area with a spark producing electric motor or where power tools are operated Store the outboard motor either vertically or horizontally with the tiller...

Page 88: ... may cause damage to the outboard motor or oil leakage Cover the outboard motor to keep out dust Do not use a plastic sheet as a dust cover A nonporous cover will trap moisture promoting rust and corrosion REMOVAL FROM STORAGE Check your outboard motor as described in the BEFORE OPERATION chapter of this manual If the cylinder was coated with oil during storage preparation the engine may smoke bri...

Page 89: ... position BF4A or portable fuel tank position BF5D and BF6A p 19 close the internal fuel tank vent by turning the vent knob clockwise all the way p 21 move the shift lever to the R reverse position to lock the tilt system and tighten the steering friction bolt securely p 52 The preferred method is to leave the engine in the normal running position but if there is insufficient road clearance you ca...

Page 90: ... BF5D and BF6A p 19 close the internal fuel tank vent by turning the vent knob clockwise all the way p 21 move the shift lever to the R reverse position to lock the tilt system and tighten the steering friction bolt securely p 52 Remove the outboard motor from the boat and secure the outboard motor in either the vertical or horizontal position shown on p 86 To carry hold the outboard motor by the ...

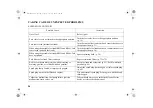
Page 91: ...ency stop switch Insert clip in emergency stop switch Gearshift lever not in neutral position Shift to neutral p 39 Choke OFF Pull choke knob to ON position unless engine is warm p 42 Throttle grip not in START position Turn throttle grip to START position p 42 31ZVC6000 book Page 89 Tuesday June 28 2016 1 09 PM ...

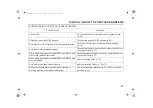
Page 92: ... BF5D and BF6A fuel hose not primed Squeeze priming bulb p 38 Fuel filter or fuel tank filter restricted Replace restricted filters p 73 or 75 Bad fuel outboard motor stored without treating or draining gasoline or refueled with bad gasoline Drain fuel tank and carburetor p 83 Refill with fresh gasoline p 69 Spark plug faulty fouled or improperly gapped Adjust the spark plug electrode gap or repla...

Page 93: ...l fuel tank vent knob counterclockwise to the open position p 21 When using the portable fuel tank BF5D and BF6A fuel vent closed portable fuel tank Turn the portable fuel tank vent knob counterclockwise to the open position p 26 When using the portable fuel tank BF5D and BF6A fuel hose not primed Squeeze priming bulb p 38 Fuel filter or fuel tank filter restricted Replace restricted filters p 73 ...

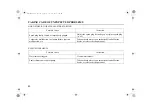
Page 94: ...place spark plug p 68 Carburetor malfunction fuel pump failure ignition malfunction etc Take outboard motor to an authorized Honda Marine dealer or refer to the shop manual Possible Cause Correction Water intakes clogged Clean water intakes Faulty thermostat or water pump Take outboard motor to an authorized Honda Marine dealer or refer to the shop manual 31ZVC6000 book Page 92 Tuesday June 28 201...

Page 95: ...OT DRIVE THE PROPELLER Possible Cause Correction Broken shear pin Replace shear pin p 77 Damaged gearshift mechanism Take outboard motor to an authorized Honda Marine dealer or refer to the shop manual 31ZVC6000 book Page 93 Tuesday June 28 2016 1 09 PM ...

Page 96: ...or is supplied with a spare fuse in fuse holder DESIGNATED FUSE RATING 15A Never use a fuse with a rating greater than specified Serious damage to the electrical system could result 3 Reinstall the fuse case lid Before further operation try to determine and correct the electrical problem that caused the fuse to burn out An uncorrected electrical problem may cause the fuse to burn out again SPARE F...

Page 97: ...pm and that could activate the engine protection system momentarily If low oil pressure activates the engine protection system stop the engine check the engine oil level p 61 and add oil if needed With the engine oil at the recommended level restart the engine If the lubrication system is OK the green indicator should come on within 30 seconds and the engine will respond normally to throttle grip ...

Page 98: ...ne oil showed signs of water contamination then a second engine oil change should be performed after running the engine for half an hour 4 Remove the spark plug p 68 and remove the emergency stop switch clip from the emergency stop switch Pull the starter grip rotate the flywheel a few revolutions to completely expel any water from the cylinder If the engine was running when it submerged there may...

Page 99: ...m above the antiventilation plate If the engine fails to start remove the spark plug clean and dry it then reinstall the spark plug and attempt to start the engine again If the engine starts and no mechanical damage is evident continue to run the engine for a half hour or longer Be sure the water level is at least 2 inches 5 cm above the antiventilation plate to avoid overheating and water pump da...

Page 100: ...ordering parts and when making technical or warranty inquiries p 108 The product identification number is stamped on a plate attached on the left side of the stern bracket The engine serial number is located on the left side of the engine Product identification number Date of purchase Engine serial number PRODUCT IDENTIFICATION NUMBER ENGINE SERIAL NUMBER 31ZVC6000 book Page 98 Tuesday June 28 201...

Page 101: ...or settings for the altitude at which you operate your outboard motor Even with carburetor modification engine horsepower will decrease about 3 5 for each 1 000 foot 300 meter increase in altitude The effect of altitude on horsepower will be greater than this if no carburetor modification is made When the carburetor has been modified for operation at one of the higher altitude ranges the air fuel ...

Page 102: ...n Air Acts and Environment Canada EPA California and Canadian regulations require all manufacturers to furnish written instructions describing the operation and maintenance of emission control systems The following instructions and procedures must be followed in order to keep the emissions from your Honda engine within the emission standards Tampering and Altering Tampering is a violation of Feder...

Page 103: ...d to the same standards as the original parts so you can be confident of their performance The use of replacement parts that are not of the original design and quality may impair the effectiveness of your emission control system A manufacturer of an aftermarket part assumes the responsibility that the part will not adversely affect emission performance The manufacturer or rebuilder of the part mus...

Page 104: ... Cleaner Marine Engine The Symbol for Cleaner Marine Engines Cleaner Air and Water for healthier lifestyle and environment Better Fuel Economy burns up to 30 40 percent less gas and oil than conventional carbureted two stroke engines saving money and resources Longer Emission Warranty protects consumer for worry free operation This engine has been certified as a 31ZVC6000 book Page 102 Tuesday Jun...

Page 105: ...ission engines Three Stars Ultra Low Emission The three star label identifies engines that meet the Air Resources Board s Personal Watercraft and Outboard marine engine 2008 exhaust emission standards or the Sterndrive and Inboard marine engine 2003 2008 exhaust emission standards Engines meeting these standards have 65 lower emissions than One Star Low Emission engines Four Stars Super Ultra Low ...

Page 106: ...city Engine 18 US oz 0 55 L 0 48 Imp qt Gear case 3 US oz 0 10 L 0 09 Imp qt CARB star label ULTRA LOW EMISSION Cooling system Water cooling with thermostat Exhaust system Underwater exhaust D C output 2 12V 6A Spark plug BKR6E E NGK Fuel pump Mechanical type fuel pump Fuel Unleaded gasoline 86 pump octane or higher Tank capacity 0 40 US gal 1 5 L 0 33 Imp gal Gear change Forward Neutral Reverse d...

Page 107: ...Imp qt Gear case 3 US oz 0 10 L 0 09 Imp qt CARB star label ULTRA LOW EMISSION Cooling system Water cooling with thermostat Exhaust system Underwater exhaust D C output 2 12V 6A Spark plug BKR6E E NGK Fuel pump Mechanical type fuel pump Fuel Unleaded gasoline 86 pump octane or higher Tank capacity Internal fuel tank 0 40 US gal 1 5 L 0 33 Imp gal Portable fuel tank 3 2 US gal 12 L 2 6 Imp gal Gear...

Page 108: ...ase 3 US oz 0 10 L 0 09 Imp qt CARB star label ULTRA LOW EMISSION Cooling system Water cooling with thermostat Exhaust system Underwater exhaust D C output 2 12V 6A Spark plug BKR6E E NGK Fuel pump Mechanical type fuel pump Fuel Unleaded gasoline 86 pump octane or higher Tank capacity Internal fuel tank 0 40 US gal 1 5 L 0 33 Imp gal Portable fuel tank 3 2 US gal 12 L 2 6 Imp gal Gear change Forwa...

Page 109: ...ervice Support and click on Shop Manuals For Canada Contact your dealer for information on the Shop Manual Parts Catalog For USA This manual provides complete illustrated parts lists The catalog is available through your Honda Marine dealer or visit http marine honda com Parts Accessories and click on Look Up Parts For Canada Contact your dealer for information on Parts Accessory Catalog Your auth...

Page 110: ...can Honda Motor Co Inc Marine Division Customer Relations Office 4900 Marconi Drive Alpharetta GA 30005 8847 Telephone 770 497 6400 M F 8 30 am 7 00 pm Eastern Time Zone In Canada Honda Canada Inc Customer Relations Department 180 Honda Boulevard Markham Ontario L6C 0H9 Tel 1 888 946 6329 Toll free Fax 1 877 939 0909 Toll free Please include the following information in your communication Your nam...

Page 111: ...nterval servicing is not included in your warranty coverage Additionally your warranty does not apply to the normal wear of items such as spark plug s water pump etc As the owner of a Honda product your servicing dealer may ask you to authorize an inspection If the problem is covered under warranty your dealer will perform any warranty repairs for you at no cost However you may be responsible for ...

Page 112: ... 65 105 Jet models Jet pump assembly is a dealer installed option Jet pump warranty is provided by Specialty Manufacturing Co Outboard Jets 3 Portable fuel tanks 24 months or the same duration as the outboard they were purchased with whichever is longer Products Covered by Warranty Length of Warranty from date of original retail purchase NON COMMERCIAL NON RENTAL COMMERCIAL RENTAL STATE LOCAL FEDE...

Page 113: ... American Honda Motor Company Inc All parts replaced under warranty will be considered as part of the original product and any warranty on those parts will expire coincidentally with the original product warranty To Obtain Warranty Service You must at your expense take your Honda Outboard Motor and proof of the original purchase date to any dealer who is authorized to service Honda Outboard Motors...

Page 114: ...r electrical components corrosion due to electrolysis water born foreign chemicals improper service or corrosion caused by damage or abuse Reimbursement for towing charges in and out of water charges or technician travel time Growth of marine organisms on motor surfaces external or internal Any product that has ever been declared a total loss or sold for salvage by a financial institution or insur...

Page 115: ...e for warranty coverage Installing parts and accessories on non Honda products or engines voids this warranty 2 You must be the first retail purchaser This warranty is not transferable to subsequent owners What American Honda Will Repair or Replace Under Warranty American Honda will repair or replace at its option any marine product accessories or replacement parts that are proven to be defective ...

Page 116: ...y causes other than defects in material or workmanship of the product Installing parts and accessories on non Honda products or engines voids this warranty Disclaimer of consequential damage and limitation of implied warranties American Honda disclaims any responsibility for loss of time or use of the outboard motor or the boat on which the product is installed transportation commercial loss or an...

Page 117: ...e periods of time listed below provided there has been no abuse neglect or improper maintenance of your outboard engine Your emission control system may include parts such as the carburetor or fuel injection system the ignition system and catalytic converter Also included may be hoses belts connectors and other emission related assemblies Where a warrantable condition exists American Honda Motor C...

Page 118: ...five years or 250 hours of operation whichever comes first or the length of the Honda Marine Distributor s Limited Warranty whichever is longer from the date of delivery to the retail purchaser This warranty is transferred to each subsequent purchaser for the duration of the warranty period Warranty repairs will be made without charge for diagnosis parts and labor All defective parts replaced unde...

Page 119: ... are not covered by this warranty This warranty does not extend to emission control systems or parts which are affected or damaged by owner abuse neglect improper maintenance misuse misfueling improper storage and or collision the incorporation of or use of unsuitable attachments or the unauthorized alteration of any part This warranty does not cover replacement of expendable maintenance items mad...

Page 120: ...Vapor separator Intake manifold tuning valve Intake air bypass control valve Ignition Flywheel magneto Ignition pulse generator Ignition coil assembly Ignition control module Engine control module Crankshaft position sensor Spark plug cap Spark plug Knock sensor and Camshaft position sensor Lubrication System Oil pump and internal parts Crankcase Emission Control Crankcase breather tube Positive c...

Page 121: ...lacements with a new part or the Honda equivalent shall be made at no cost to the consumer for parts and labour when Honda acknowledges that such defects are attributable to faulty material or workmanship at the time of manufacture WARRANTY PERIOD RETAILED ON OR AFTER APRIL 1 2005 THIS WARRANTY COVERS a Any Honda marine product purchased in Canada from an authorized Honda dealer which has been reg...

Page 122: ...es susceptible to natural wear f Outboard propeller or shear pin g All accessories or attachments THE OWNER S OBLIGATION In order to maintain the validity of this DISTRIBUTORS WARRANTY the required maintenance services as set forth in the Owner s Manual must be performed at the proper intervals and detailed receipts and records retained as proof TO OBTAIN WARRANTY SERVICE You must take your Honda ...

Page 123: ... the only and the entire written warranties given by Honda for Marine engines No dealer or his agent or employee is authorized to extend or enlarge on these warranties on behalf of Honda by any written or verbal statement or advertisement DISCLAIMER To the extent the law permits Honda disclaims any responsibility for loss of time or use of the product transportation or towing costs or any other in...

Page 124: ... CODES 14 CONTROLS 17 CONTROLS AND FEATURES 14 Cooling System Indicator 25 CRUISING 53 Customer Service Information 108 Distributor s Limited Warranty 110 Distributor s Warranty 119 EMERGENCY STARTING 43 Emergency Stop Switch Clip and Emergency Stop Switch 17 Emission Control System Information 100 Emission Control System Warranty 115 Engine Cover Latch 22 REMOVAL AND INSTALLATION 61 Oil Change 63...

Page 125: ...RD STARTING OR STALLS AFTER STARTING 91 Honda Publications 107 IMPORTANT SAFETY INFORMATION 6 INDICATORS 24 INFREQUENT OR OCCASIONAL USE 39 INSTALLATION 28 INSTALLATION POSITION 28 INSTRUMENTS 24 IS YOUR OUTBOARD MOTOR READY TO GO 32 Lubrication Points 67 MAINTENANCE SAFETY 57 MAINTENANCE SCHEDULE 59 MOORING BEACHING LAUNCHING 55 Oil Pressure Indicator 24 OIL PRESSURE INDICATOR GOES OFF AND ENGINE...

Page 126: ... STARTING THE ENGINE 39 STEERING 52 Steering Friction Bolt 23 STOPPING THE ENGINE 49 Emergency Engine Stopping 49 Normal Engine Stopping 49 STORAGE 82 Engine Oil 84 Fuel 82 STORAGE PRECAUTIONS 85 SUBMERGED OUTBOARD MOTOR 96 TAKING CARE OF UNEXPECTED PROBLEMS 89 TECHNICAL INFORMATION 98 THE IMPORTANCE OF MAINTENANCE 56 Throttle Friction Knob 18 Throttle Grip 18 Tilt Lever 23 TOOL KIT AND EMERGENCY ...

Page 127: ... Models 00X31 ZVC 6000_BF4A BF5D BF6A Cover1 4 31ZVC600 00X31 ZVC 6000 XXX 20XX XX Printed in China 00X31 ZVC 6000 BF4A BF5D BF6A Cover indd 1 2011 10 18 19 26 06 2016 Honda Motor Co Ltd All Rights Reserved BF4A BF5D BF6A FM 6 ...

Reviews: