background image

2. 

SERVICE 

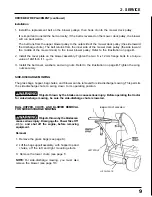
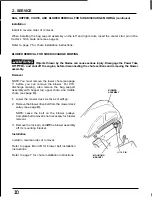
CHUTE  DISCONNECTION AND  REMOVAL 

FOR 

CLEANING 

Objects thrown by the blades can  cause serious injury. Disengage the  Power  Take 

Off 

and  shut 

off 

the  engine,  before disconnecting the  chute  sections. 

Removal 

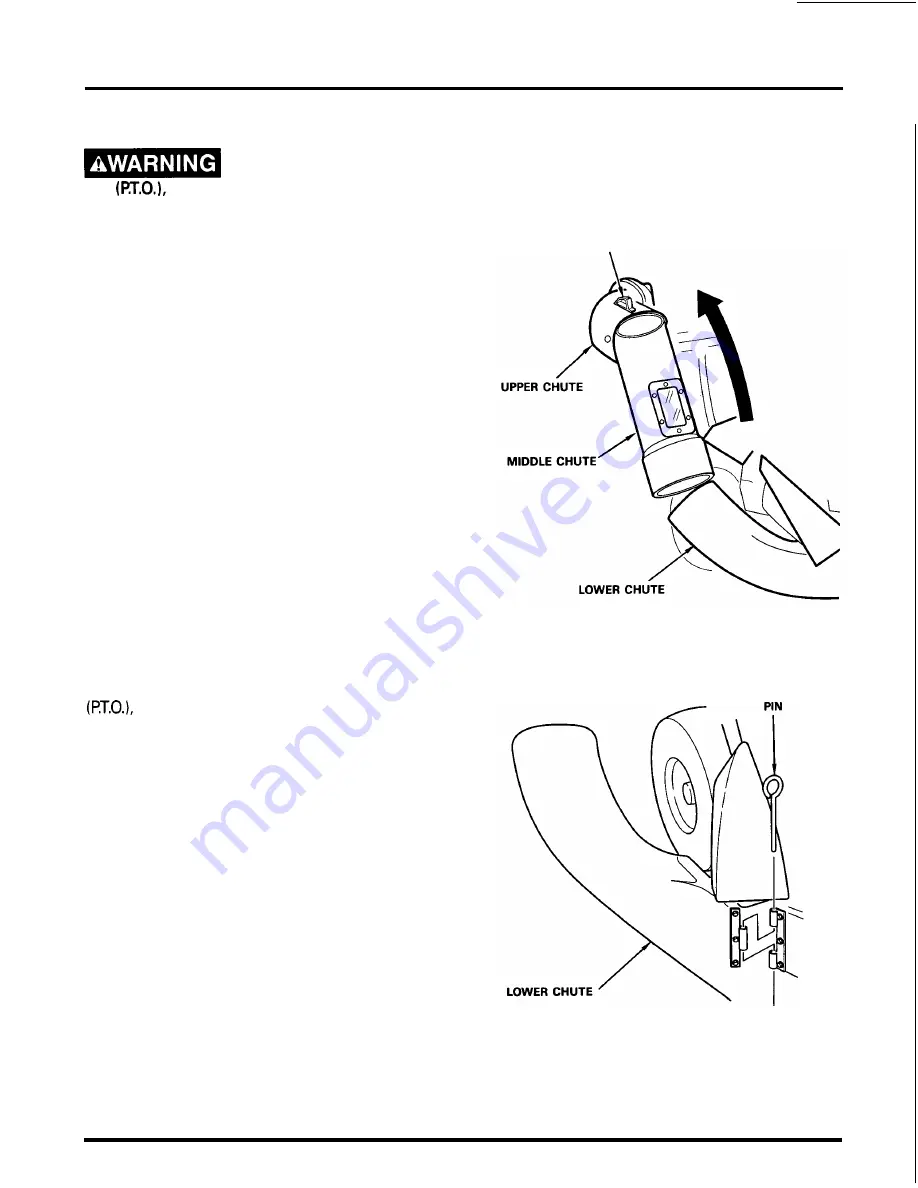
CHUTE 

HANDLE 

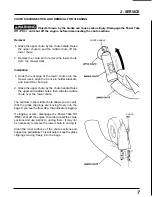
1. 

Grasp 

the 

upper chute by 

the 

chute handle. Raise 

the 

upper chute to  pull the middle chute off the 

lower chute. 

2. 

Remove the chute pin to remove 

the 

lower chute 

from the  mower deck. 

Installation 

1. 

Hook the  rear  edge of  the lower chute onto the 
mower deck,  align the front  pin holder  brackets, 

and  insert 

the 

chute  pin. 

2. 

Grasp 

the 

upper chute by 

the 

chute handle. Raise 

the upper and middle chutes, then slide 

the 

middle 

chute  over 

the 

lower chute. 

The window in the middle chute allows you to verify 
that  the  grass  clippings  are  moving  freely  into the 

bags. If you see 

the 

flow stop, that indicates clogging. 

If  clogging  occurs,  disengage 

the 

Power  Take  Off 

shut 

off the 

engine, then disconnect the chute 

sections and use a stick to unclog them. 

It 

may not 

be necessary to remove the lower chute to unclog 

it. 

Clean 

the 

inner surfaces  of  the chute  sections and 

hopper top periodically. This will help to keep the grass 
clippings moving freely  into the  bags. 

CHUTE 

Summary of Contents for BK4542

Page 1: ......

Page 2: ......

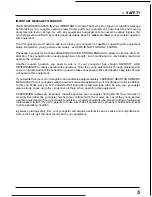
Page 3: ...esold READTHIS OPERATOR S MANUALCAREFULLY Pay special attentionto these symbols and any instructions that follow You WILL be KILLED or SERIOUSLY HURT if you don t follow instructions You CAN be KILLED or SERIOUSLY HURT if you don t follow instructions You CAN be HURT if you don t follow instructions I IYour equipment or other property can be damaged if you don t follow instructions Honda side blow...

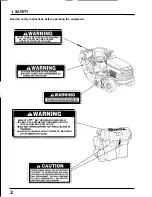
Page 4: ...ons before operating the equipment OBJECTS MAY BE THROWN FROM MOWER DO NOT OPERATE MOWER UNLESS GRASS CATCHER IS ATTACHED OBJECTS MAY BE THROWN FROM MOWER W SHUT OFF ENGINE BEFORE REMOVING OR INSTALLING BAG AND CHUTE COMPLETE BAGGING 2 ...

Page 5: ...a hill make sure the grass bags are no more than half full Wear sturdy full coverage footwear Operating the tractor barefoot or with open toe shoes or sandals increases your risk of injury Dress sensibly Loose clothing may get caught in moving parts increasing your risk of injury The blower drive belt and pulleyscan injureyou Be sure the blower belt cover is in place beforeoperating the tractor Be...

Page 6: ...opper top grass bags and grass bag chutes are in place or that the side discharge chute is down Disengagethe Power Take Off m O and shut off the engine beforeopening the hopper top or removing and installing grass bags and chutes Disengage the Power Take Off P T O to stop the blades before crossing a gravel driveway or any other area with loose stones Broken piecesthrown from worn or damaged blade...

Page 7: ...quipment Does the young person think through problems and come to logical solutions Be honest Anyone who takes unnecessary risks and doesn t obey rules should not operate this equipment If you decide that your son or daughter can handlethis equipment safely CAREFULLY READ THE OWNER S MANUALS with your youngster read the owner s manual supplied with your Honda lawn tractor in addition to this one M...

Page 8: ...m flange bolt at the base of the retaining band and move the band up or down Tighten the 6 mm flange bolt to a torque value of 8 0 ft lb 1 1 kg m Under normal mowing conditions the left grass bag will fill first then the right bag will fill Empty the grass bags before they both become filled to capacity If the bags become overfilled grass may c og the chute Grass bags will not collect grass effici...

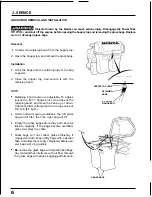
Page 9: ...the front pin holder brackets and insert the chute pin 2 Grasp the upper chute by the chute handle Raise the upper and middle chutes then slide the middle chute over the lower chute The window in the middle chute allows you to verify that the grass clippings are moving freely into the bags If you see the flow stop that indicatesclogging If clogging occurs disengage the Power Take Off W O shut off ...

Page 10: ...he rear belt cover mounting holes Be carefull not to lose any of the washers 3 Remove the two 6 x 12 mm flange bolts from the cover plate on the blower assembly Remove the cover plate 4 Unhook the blower drive belt from the mower deck pulley then remove it from the blower assembly NOTE Observe the installed position of the blower drive belt so you will be sure to replace it correctly If the belt i...

Page 11: ...ers and wing nuts Refer to the illustration on page 8 Tighten the wing nuts securely SIDE DISCHARGE MOWING The grass bags hopper bag chutes and blower can be removed for side discharge mowing This permits the side discharge chute to swing down to its operating position Objects thrown by the blades can cause serious injury Before operating the tractor for side discharge mowing be sure the side disc...

Page 12: ...ving the blower assembly Removal NOTE You must remove the lower chute see page 7 before you can remove the blower For side discharge mowing also remove the bag support assembly with hopper top upper chute and middle chute see page 9 1 Lower the mower deck as far as it will go 2 Removethe blower drive belt from the mower deck pulley see page 8 NOTE Leave the belt on the blower pulleys Complete belt...

Page 13: ...to your satisfaction contact the Power Equipment Customer Service Department of American Honda Motor Co Inc American Honda Motor Co Inc Power Equipment Division P O Box 100021 Duluth Georgia 30136 9421 Telephone 404 497 6400 We will need the following information in order to assist you Your name address and telephone number Product model Date of purchase Dealer name and address Nature of problem A...

Page 14: ......

Page 15: ......

Page 16: ......

Reviews: