background image

73

TECHNICAL INFORMATION

Air Index

(Models sold in California)

An Air Index Information label is applied to engines certified to an 
emission durability time period in accordance with the requirements of 
the California Air Resources Board.

The bar graph is intended to provide you, our customer, the ability to 
compare the emissions performance of available engines. The lower the 
Air Index, the less pollution.

The durability description is intended to provide you with information 
relating to the engine’s emission durability period. The descriptive term 
indicates the useful life period for the engine’s emission control 
system. See your 

Emission Control System Warranty

 (see page 83) fo

additional information.

Descriptive Term

Applicable to Emission Durability Period

Moderate

50 hours (0–80 cc, inclusive)

125 hours (greater than 80 cc)

Intermediate

125 hours (0–80 cc, inclusive)
250 hours (greater than 80 cc)

Extended

300 hours (0–80 cc, inclusive)
500 hours (greater than 80 cc)

1,000 hours (225 cc and greater)

31ZT76331.book  Page 73  Friday, February 23, 2018  2:59 PM

Summary of Contents for EU3000is

Page 1: ...C 2018 Honda Motor Co Ltd All Rights Reserved GENERATOR BK 背幅4mm PANTONE186C EU3000is 31ZT7633 00X31 ZT7 6331 Printed in Japan FM Hi EM4 英 AH Owner s Manual See page 89 for Initial Use Instructions ...

Page 2: ...roduct contains chemicals known to the State of California to cause cancer birth defects or other reproductive harm Exhaust contains poisonous carbon monoxide gas that can build up to dangerous levels in closed areas Breathing carbon monoxide can cause unconsciousness or death Never run the generator in a closed or even partly closed area where people may be present QUICK REFERENCE INFORMATION Fue...

Page 3: ...ed to help you avoid damage to your generator other property or the environment We suggest you read the Distributor s Limited Warranty see page 78 to fully understand its coverage and your responsibilities of ownership When your generator needs scheduled maintenance keep in mind that your Honda servicing dealer is specially trained in servicing Honda generators and is supported by the parts and se...

Page 4: ...gement You will find important safety information in a variety of forms including Safety Labels on the generator Safety Messages preceded by a safety alert symbol and one of three signal words DANGER WARNING or CAUTION These signal words mean Safety Headings such as IMPORTANT SAFETY INFORMATION Safety Section such as GENERATOR SAFETY Instructions how to use this generator correctly and safely This...

Page 5: ...LS 12 Engine Switch 12 Starter Grip 12 Fuel Valve Lever 13 Choke Knob 13 Eco Throttle Switch 14 Parallel Operation Outlets 14 AC Circuit Protectors 15 DC Receptacle 15 DC Circuit Protector 15 FEATURES 16 Output Indicator 16 Overload Alarm Indicator 16 Oil Alert Indicator 17 Ground Terminal 18 BEFORE OPERATION 19 ARE YOU READY TO GET STARTED 19 Knowledge 19 IS YOUR GENERATOR READY TO GO 19 Check th...

Page 6: ...ERATOR 39 THE IMPORTANCE OF MAINTENANCE 39 MAINTENANCE SAFETY 40 Safety Precautions 40 MAINTENANCE SCHEDULE 41 REFUELING 42 FUEL RECOMMENDATIONS 43 ENGINE OIL LEVEL CHECK 44 ENGINE OIL CHANGE 45 ENGINE OIL RECOMMENDATIONS 46 AIR CLEANER SERVICE 47 FOAM AIR FILTER CLEANING 48 SPARK PLUG SERVICE 49 SPARK ARRESTER SERVICE 51 SEDIMENT CUP CLEANING 54 BATTERY SERVICE 56 FUSE 60 STORAGE 61 STORAGE PREPA...

Page 7: ...de Operation 70 Emission Control System Information 71 Air Index 73 Specifications 74 Wiring Diagram 75 CONSUMER INFORMATION 76 Dealer Locator Information 76 Honda Publications 76 Customer Service Information 77 Distributor s Limited Warranty 78 Emission Control System Warranty 83 INITIAL USE INSTRUCTIONS 88 ENGINE OIL 88 FUEL 89 BATTERY 90 BEFORE OPERATION 91 INDEX 92 QUICK REFERENCE INFORMATION ...

Page 8: ...erator controls output receptacles and connections Be sure that anyone who operates the generator receives proper instruction Do not let children operate the generator without parental supervision Carbon Monoxide Hazards A generator s exhaust contains toxic carbon monoxide which you cannot see or smell Breathing carbon monoxide can KILL YOU IN MINUTES To avoid carbon monoxide poisoning follow thes...

Page 9: ...rol panel before each use Moisture or ice can cause a malfunction or short circuit in electrical components that could result in electrocution Do not connect to a building s electrical system unless an isolation switch has been installed by a qualified electrician Use only a Honda approved parallel operation cable kit optional equipment when connecting two EU3000is generators for parallel operatio...

Page 10: ...ll ventilated area and on a level surface Never smoke near gasoline and keep other flames and sparks away Do not overfill the fuel tank Overfilling the fuel tank may cause fuel to leak out of the bottom of the EVAP canister Make sure that any spilled fuel has been wiped up and cleaned before starting the engine Always store gasoline in an approved container 31ZT76331 book Page 8 Friday February 23...

Page 11: ...hese labels warn you of potential hazards that can cause serious injury Read them carefully If a label comes off or becomes hard to read contact your Honda generator dealer for a replacement 31ZT76331 book Page 9 Friday February 23 2018 2 59 PM ...

Page 12: ...tify the most frequently used controls PARALLEL OPERATION OUTLETS DC CIRCUIT PROTECTOR DC RECEPTACLE AC CIRCUIT PROTECTORS OUTPUT INDICATOR OVERLOAD ALARM OIL ALERT INDICATOR ENGINE SWITCH CHOKE KNOB FUEL VALVE LEVER ECO THROTTLE SWITCH AC RECEPTACLES 31ZT76331 book Page 10 Friday February 23 2018 2 59 PM ...

Page 13: ...LUG CAP MUFFLER OIL FILLER CAP OIL DRAIN PLUG OIL MAINTENANCE COVER LEFT SIDE MAINTENANCE COVER FRONT HANDLE AIR CLEANER FUEL TANK CAP STARTER GRIP GROUND TERMINAL REAR HANDLE 31ZT76331 book Page 11 Friday February 23 2018 2 59 PM ...

Page 14: ...h the recoil starter START Operates the electric starter Starter Grip Used when the battery voltage is too low to turn the starter motor Pulling the starter grip operates the recoil starter to crank the engine Do not allow the starter grip to snap back against the generator Return it gently to prevent damage to the starter ENGINE SWITCH ON STARTER GRIP OFF START Direction to pull 31ZT76331 book Pa...

Page 15: ...ne turn the fuel valve to the OFF position Choke Knob The choke is used to provide proper starting mixture when the engine is cold It can be opened and closed by operating the choke knob manually Move the choke knob to the closed position to enrich the mixture for cold starting FUEL VALVE LEVER ON OFF CHOKE KNOB CLOSED OPEN 31ZT76331 book Page 13 Friday February 23 2018 2 59 PM ...

Page 16: ...ed to minimize fuel consumption and further reduce noise levels when less than a full load is applied to the generator OFF The Eco Throttle system does not operate Generator operates at full speed Parallel Operation Outlets These outlets are used for connecting two EU3000is generators for parallel operation see page 29 A Honda approved parallel operation cable kit optional equipment is required fo...

Page 17: ...acle should ONLY be used for charging 12 volt automotive type batteries The DC charging output is not regulated DC Circuit Protector The DC circuit protector automatically shuts off the DC battery charging circuit when the DC charging circuit is overloaded when there is a problem with the battery or when the connections between the battery and the generator are improper However the DC circuit prot...

Page 18: ...f the generator is overloaded in excess of 3 0 kVA or if there is a short circuit in a connected appliance the overload alarm red will come ON The overload alarm red will stay ON and after about four seconds current to the connected appliance s will shut off and the output indicator green will go OFF However the engine will continue to run OUTPUT INDICATOR GREEN OVERLOAD ALARM RED 31ZT76331 book P...

Page 19: ...l Alert indicator red comes on and the Oil Alert system automatically will stop the engine the engine switch will remain in the ON position If the engine stops or the Oil Alert indicator red comes on when you turn the engine switch to START position or pull the starter grip check the engine oil level see page 44 before troubleshooting in other areas OIL ALERT INDICATOR RED 31ZT76331 book Page 17 F...

Page 20: ...electrician electrical inspector or local agency having jurisdiction for local codes or ordinances that apply to the intended use of the generator NEUTRAL FLOATING The generator stator winding is isolated from the frame and from the AC receptacle ground pin Electrical devices that require a grounded receptacle pin connection will not function if the receptacle ground pin is not functional GROUND T...

Page 21: ...ng see pages 28 and 32 IS YOUR GENERATOR READY TO GO For your safety to ensure compliance with environmental regulations and to maximize the service life of your equipment it is very important to take a few moments before you operate the generator to check its condition Be sure to take care of any problem you find or have your servicing dealer correct it before you operate the generator Failure to...

Page 22: ...ion Check the Engine Before each use look around and underneath the engine for signs of oil or gasoline leaks Check the oil level see page 44 A low oil level will cause the Oil Alert system to shut down the engine Check the air filter see page 47 A dirty air filter will restrict air flow to the carburetor reducing engine and generator performance Check the fuel level see page 42 Starting with a fu...

Page 23: ...ed Make sure that the appliance is in good working order Faulty appliances or power cords can create a potential for electric shock Make sure the electrical rating of the tool or appliance does not exceed the rated power of the generator or the receptacle being used Operate the generator at least 3 feet 1 meter away from buildings and other equipment Do not operate the generator in an enclosed str...

Page 24: ...nd damage the generator For proper cooling allow at least 3 feet 1 meter of empty space above and around the generator Refer to SAFE OPERATING PRECAUTIONS on page 21 and perform the IS YOUR GENERATOR READY TO GO checks see page 19 Refer to AC OPERATION see page 27 or DC OPERATION see page 33 for connecting loads to the generator 1 Make sure that all appliances are disconnected from the AC receptac...

Page 25: ...wing the switch to return to the ON position If the engine fails to start within 5 seconds release the key and wait at least 10 seconds before operating the starter again Using the electric starter for more than 5 seconds at a time will overheat the starter motor and can damage it Do not leave the engine switch in the ON position when the generator is not operating as the battery will discharge Tu...

Page 26: ...engine has warmed up for 2 or 3 minutes Manual starting 1 Make sure that all appliances connected to the generator are turned off 2 Turn the fuel valve lever to the ON position 3 To start a cold engine pull the choke knob out to the CLOSED position To restart a warm engine leave the choke knob in the OPEN position 4 Turn the engine switch to the ON position CHOKE KNOB OPEN ECO THROTTLE SWITCH ON 3...

Page 27: ... gently to prevent damage to the starter 6 If the choke knob was moved to the CLOSED position to start the engine gradually push it to the OPEN position as the engine warms up 7 If you wish to use the Eco Throttle system turn the Eco Throttle switch to the ON position after the engine has warmed up for 2 or 3 minutes STARTER GRIP Direction to pull 31ZT76331 book Page 25 Friday February 23 2018 2 5...

Page 28: ...to the generator or the parallel operation kit 2 Turn the engine switch to the OFF position 3 Turn the fuel valve lever to the OFF position 4 If two generators were connected for parallel operation disconnect the parallel operation kit receptacle assembly after stopping the engines if you do not wish to resume parallel operation ENGINE SWITCH OFF ON FUEL VALVE LEVER OFF ON 31ZT76331 book Page 26 F...

Page 29: ...the output indicator green comes on 2 Plug in the appliance 3 Turn on the appliance If the generator is overloaded in excess of 3 0 kVA if there is a short circuit in a connected appliance or if the inverter is overheated the overload alarm red will come ON The overload alarm red will stay ON and after about five seconds current to the connected appliance s will shut off and the output indicator g...

Page 30: ...wattage for startup Make sure the electrical rating of the tool or appliance does not exceed the maximum power rating of the generator Maximum power is 3 0 kVA For continuous operation do not exceed the rated power Rated power is 2 8 kVA In either case the total power requirements VA of all appliances connected must be considered Appliance and power tool manufacturers usually list rating informati...

Page 31: ...c motor is started the overload alarm red may come on This is normal if the overload alarm red goes off within 4 seconds If the overload alarm red stays on consult your generator dealer 1 Connect the parallel operation kit between the two EU3000is generators following the instructions supplied with the kit 2 Start the generators see page 22 and make sure the output indicator green on each generato...

Page 32: ... overload alarm red will go ON The overload alarm red will stay ON and after about four seconds current to the connected appliance s will shut off and the output indicator green will go OFF Stop the engines and investigate the problem Determine if the cause is a short circuit in a connected appliance an overload or an overheated inverter Correct the problem and restart the generator 31ZT76331 book...

Page 33: ...stops suddenly turn it off immediately Disconnect the appliance and determine whether the problem is the appliance or the rated load capacity of the generator has been exceeded Never connect different generator models and types Use only a Honda approved parallel operation kit optional equipment when connecting two EU3000is generators for parallel operation Never connect or remove the parallel oper...

Page 34: ... power in parallel operation is 5 6 kVA In either case the total power requirements VA of all appliances connected must be considered Appliance and power tool manufacturers usually list rating information near the model number or serial number Substantial overloading that continuously lights the overload alarm red may damage the generator Marginal overloading that temporarily lights the overload a...

Page 35: ...ng cable optional equipment to a battery that is installed in a vehicle disconnect the vehicle battery ground cable from the negative battery terminal WARNING Battery posts terminals and related accessories contain lead and lead components Wash hands after handling OFF ON Do not use the AC output Model EU3000is 12 A approximately 4 A The battery gives off explosive hydrogen gas during normal opera...

Page 36: ...An overloaded DC circuit excessive current drawn by the battery or a wiring problem will trip the DC circuit protector the yellow indicator inside the clear circuit protector button will pop out If this happens wait a few minutes before pushing in the circuit protector button to resume operation If the circuit protector continues to go OFF discontinue charging and see your authorized Honda generat...

Page 37: ... the battery charging cable from the positive battery terminal 4 Disconnect the battery charging cable from the DC receptacle of the generator 5 Connect the vehicle battery ground cable to the negative battery terminal DC CIRCUIT PROTECTOR YELLOW INDICATOR DC RECEPTACLE OFF ON RED LEAD BATTERY CHARGING CABLE optional equipment BLACK LEAD 31ZT76331 book Page 35 Friday February 23 2018 2 59 PM ...

Page 38: ...the OFF position and connect the appliance to the generator If the engine still will not reach normal operating speed check that the appliance does not exceed the rated load capacity of the generator If high electrical loads are connected simultaneously turn the Eco Throttle switch to the OFF position to reduce voltage changes The Eco Throttle system is not effective for use with appliances or too...

Page 39: ...ystem Ground This generator has a system ground that connects the generator frame components to the ground terminals in the AC output receptacles The system ground is not connected to the AC neutral wire Improper connections to a building s electrical system can allow current from the generator to backfeed into the utility lines Such backfeed may electrocute utility company workers or others who c...

Page 40: ...t Oil may leak and damage the engine or your property There may be Federal or State Occupational Safety and Health Administration OSHA regulations local codes or ordinances that apply to the intended use of the generator Please consult a qualified electrician electrical inspector or the local agency having jurisdiction In some areas generators are required to be registered with local utility compa...

Page 41: ...ration or use it in dusty conditions consult your servicing dealer for recommendations applicable to your individual needs and use Remember that an authorized Honda servicing dealer knows your generator best and is fully equipped to maintain and repair it To ensure the best quality and reliability use only new Honda Genuine parts or their equivalents for repair and replacement Maintenance replacem...

Page 42: ... the engine and exhaust system cool before touching Injury from moving parts Do not run the engine unless instructed to do so Read the instructions before you begin and make sure you have the tools and skills required To reduce the possibility of fire or explosion be careful when working around gasoline Use only a non flammable solvent not gasoline to clean parts Keep cigarettes sparks and flames ...

Page 43: ...le failures REGULAR SERVICE PERIOD 3 Perform at every indicated month or operating hour interval whichever comes first Each use First month or 20 Hrs Every 3 months or 50 Hrs Every 6 months or 100 Hrs Every year or 300 Hrs page Engine oil Check level o 44 Change o o 45 Air cleaner Check o 47 Clean o 1 48 Replace o 47 Sediment cup Clean o 54 Spark plug Check adjust o 49 Replace o 49 Spark arrester ...

Page 44: ...tank above the upper level mark see page 43 or fuel may flow into the EVAP canister causing fuel spillage Never refuel the engine inside a building where gasoline fumes may reach flames or sparks Keep gasoline away from appliance pilot lights barbecues electric appliances power tools etc Spilled fuel is not only a fire hazard it causes environmental damage Wipe up spills immediately Gasoline is hi...

Page 45: ... fuels with content of ethanol or methanol greater than shown above may cause starting and or performance problems It may also damage metal rubber and plastic parts of the fuel system Engine damage or performance problems that result from using a fuel with percentages of ethanol or methanol greater than shown above are not covered under warranty If your equipment will be used on an infrequent or i...

Page 46: ...upper limit fill with the recommended oil see page 46 to the upper limit 4 Reinstall the oil filler cap securely 5 Close and latch the oil maintenance cover The Oil Alert system will automatically stop the engine before the oil level falls below safe limits However to avoid the inconvenience of an unexpected shutdown check the oil level regularly OIL FILLER CAP OIL MAINTENANCE COVER UPPER LIMIT 31...

Page 47: ...with the recommended oil see page 46 and check the oil level Maximum oil capacity 18 oz 0 55 L 5 Reinstall the oil filler cap and tighten it securely 6 Reinstall close and latch the oil maintenance cover Wash your hands with soap and water after handling used oil Improper disposal of engine oil can be harmful to the environment If you change your own oil please dispose of it properly Put it in a s...

Page 48: ... for general use Other viscosities shown in the chart may be used when the average temperature in your area is within the recommended range The SAE oil viscosity and service category are in the API label on the oil container Honda recommends that you use API service category SJ or later or equivalent oil AMBIENT TEMPERATURE 31ZT76331 book Page 46 Friday February 23 2018 2 59 PM ...

Page 49: ...eplace the foam air filter if it is damaged If the paper air filter is dirty replace it with a new one Do not clean the paper air filter 4 Reinstall the air cleaner cover 5 Close and latch the left side maintenance cover Operating the engine without an air filter or with a damaged air filter will allow dirt to enter the engine causing rapid engine wear This type of damage is not covered by the Dis...

Page 50: ...hen rinse thoroughly or wash in non flammable or high flash point solvent Allow the foam air filter to dry thoroughly 2 Soak the foam air filter in clean engine oil and squeeze out the excess oil The engine will smoke during initial startup if too much oil is left in the foam air filter 3 Wipe dirt from the air cleaner housing and cover using a moist rag Be careful to prevent dirt from entering th...

Page 51: ...plug can cause engine damage If the engine is hot allow it to cool before servicing the spark plug 1 Use a screwdriver to loosen the latch and open the left side maintenance cover 2 Loosen the cover screw and remove the spark plug inspection cover 3 Remove the spark plug cap 4 Clean any dirt from around the spark plug base 5 Use a spark plug wrench to remove the spark plug SPARK PLUG INSPECTION CO...

Page 52: ...tighten with a spark plug wrench to compress the washer If installing a new spark plug tighten 1 2 turn after the spark plug seats to compress the washer If reinstalling a used spark plug tighten 1 8 1 4 turn after the spark plug seats to compress the washer TORQUE 18 N m 1 8 kgf m 13 lbf ft A loose spark plug can overheat and damage the engine Overtightening the spark plug can damage the threads ...

Page 53: ...er as follows 1 Remove the four 6 mm cap nuts and remove the rear cover 2 Remove the four 6 mm bolts and remove the upper muffler protector 3 Remove the four 8 mm bolts and remove the rear handle 4 Remove the four 6 mm bolts and remove the rear under plate 5 Remove the lower muffler protector 6 mm CAP NUTS UPPER MUFFLER PROTECTOR REAR COVER 6 mm BOLTS 8 mm BOLTS 6 mm BOLTS LOWER MUFFLER PROTECTOR ...

Page 54: ...s from the spark arrester screen Be careful to avoid damaging the screen The spark arrester must be free of breaks and holes Replace the spark arrester if it is damaged 8 Install the spark arrester and the exhaust tail pipe in the reverse order of removal EXHAUST TAIL PIPE SPARK ARRESTER 5 mm BOLTS 31ZT76331 book Page 52 Friday February 23 2018 2 59 PM ...

Page 55: ...e upper muffler protector and the rear cover in the reverse order of removal When installing the rear cover carefully fit the rubber drip guard around the oil filler neck and oil drain neck LOWER MUFFLER PROTECTOR HOOK HOOK REAR UNDER PLATE REAR HANDLE LOWER MUFFLER PROTECTOR OIL FILLER NECK UPPER MUFFLER PROTECTOR REAR COVER OIL DRAIN NECK RUBBER DRIP GUARD 31ZT76331 book Page 53 Friday February ...

Page 56: ...ewdriver to loosen the latch and open the left side maintenance cover 4 Remove the air cleaner cover and paper air filter see page 47 5 Disconnect the canister charge hose from the fuel tank and hose joint 6 Disconnect the breather hose and canister purge hose from the air cleaner base 7 Remove the 6 mm bolt and two 6 mm nuts and remove the air cleaner base 6 mm NUTS FUEL TANK BREATHER HOSE HOSE J...

Page 57: ...ner base and connect the breather hose and canister purge hose to the air cleaner base 14 Reinstall the paper air filter and air cleaner cover 15 Close and latch the left side maintenance cover Gasoline is highly flammable and explosive You can be burned or seriously injured when handling fuel Stop the engine and let it cool before handling fuel Keep heat sparks and flame away Handle fuel only out...

Page 58: ...the eye Immediately call 911 USA only or a physician Skin Remove contaminated clothing Flush the skin with large quantities of water Call a physician immediately Swallowing Drink water or milk Call your local Poison Control Center USA only or a physician immediately The battery contains sulfuric acid electrolyte which is highly corrosive and poisonous Getting electrolyte in your eyes or on your sk...

Page 59: ...the negative cable from the battery negative terminal and then remove the positive cable from the battery positive terminal 4 Remove the battery and the battery rubber from the battery tray 1 Remove the four 6 mm cap nuts and remove the front cover 6 mm CAP NUTS FRONT COVER COLLAR 4 POSITIVE CABLE BATTERY HOLDER BAND NEGATIVE CABLE BATTERY RUBBER 31ZT76331 book Page 57 Friday February 23 2018 2 59...

Page 60: ...hours 3 Clean the outside of the battery and the battery tray compartment with a solution of baking soda and water The battery will expel explosive hydrogen gas when overcharged A spark or flame can cause the battery to explode with enough force to kill or seriously hurt you Always use a regulated charger that provides the correct charging current to prevent overcharging Wear protective clothing a...

Page 61: ...terminal 4 Connect the battery negative cable to the battery negative terminal and tighten the bolt securely 5 Install the battery rubber and the battery holder band 6 Install the front cover and install the four 6 mm cap nuts making sure the four collared washers are placed in the rubber grommets inside the cover POSITIVE CABLE NEGATIVE CABLE BATTERY BOOT BATTERY HOLDER BAND BATTERY RUBBER 31ZT76...

Page 62: ...der cover and replace the fuse The specified fuse is 5 A If frequent fuse failure occurs determine the cause and correct the problem before attempting to operate the generator further Never use a fuse with a different rating from that specified Serious damage to the electrical system or fire may result COLLAR 4 FRONT COVER 6 mm CAP NUTS FUSE HOLDER 31ZT76331 book Page 60 Friday February 23 2018 2 ...

Page 63: ...sits that clog the fuel system If the gasoline in your generator deteriorates during storage you may need to have the carburetor and other fuel system components serviced or replaced The length of time that gasoline can be left in your fuel tank and carburetor without causing functional problems will vary with such factors as gasoline blend your storage temperatures and whether the fuel tank is pa...

Page 64: ...zer Drain the carburetor float bowl page 63 Drain the fuel sediment cup page 54 Remove the spark plug Put a teaspoon of engine oil into the cylinder Turn the engine slowly with the pull rope to distribute the oil Reinstall the spark plug Change the engine oil page 45 After removal from storage drain the stored gasoline into a suitable container and fill with fresh gasoline before starting Use gaso...

Page 65: ... and tank 5 After all the fuel has drained into the container tighten the drain screw securely 6 Remove the sediment cup and empty it see page 54 7 Reinstall the sediment cup 8 Close the left side maintenance cover Gasoline is highly flammable and explosive You can be burned or seriously injured when handling fuel Stop the engine and let it cool before handling fuel Keep heat sparks and flame away...

Page 66: ...2 Reinstall the spark plug cap on the spark plug securely 3 Reinstall the spark plug inspection cover 4 Slowly pull the starter grip until resistance is felt At this point the piston is coming up on its compression stroke and both the intake and exhaust valves are closed Storing the engine in this position will help to protect it from internal corrosion Battery Charge the battery before storing th...

Page 67: ... level surface Tilting or laying it on its side can cause fuel or oil leakage With the engine and exhaust system cool cover the generator to keep out dust A hot engine and exhaust system can ignite or melt some materials Do not use a plastic sheet as a dust cover A nonporous cover will trap moisture around the generator promoting rust and corrosion REMOVAL FROM STORAGE Check your generator as desc...

Page 68: ...ding the generator on the transport vehicle A hot engine and exhaust system can burn you and can ignite some material When transporting the generator turn the engine switch and the fuel valve OFF and keep the generator level to reduce the possibility of fuel leakage Take care not to drop or strike the generator when transporting Do not place heavy objects on the generator 31ZT76331 book Page 66 Fr...

Page 69: ...roperly gapped Gap or replace spark plug p 49 Spark plug wet with fuel flooded engine Dry and reinstall spark plug Fuel filter restricted carburetor malfunction ignition malfunction valves stuck etc Take the generator to an authorized Honda servicing dealer or refer to the shop manual Possible cause Correction Air filter restricted Clean or replace air filter p 47 48 Bad fuel generator stored with...

Page 70: ...ped Check AC load and reset circuit protector p 15 Faulty power tool or appliance Replace or repair power tool or appliance Stop and restart the engine Faulty generator Take the generator to an authorized Honda servicing dealer or refer to the shop manual Possible Cause Correction DC circuit protector OFF Turn DC circuit protector ON p 15 Faulty generator Take the generator to an authorized Honda ...

Page 71: ...me serial number and date purchased in the spaces below You will need this information when ordering parts and when making technical or warranty inquiries Frame serial number Date purchased FRAME SERIAL NUMBER 31ZT76331 book Page 69 Friday February 23 2018 2 59 PM ...

Page 72: ...arburetor modification This engine when operated at high altitude with the carburetor modifications for high altitude use will meet each emission standard throughout its useful life Even with carburetor modification engine horsepower will decrease about 3 5 for each 1 000 foot 300 meter increase in altitude The effect of altitude on horsepower will be greater than this if no carburetor modificatio...

Page 73: ...e evaporative emissions The U S and California Clean Air Acts EPA and California regulations require all manufacturers to furnish written instructions describing the operation and maintenance of emission control systems The following instructions and procedures must be followed in order to keep the Honda engine emissions within the emission standards Tampering and Altering Tampering is a violation...

Page 74: ...service performed at non Honda locations However the use of replacement parts that are not of the original design and quality may impair the effectiveness of your emissions control system A manufacturer of an aftermarket part assumes the responsibility that the part will not adversely affect emissions performance The manufacturer or rebuilder of the part must certify that use of the part will not ...

Page 75: ...ription is intended to provide you with information relating to the engine s emission durability period The descriptive term indicates the useful life period for the engine s emission control system See your Emission Control System Warranty see page 83 for additional information Descriptive Term Applicable to Emission Durability Period Moderate 50 hours 0 80 cc inclusive 125 hours greater than 80 ...

Page 76: ...ith Eco Throttle switch OFF Cooling system Forced air Ignition system Transistor magneto Oil capacity 18 oz 0 55 L Fuel tank capacity 3 43 US gal 13 0 L Spark plug BPR6ES NGK W20EPR U DENSO Model EU3000is1 Type A type AC output Rated voltage 120 V Rated frequency 60 Hz Rated current 23 4 A Rated output 2 8 kVA Maximum output 3 0 kVA DC output Only for charging 12 V automotive batteries Maximum cha...

Page 77: ...75 TECHNICAL INFORMATION Wiring Diagram 31ZT76331 book Page 75 Friday February 23 2018 2 59 PM ...

Page 78: ... Available through your Honda dealer or visit http powerequipment honda com support shop manuals Parts Catalog This manual provides complete illustrated parts lists Available through your Honda dealer Accessories Your authorized Honda power equipment dealer offers a wide selection of accessories optional equipment to make your Generator even more useful Visit http powerequipment honda com generato...

Page 79: ...he dealership s management contact the Honda Power Equipment Customer Relations Office You can write to American Honda Motor Co Inc Power Equipment Division Customer Relations Office 4900 Marconi Drive Alpharetta Georgia 30005 8847 Or telephone 770 497 6400 1 888 888 3139 toll free 8 30 am to 7 00 pm ET When you write or call please give us this information Model and serial number see page 69 Name...

Page 80: ...hased in the United States Puerto Rico or the U S Virgin Islands from American Honda or a dealer authorized by American Honda to sell those products This warranty applies to first retail purchaser and each subsequent owner during the applicable warranty time period What American Honda Will Repair or Replace Under Warranty American Honda will repair or replace at its option any part that is proven ...

Page 81: ...s To locate a dealer near you visit our web site at http powerequipment honda com dealer locator If you are unable to obtain warranty service or are dissatisfied with the warranty service you receive contact the owner of the dealership involved normally this will resolve the problem However if you should require further assistance write or call the Power Equipment Customer Relations Department of ...

Page 82: ... wheel bearing recoil starter rope cable belt cutter blade Lubricant oil and grease 3 Cleaning adjustment and normal periodic maintenance work carburetor cleaning engine oil draining blade sharpening belt and cable adjustments 4 Any product that has ever been declared a total loss or sold for salvage by a financial institution or insurer 5 Auger and paddle assemblies of snowthrowers tiller tines o...

Page 83: ...ipment parts accessories or apparel that are proven to be defective in material or workmanship under normal use during the applicable warranty time period Anything replaced under warranty becomes the property of American Honda Motor Co Inc The warranty on all parts accessories and apparel replaced under warranty will expire coincident with the original warranty on the replaced parts accessories or...

Page 84: ...ected or damaged by collision normal wear use in an application for which the product was not designed or any other misuse neglect incorporation or use of unsuitable attachments or parts unauthorized alteration improper installation or any causes other than defects in material or workmanship of the product Installing parts and accessories on non Honda products or engines voids this warranty Discla...

Page 85: ...ate s stringent anti smog standards Specific Honda products that do not meet the California emissions regulations can be identified by a Not for Sale in California decal Other States U S territories and Canada In other areas of the United States and in Canada your engine must be designed built and equipped to meet the U S EPA and Environment Canada emission standards for spark ignited engines at o...

Page 86: ...ue to abuse neglect improper maintenance or unapproved modifications You are responsible for presenting your power equipment engine to a Honda Power Equipment dealer as soon as a problem exists The emission related warranty repairs should be completed in a reasonable amount of time not to exceed 30 days If you have any questions regarding your emission warranty rights and responsibilities you shou...

Page 87: ...arranty repairs and must be provided without charge to the owner A list of warranted parts is on page 87 Normal maintenance items such as spark plugs and filters that are on the warranted parts list are warranted up to their required replacement interval only Honda will also replace other engine components damaged by a failure of any warranted part during the warranty period The use of replacement...

Page 88: ...region Exclusions Failures other than those resulting from defects in material or workmanship are not covered by this warranty This warranty does not extend to emission control systems or parts that are affected or damaged by owner abuse neglect improper maintenance misuse misfueling improper storage collision the incorporation of or use of unsuitable attachments or the unauthorized alteration of ...

Page 89: ...first required replacement only See the MAINTENANCE SCHEDULE on page 41 SYSTEMS COVERED BY THIS WARRANTY PARTS DESCRIPTION Fuel Metering Carburetor assembly includes starting enrichment system Oxygen sensor Throttle body Engine temperature sensor Engine control module Fuel injector Fuel regulator Intake manifold Evaporative Fuel tank Fuel cap Fuel hoses Vapor hoses Carbon canister Canister mountin...

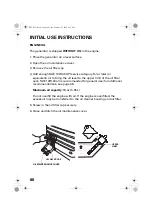
Page 90: ...to the upper limit of the oil filler neck SAE 10W 30 oil is recommended for general use for additional recommendations see page 46 Maximum oil capacity 18 oz 0 55 L Do not overfill the engine with oil If the engine is overfilled the excess oil may be transferred to the air cleaner housing and air filter 5 Screw in the oil filler cap securely 6 Close and latch the oil maintenance cover OIL MAINTENA...

Page 91: ...ge 43 for additional fuel recommendations 1 Remove the fuel tank cap 2 Fuel carefully to avoid spilling fuel 3 Do not fill the fuel tank above the upper level mark red on the fuel strainer or fuel may flow into the EVAP canister causing fuel spillage 4 After refueling reinstall the fuel tank cap securely Gasoline is highly flammable and explosive You can be burned or seriously injured when handlin...

Page 92: ...nd nuts from the small plastic bag that is taped to the top of the battery 3 Connect the battery positive cable to the battery positive terminal first and tighten the bolt securely 4 Slide the battery boot over the positive cable and terminal 5 Connect the battery negative cable to the battery negative terminal and tighten the bolt securely 6 Install the battery rubber and the battery holder band ...

Page 93: ...your dealer did not collect registration information from you please take a few minutes and register your purchase with Honda This allows us to contact you with any important updates regarding your generator Please note registration is not required to obtain warranty service You can register your generator by visiting the Honda Power Equipment website http powerequipment honda com support and clic...

Page 94: ...azards 6 Carburetor Modification for High Altitude Operation 70 Check the Engine 20 Choke Knob 13 Cleaning 61 COMPONENT CONTROL LOCATIONS 10 Connections to a Building s Electrical System 37 CONSUMER INFORMATION 76 CONTENTS 3 CONTROLS 12 CONTROLS FEATURES 10 Customer Service Information 77 D DC Circuit Protector 15 DC OPERATION 33 DC Receptacle 15 Dealer Locator Information 76 Distributor s Limited...

Page 95: ...IL LEVEL CHECK 44 ENGINE OIL RECOMMENDATIONS 46 Engine Switch 12 ENGINE WILL NOT START 67 F FEATURES 16 Fire and Burn Hazards 7 FOAM AIR FILTER CLEANING 48 Fuel 61 89 FUEL RECOMMENDATIONS 43 Fuel Valve Lever 13 FUSE 60 G GENERATOR SAFETY 6 Ground Terminal 18 H Honda Publications 77 I IMPORTANT SAFETY INFORMATION 6 INITIAL USE INSTRUCTIONS 88 IS YOUR GENERATOR READY TO GO 19 K Knowledge 19 31ZT7633...

Page 96: ... 68 O Oil Alert Indicator 17 OPERATION 21 Operator Responsibility 6 Output Indicator 16 Overload Alarm Indicator 16 P Parallel Operation Outlets 14 Q QUICK REFERENCE INFORMATION Inside back cover R REFUELING 42 Refuel With Care 8 REGISTRATION 91 REMOVAL FROM STORAGE 65 31ZT76331 book Page 94 Friday February 23 2018 2 59 PM ...

Page 97: ... PLUG SERVICE 49 Special Requirements 38 Specifications 74 STANDBY POWER 37 Starter Grip 12 STARTING THE ENGINE 22 STOPPING THE ENGINE 26 STORAGE 61 STORAGE PRECAUTIONS 65 STORAGE PREPARATION 61 System Ground 37 T TAKING CARE OF UNEXPECTED PROBLEMS 67 TECHNICAL INFORMATION 69 THE IMPORTANCE OF MAINTENANCE 39 TRANSPORTING 66 W Wiring Diagram 75 31ZT76331 book Page 95 Friday February 23 2018 2 59 PM...

Page 98: ...96 MEMO 31ZT76331 book Page 96 Friday February 23 2018 2 59 PM ...

Page 99: ...roduct contains chemicals known to the State of California to cause cancer birth defects or other reproductive harm Exhaust contains poisonous carbon monoxide gas that can build up to dangerous levels in closed areas Breathing carbon monoxide can cause unconsciousness or death Never run the generator in a closed or even partly closed area where people may be present QUICK REFERENCE INFORMATION Fue...

Page 100: ...C 2018 Honda Motor Co Ltd All Rights Reserved GENERATOR BK 背幅4mm PANTONE186C EU3000is 31ZT7633 00X31 ZT7 6331 Printed in Japan FM Hi EM4 英 AH Owner s Manual See page 89 for Initial Use Instructions ...

Reviews: