WARNING
Gasoline is highly flammable explosive.You can
be burned or seriously injured when handing fuel.
Keep heat, sparks, and flame away.
Handle fuel only outdoors.
Wipe up spills immediately.
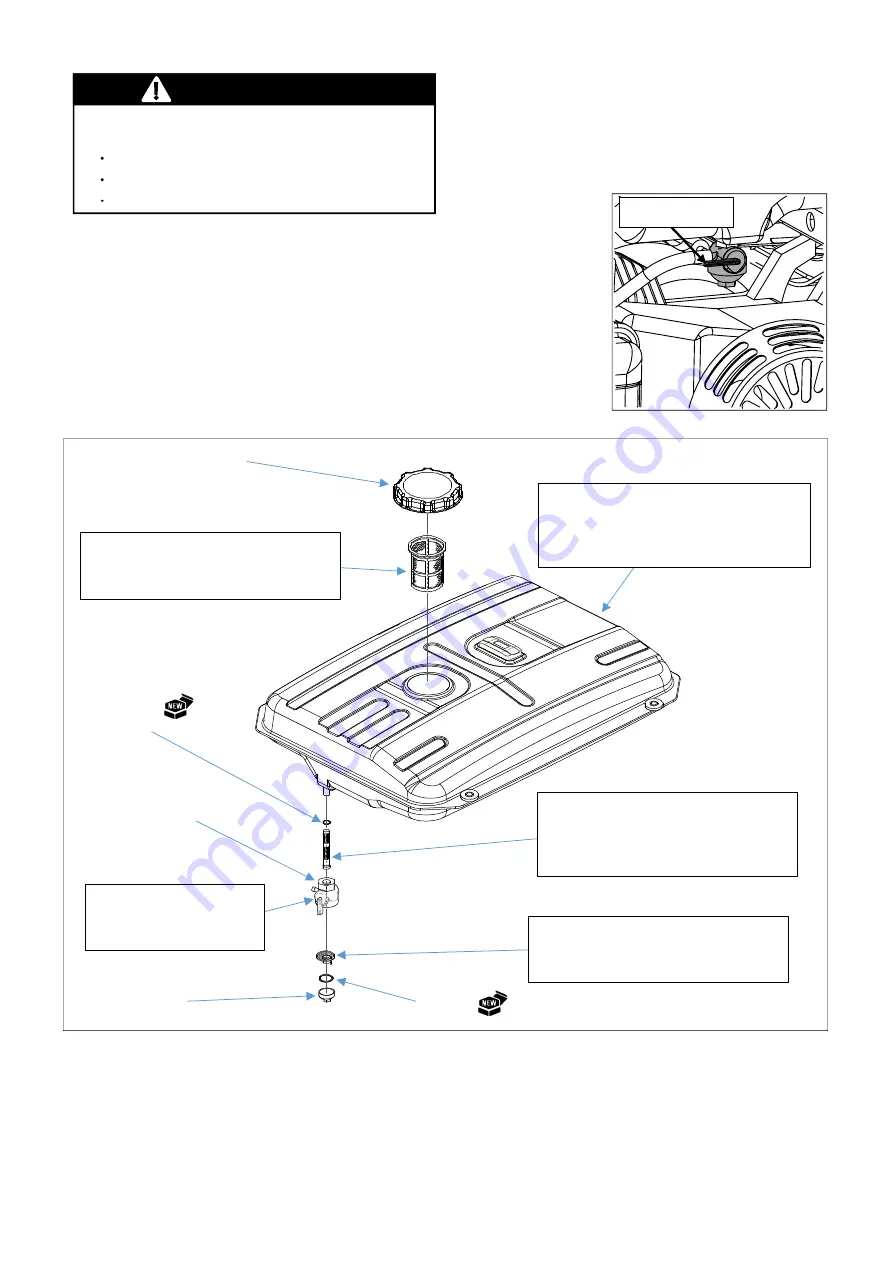
2-2. FUEL TANK AND STRAINER CLEANING
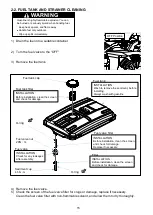
1) Drain the fuel into a suitable container.
2) Turn the fuel valve to the
“OFF”
3) Remove the fuel tank.
4) Remove the fuel valve.
5) Check the screen of the fuel valve filter for clogs or damage, replace if necessary.
Clean the fuel valve filter with non-flammable solvent, and allow them to dry thoroughly.
OFF Position
Fuel valve filter
Fuel tank
O-ring
Fuel valve nut
20N
・
m
Filter
O-ring
INSTALLATION
:
Before installation, clean the screen
and check for damage.
Fuel tank filter
Fuel tank cap
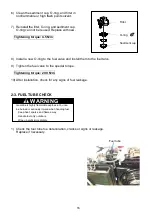
INSTALLATION
:
Wash to remove the sediment, before
installing.
Always wash with gasoline.
Sediment cup
4.5N
・
m
INSTALLATION
:
Check for any leakages
after assembly.
INSTALLATION
:
Before installation, clean the screen
and check for damage.
INSTALLATION
:
Before installation, clean the screen
and check for damage.
Replace if necessary.
Fuel valve
15
Summary of Contents for EZ6500CXS
Page 1: ......
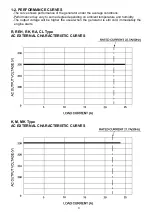
Page 10: ...L LB Type AC EXTERNAL CHARACTERISTIC CURVES S SB Type AC EXTERNAL CHARACTERISTIC CURVES 10 ...
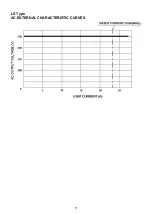
Page 11: ...LS Type AC EXTERNAL CHARACTERISTIC CURVES 11 ...
Page 44: ...4 4 ALTERNATING CURRENT VOLTAGE IS OV 44 ...
Page 51: ...4 11 WIRING DIAGRAM R S K Type 51 ...
Page 52: ...RK LS MK Type 52 ...
Page 53: ...REH CL Type 53 ...
Page 54: ...M Type 54 ...
Page 55: ...SB LB Type 55 ...
Page 56: ...L Type 56 ...
Page 57: ...62EAB00 2019 Sep ...


