background image

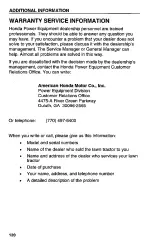
Current customer service contact information: 

 
United States, Puerto Rico, and U.S. Virgin Islands: 

Honda Power Equipment dealership personnel are trained professionals. They should 
be able to answer any question you may have. If you encounter a problem that your 
dealer does not solve to your satisfaction, please discuss it with the dealership's 
management. The Service Manager or General Manager can help. Almost all problems 
are solved in this way.  

If you are dissatisfied with the decision made by the dealership's management, contact 
the Honda Power Equipment Customer Relations Office. You can write: 

American Honda Motor Co., Inc. 
Power Equipment Division 
Customer Relations Office 
4900 Marconi Drive 
Alpharetta, GA 30005-8847 

Or telephone: (770) 497-6400 M-F, 8:30 am - 7:00 pm EST 

When you write or call, please provide the following information: 

  Model and serial numbers 

  Name of the dealer who sold the Honda power equipment to you 

  Name and address of the dealer who services your equipment 

  Date of purchase 

  Your name, address, and telephone number 

  A detailed description of the problem 


Summary of Contents for HARMONY H1011HS

Page 1: ......

Page 2: ...with the riding mower if you sell it This owner s manual is considered a permanent part of your riding mower and should remain with the riding mower if resold The information and specifications in th...

Page 3: ...help you avoid damage to your riding mower other property or the environment We suggest you read the warranty policy to fully understand its coverage and your responsiblities of ownership When your r...

Page 4: ...ent You will find important safety information in a variety of forms including l Safety Labels on the riding mower l Safety Messages proceeded by a safety alert symbolm and one of three signal words D...

Page 5: ...n tells you how to operate the riding mower for safe and effective mowing MAINTENANCE ADJUSTMENTS 47 This section tells you how to perform normal maintenance and adjustments TRANSPORTING and STORING 9...

Page 6: ...P...

Page 7: ...ant Safety Information 6 Avoid Rotating Blades 6 Clear Mowing Area 6 Keep Shields in Place 6 Refuel with Care 7 Wear Protective Clothing 7 Turn Engine Off When Not Mowing 7 Operation on Slopes 7 Mowin...

Page 8: ...or for any other reason always shut off the engine and remove the key Disconnect the spark plug cap and wear heavy gloves when you need to clean the mower deck or handle a blade Clear Mowing Area A ri...

Page 9: ...s Turn Engine Off When Not Mowing If you need to leave the mower for any reason even just to inspect the lawn ahead always turn the engine off And take the key if you go farther away Operation on Slop...

Page 10: ...can cause serious injury Read them carefully If a label comes off or becomes hard to read contact your Honda riding mower dealer for a replacement IHOT MUFFLER CAN BURN YOU Stay away If engine has be...

Page 11: ...can cause serious injury n Keep hands and feet away from mower deck Gtop engine before leaving operator s position n Do not allow children to ride as passengers They can fall or be thrown off causin...

Page 12: ...as enough MATURITY AND RESPONSIBILITY to safely operate this riding mower Does the young person think through problems and come to logical solutions Be honest Anyone who takes unnecessary risks and do...

Page 13: ...do and how they work COMPONENT IDENTIFICATION 12 DESCRIPTION OF CONTROLS 14 Seat 14 Fuel Valve 14 Ignition Switch 14 Height Adjustment Lever 15 Clutch Pedal 15 Brake Pedal 15 Shift Lever 16 Throttle...

Page 14: ...O CLUTCH LEVER 3 PARKING BRAKE LEVER 4 HEIGHT ADJUSTMENT LEVER 5 RECOIL STARTER HANDLE recoil start model S TRANSMISSION RELEASE LEVER hydrostatic transmission model A RIDING MOWER SERIAL NUMBER near...

Page 15: ...AT LOCK ROD under seat 14 COOLING FAN SCREEN B ENGINE SERIAL NUMBER lift seat to view PI Record the frame and engine serial numbers in the space below You will need these numbers when ordering parts a...

Page 16: ...lift controls for example deck height adjustment Seat The seat can be adjusted back and forth for operator comfort and tilted forward for battery access on electric start models Refer to page 53 for...

Page 17: ...between gears Brake Pedal gear transmission models The brake pedal applies a brake to the rear wheels The brake pedal should only be used once the clutch pedal is pressed all the way down except when...

Page 18: ...e transmission of the riding mower if you move the shift lever between REVERSE and any forward gear without coming to a full stop F ress on the brake pedal if needed to bring the riding mower to a ful...

Page 19: ...our riding mower where engine power is applied to the mower deck The forward position is ON this starts the mower blade spinning The rear position is OFF and this stops the mower blade from spinning W...

Page 20: ...wn and hold the brake and clutch pedals gear transmission models or just the brake pedal hydrostatic transmission model then move the parking brake lever up You can then gently release the pedal s The...

Page 21: ...s Engine Oil Level Air Intake Cleaner and Filters Muffler and Exhaust Area Transmission Release Lever hydrostatic transmission model Grass Bag Brake Pedal Parking Brake Cooling Air Intake Fuel Cutting...

Page 22: ...Pets People and animals near the mowing area can move into your mowing path or into a position where they could be struck by thrown objects Clear the area of people especially children and pets Their...

Page 23: ...l The ignition switch is OFF and the key is removed l The parking brake is ON General Items Walk around the riding mower and check its general condition Look around and underneath it for signs of flui...

Page 24: ...for an engine to breathe The cooling air for the engine is drawn in from behind the seat Make sure the cooling air path is not obstructed with grass or covered in any way Remove the rear cover see pag...

Page 25: ...th the optional grass bag kit check it for proper installation including the front counterweight and verify the bags are in good condition Brake Pedal Gear Transmission Models Verify that the clutch p...

Page 26: ...mowing conditions See page 41 Tire Pressure Check the tires for proper inflation See page 68 Blade Before each use check the mower blade for damage or abnormal wear See page 83 for details Belts Chec...

Page 27: ...operation before you begin mowing Know what to do in case of emergencies Clothing Wearing protective clothing will reduce your risk of injury Long pants and eye protection reduce the risk of injuries...

Page 28: ...BEFORE MOWING 26...

Page 29: ...g mower for safe and effective mowing MOWING PRECAUTIONS 28 Starting the Engine 29 Driving the Riding Mower 31 Mowing 32 Braking 33 Adjusting Speeds 34 Stopping the Riding Mower 35 Safe Mowing Practic...

Page 30: ...operating the engine in an enclosed area such as a garage Your riding mower s exhaust contains poisonous carbon monoxide gas which can collect rapidly in an enclosed area and cause illness or death T...

Page 31: ...uel valve handle toward the engine to ON allows fuel to flow 2 Make sure the PTO lever is OFF disengaged the parking brake is set ON and the shift lever is in NEUTRAL The engine will not start unless...

Page 32: ...TICEI electric start models Holding the ignition key in the START position for more than five seconds may damage the starter 5 If the engine fails to stat t wait at least ten seconds before trying aga...

Page 33: ...eeds can cause the riding mower to lose traction The riding mower can tip over and you can be injured or killed Avoid sharp turns when using higher gears After using the riding mower for a while you l...

Page 34: ...lower ground speeds under the following conditions l For sharp turns l Mowing in narrow areas or near trees l When edging or trimming near obstructions l Cutting tall or very thick grass REVERSE is us...

Page 35: ...iq Partially pressing the brake pedal without first pressing the clutch pedal can cause the drive belt to wear prematurely When using the brake pedal press the brake pedal all the way down and only wh...

Page 36: ...e riding mower to lose traction The riding mower can tip over and you can be killed or seriously injured Do not operate the shift lever while the riding mower is on a sloped surface When shifting betw...

Page 37: ...g Forward Speed 1 To make the riding mower move faster when moving forward push the shift lever away from NEUTRAL 2 To slow down pull the shift lever back toward NEUTRAL Adjusting Reverse Speed 1 To m...

Page 38: ...the PTO lever to OFF Gear transmission models Move the shift lever to NEUTRAL 5 With the brake pedal pressed all the way down press the parking brake ON 6 Remove your foot from the brake pedal 7 Turn...

Page 39: ...ing your foot on the ground Keep your feet on the platform and near the pedals Take extra care when mowing near blind corners shrubs trees or any other objects that may obscure your vision If you do s...

Page 40: ...across When mowing on slopes empty the optional grass bags when they are half full Never operate the shift lever when mowing on a sloped surface Never mow a sloped surface when the grass is wet Avoid...

Page 41: ...stacles such as fences or walls Be careful when mowing over obstacles embedded in the lawn such as sprinkler heads paving edging etc Avoid anything that sticks up above the surface of the lawn If a bl...

Page 42: ...the throttle in the FAST position when mowing In general a slower ground speed produces a better quality cut Try to maintain a constant travel speed when possible Changing speeds can produce an uneve...

Page 43: ...ent possible damage to the mower deck always raise it fully 3 5 when driving the riding mower to and from the mowing area this provides maximum ground clearance To avoid damaging or disabling the mowe...

Page 44: ...may wish to alter the pattern to prevent clippings from accumulating in areas such as a nearby patio or driveway Overlapping Your Path Allow an adequate amount of overlap in the cutting path when mowi...

Page 45: ...ht adjustment lever Overinflated tires produce a harsher less comfortable ride and can also damage the grass and tires See page 68 After Mowing Always take a few moments to inspect the riding mower wh...

Page 46: ...mower is cool you should inspect these areas and brush or wipe off any debris with a soft brush or slightly damp rag Specifically remove the rear cover and look around the top of the engine exhaust ar...

Page 47: ...cation is made A reduction in engine horsepower will reduce mowing performance When the carburetor is modified for high altitude operation the air fuel mixture will be too lean for low altitude use IN...

Page 48: ...OPERATING THE MOWER...

Page 49: ...53 Rear Cover 54 Air Cleaner 54 Fuel 56 Engine Oil 59 Spark Plug 62 Battery Service electric start model 63 Fuse Replacement electric start model 65 Clutch Pedal Freeplay 67 Tires and Wheels 68 PTO L...

Page 50: ...more difficult or require special tools are best handled by professionals and are normally performed by a Honda technician or other qualified mechanic The maintenance schedule applies to normal opera...

Page 51: ...otential hazards Carbon monoxide poisoning from engine exhaust Be sure there is adequate ventilation whenever you operate the engine Burns from hot parts Let the engine and exhaust system cool before...

Page 52: ...retor settings and other systems to reduce the emissions of carbon monoxide oxides of nitrogen and hydrocarbons The U S and California Clean Air Acts EPA and California regulations require all manufac...

Page 53: ...parts are manufactured to the same standards as the original parts so you can be confident of their performance The use of replacement parts that are not of the original design and quality may impair...

Page 54: ...ore frequently when used in dusty areas i These items should be serviced by an authorized Honda riding mower dealer unless the owner has proper tools and is mechanically proficient See the Shop Manual...

Page 55: ...t is locked in the upright position by pressing down on the seat Adjusting the Seat Position 1 Locate and loosen don t remove the four hex bolts used to attach the seat to the seat bracket 2 Move the...

Page 56: ...r cover so the rounded edge aligns with the clips in the rear body 3 The two posts on the lower edges of the rear cover should be carefully pressed into the rubber grommets on the rear body Air Cleari...

Page 57: ...t by squeezing it in warm soapy water rinsing it and allowing it to dry You may also use a nonflammable solvent and then allow it to dry Oil the foam element by dipping it in clean engine oil and sque...

Page 58: ...el can damage paint and plastic Be careful not to spill fuel when filling the fuel tank Damage caused by spilled fuel is not covered under warranty Gasoline is highly flammable and explo sive and you...

Page 59: ...engine or its fuel system Avojd getting dirt or water in the fuel tank When the engine speed drops under heavy loads you may hear light spark knock or pinging a metallic rapping noise This is no cause...

Page 60: ...lf Drain any remaining fuel from the riding mower into an approved container by removing the angled carburetor drain bolt Locate the fuel supply line between the carburetor and fuel tank Loosen the ho...

Page 61: ...ick with a clean cloth 3 Insert the dipstick as shown here don t screw it back in 4 If the oil level is low near the bottom add enough oil to bring the level to the upper mark Recheck the oil level af...

Page 62: ...commended for general use Other viscosities shown in the chart may be used when the average temperature in your area is within the recommended range The SAE oil viscosity and service classification ar...

Page 63: ...pen but do not remove the petcock valve Once the used oil has drained close the petcock valve and seat it lightly Do not over tighten Remove the drain tube and wipe it clean Fill the engine with the c...

Page 64: ...posits Remove the rear cover then disconnect the spark plug cap and remove any dirt from around the spark plug area Remove the spark plug Inspect the spark plug for excessively worn electrodes chips o...

Page 65: ...he riding mower charging system charges the battery while the engine is running However if the riding mower is only used periodically the battery must be charged monthly to maintain the battery servic...

Page 66: ...a physician immediately Skin Remove contaminated clothing Flush the skin with large quantities of water Call a physician immediately Swallowing Drink water or milk Call your local Poison Control Cente...

Page 67: ...water as necessary then install the battery caps 4 Clean the outside of the battery and the battery compartment with a solution of baking soda and water Don t allow any of the solution to drip down th...

Page 68: ...ull the fuse straight out of the holder A blown fuse is indicated by a broken link visible between the two blades on the fuse Discard a blown fuse and replace it with one of the same value I If fuse f...

Page 69: ...d adjust the freeplay when it reaches 17 mm 1 l 16 inch I Adjustment 1 Lower the mower deck all the way down 2 From the right side look between the riding mower frame and the mower deck Locate the clu...

Page 70: ...roper inflation pressure and periodically inspected for tread wear or damage Keeping the tire treads clean and free of mud and other debris improves traction and steering control Tire pressure Front 9...

Page 71: ...he old circlip Circlips have a round side and a flat side Install the new circlip with the flat side out being careful not to expand the clip too far Install the dust cap Rear Wheel Removal 1 Block th...

Page 72: ...tch lever OFF and the mower deck in the highest position there should be no freeplay in the PTO clutch lever If you feel freeplay the PTO clutch spring should be adjusted IW f B Move the PTO clutch le...

Page 73: ...l the way down with one hand 2 With your other hand slowly press the brake pedal down and note a strong resistance At this point measure the brake pedal arm travel 3 Brake pedal arm travel from rest t...

Page 74: ...052 inch the freeplay must be adjusted 1 3 mm 0 052 in Brake Pedal Freeplay Adjustment 1 Locate the brake assembly and adjustment nut below the muffler Tighten the adjustment nut until resistance is f...

Page 75: ...reinstalled l Mower deck height and leveling l PTO lever freeplay l Blade belt tension Removing the Mower Deck 1 2 3 4 5 To do this job properly and safely use heavy gloves when handling the mower dec...

Page 76: ...ss rod mounts the front of the mower deck This cross rod is held in place with a single spring clip remove the spring clip e I 5 9 10 74 From the left front side of the mower deck locate the L shaped...

Page 77: ...mower deck you should always perform the three mower deck adjustments as outlined in the next section Mower Deck Height Adjustments For the best cut quality the mower deck must sit at a proper angle t...

Page 78: ...tool measure the height of the blade tip on the right side MEASURING TOOL HONDA PART NUMBER 07JPJ 75001OA RIGHT SIDE Using a blade height measuring tool measure the height of the blade tip on the left...

Page 79: ...ification carefully tighten the plate locking nuts and then verify the measurements again Front to Rear Mower Deck Adjustment Inspection 1 2 3 4 5 6 Prepare the riding mower as previously outlined Set...

Page 80: ...te counterclockwise as viewed from the left side to raise the rear of the mower deck 7 Once you have obtained a proper measurement rear blade tip at least 6 mm l 4 inch but no more than 9 mm 3 8 inch...

Page 81: ...ded section of the rod where two locknuts hold a mounting pin in position The position of this mounting pin on the rod determines how high the mower deck is in relation to the height adjustment lever...

Page 82: ...d Before the blade belt tension is adjulsted make sure there is no freeplay in the PTO spring Inspecting and adjusting PTO lever freeplay is described on page 70 You should also verify correct cutting...

Page 83: ...its bracket belt holder left or right to bring the PTO clutch tensioner arm to line up with the inner set of scribed marks 3 Tighten the idler pulley adjustment nut securely If the idler pulley can t...

Page 84: ...he path of the moving PTO clutch arm Put on some heavy gloves Carefully push the PTO clutch tensioner arm toward the center of the mower deck Move the arm enough to provide cle arance for the blade be...

Page 85: ...eck bolt tightness remove sharpen and replace the blade as described in this section Always complete these steps before working around the mower blade 1 Move the PTO clutch lever to OFF Engage the par...

Page 86: ...ower with a worn or damaaed blade i3 Yl B I NEW WORN BENT CRACKED When the blade needs resharpening or replacement take the riding mower to an authorized Honda riding mower dealer Or if you have a tor...

Page 87: ...blade 180 degrees and again measure the blade tip on the right hand side The two measurements should be the same Any difference indicates a bent blade and or a bent blade spindle Install a new blade a...

Page 88: ...O and remove the ignition key to prevent accidental starting Wear heavy gloves to protect your hands Remove the mower deck from the riding mower see page 73 Put on heavy gloves and turn the mower deck...

Page 89: ...nd with the mower deck removed loosen the center blade bolt and special washer Note how the cone shaped washer is aligned on the pulley shaft The side marked INSIDE goes toward the blade LADE OLDER Re...

Page 90: ...to remove material to restore the cutting edge taper the edge toward the tip Do not taper beyond l 3 of the blade width l Do not grind the back side of the blade l Check the balance of the blade by p...

Page 91: ...for legal operation in some areas If a spark arrester is installed on your riding mower it should be inspected cleaned and replaced if necessary INOTICE The spark arrester must be serviced every 100...

Page 92: ...e the parking brake lever Check the drive belt make sure it is snug and routed through all the belt guards pulleys and the clutch tensioner arm 7 Reconnect the spark plug cap Drive Belt Replacement Th...

Page 93: ...uide Remove the rear cover On the frame just below the spark plug locate a self tapping screw that holds down a metal access plate on the frame Remove the screw and plate Loosen and remove the single...

Page 94: ...acks or other damage If needed replace with a genuine Honda belt Installation of the new drive belt is the reverse of removal Use the illustration shown here for proper belt routing and spacing Be sur...

Page 95: ...hium Base EP Lubricate the following grease points GREASE Front axle shaft grease fittings PTO clutch pulley shaft GREASE Mower deck rear GREASE Rear axle shaft grease fittings GREASE 1 Drive clutch p...

Page 96: ...engine to warm to normal operating temperature With the throttle on SLOW turn the throttle stop screw brass colored in or out to obtain the specified idle speed IDLE SPEED 1750 l 950 RPM THROlTLE STOP...

Page 97: ...TRANSPORTING and STORING This section fells you how to safely transport and store your riding mower Transporting Your Riding Mower 96 Storage Preparation 97 Storage 100 Removing From Storage 101 95...

Page 98: ...fore loading the riding mower Make sure the transmission engagement lever is set to DISENGAGE hydrostatic transmission model only See Transport the riding mower on a flat level trailer or truck bed Th...

Page 99: ......

Page 100: ...oblems may occur within a few months or even less if the gasoline was not fresh when you filled the fuel tank The Distributor s Limited Warranty does not cover fuel system damage or engine performance...

Page 101: ...r and turn the fuel valve to the ON position Handling gasoline improperly can cause it to ignite or explode causing you to be seriously or fatally injured Always put out cigarettes and other smoking m...

Page 102: ...riding mower will be stored with gasoline in the fuel tank and carburetor it is important to reduce the hazard of gasoline vapor ignition Select a well ventilated storage area away from any appliance...

Page 103: ...ng mower is in storage This will help to extend the service life of the battery Removal From Storage Check your riding mower as described in the Before Mowing chapter of this manual If the fuel was dr...

Page 104: ...TRANSPORTING and STORING 102...

Page 105: ...TROUBLESHOOTING This section tells you what to look for if you encounter problems Engine 104 Riding Mower 105 Mower Deck 105 103...

Page 106: ...age 17 Fuel valve must be ON page 14 Fuel tank should be full of fresh fuel Fuel filter should be clean and free of obstructions page 58 Spark plug cap should be securely attached to the spark plug pa...

Page 107: ...ade must be in good condition page 83 Mower deck must be free of any obstructions grass mud etc page 44 Drive and blade belts should be in good condition and at correct tension pages 90 and 80 Drive o...

Page 108: ...tion and at correct tension pages 90 and 80 doesn t discharge grass well Throttle should be in FAST page 17 Mow only dry grass Mower deck height not set properly page 15 Improper overlap page 42 Mow t...

Page 109: ...SPECIFICATIONS This section provides you with important dimensions and capacities Engine 108 Frame 108 Transmission 109 Mower deck 109 Miscellaneous 109 107...

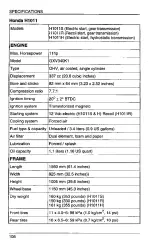
Page 110: ...em Starting system Transistorized magneto 1 12Vdcelectric HlOl1S H Recoil HlOl1R Cooling system Forced air Fuel type capacity Unleaded 3 4 liters 0 9 US gallons I Air filter Dual element foam and pape...

Page 111: ...pe 1 Sealed hydrostatic motor and pump Approximate ground speeds REVERSE REVERSE MOWING and TRANSPORT 0 3 4 km h 0 2 1 mph MOWING 10 5 2 km h 0 3 2 mph TRANSPORT 15 2 6 6 km h 3 2 4 1 mph MOWER DECK T...

Page 112: ...SPECIFICATIONS 110...

Page 113: ...NAL INFORMATION This section gives you sources for more information about your riding mower Honda Publications 112 Product Warranty 113 Warranty Service Information i 120 Additional Fuel Information 1...

Page 114: ...mation about maintaining your riding mower You may order them from your Honda riding mower dealer Shop Manual This manual covers complete maintenance and overhaul procedures It is intended to be used...

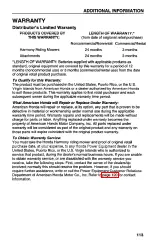
Page 115: ...to be defective in material or workmanship under normal use during the applicable warranty time period Warranty repairs and replacements will be made without charge for parts or labor Anything replac...

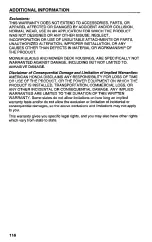
Page 116: ...TED TO ABRASIVE DAMAGE Disclaimer of Consequential Damage and Limitation of Implied Warranties AMERICAN HONDA DISCLAIMS ANY RESPONSIBILITY FOR LOSS OF TIME OR USE OF THE PRODUCT TRANSPORTATION COMMERC...

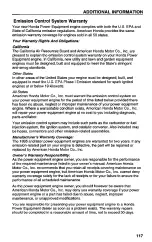
Page 117: ...e parts will expire coincident with the original product warranty Accessories and replacement parts installed by a dealer who is authorized by American Honda to sell them will be repaired or replaced...

Page 118: ...ITED TO ABRASIVE DAMAGE Disclaimer of Consequential Damage and Limitation of Implied Warranties AMERICAN HONDA DISCLAIMS ANY RESPONSIBILITY FOR LOSS OF TIME OR USE OF THE PRODUCT OR THE POWER EQUIPMEN...

Page 119: ...agnosis parts and labor Your emission control system may include such parts as the carburetor or fuel injection system the ignition system and catalytic converter Also included may be hoses connectors...

Page 120: ...ts may be used in the performance of any warranty repairs and must be provided without charge to the owner The use of replacement parts not equivalent to the original parts may impair the effectivenes...

Page 121: ...ERICAN HONDA MOTOR CO INC DISCLAIMS ANY RESPONSIBILITY FOR INCIDENTAL OR CONSEQUENTIAL DAMAGES SUCH AS LOSS OF TIME OR THE USE OF THE POWER EQUIPMENT OR ANY COMMERCIAL LOSS DUE TO THE FAILURE OF THE E...

Page 122: ...are dissatisfied with the decision made by the dealership s management contact the Honda Power Equipment Customer Relations Office You can write American Honda Motor C o Inc Power Equipment Division...

Page 123: ...is way If you are dissatisfied with the decision made by the dealership s management contact the Honda Power Equipment Customer Relations Office You can write American Honda Motor Co Inc Power Equipme...

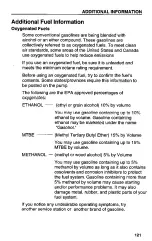
Page 124: ...the EPA approved percentages of oxygenates ETHANOL ethyl or grain alcohol 10 by volume You may use gasoline containing up to 10 ethanol by volume Gasoline containing ethanol may be marketed under the...

Page 125: ...INiFORMATION Fuel system damage and engine performance problems resulting from the use of oxygenated fuels containing more than the percentages of oxygenates mentioned above are not covered under war...

Page 126: ...n 83 84 installation 88 removal 87 sharpening 87 brake adjustment 72 parking 23 pedal freeplay adjustment 72 pedal operation 18 wear indicator 73 C carburetor 94 clutch pedal adjustment 67 operation 1...

Page 127: ...75 left right adjustment 76 removal 73 specifications 109 mower safety 6 7 8 9 10 37 mowing on slopes 7 38 mowing patterns 42 mowing tips 40 Mowing precautions 28 N neutral 16 O oil capacity 59 changi...

Page 128: ...62 steering 31 storage preparation 97 storage 100 storage removal 101 T throttle 30 31 positions 17 tire pressure 68 transmission adjustment 94 control 16 specifications 109 usage 31 transmission hyd...

Page 129: ......

Page 130: ......
Reviews: