4
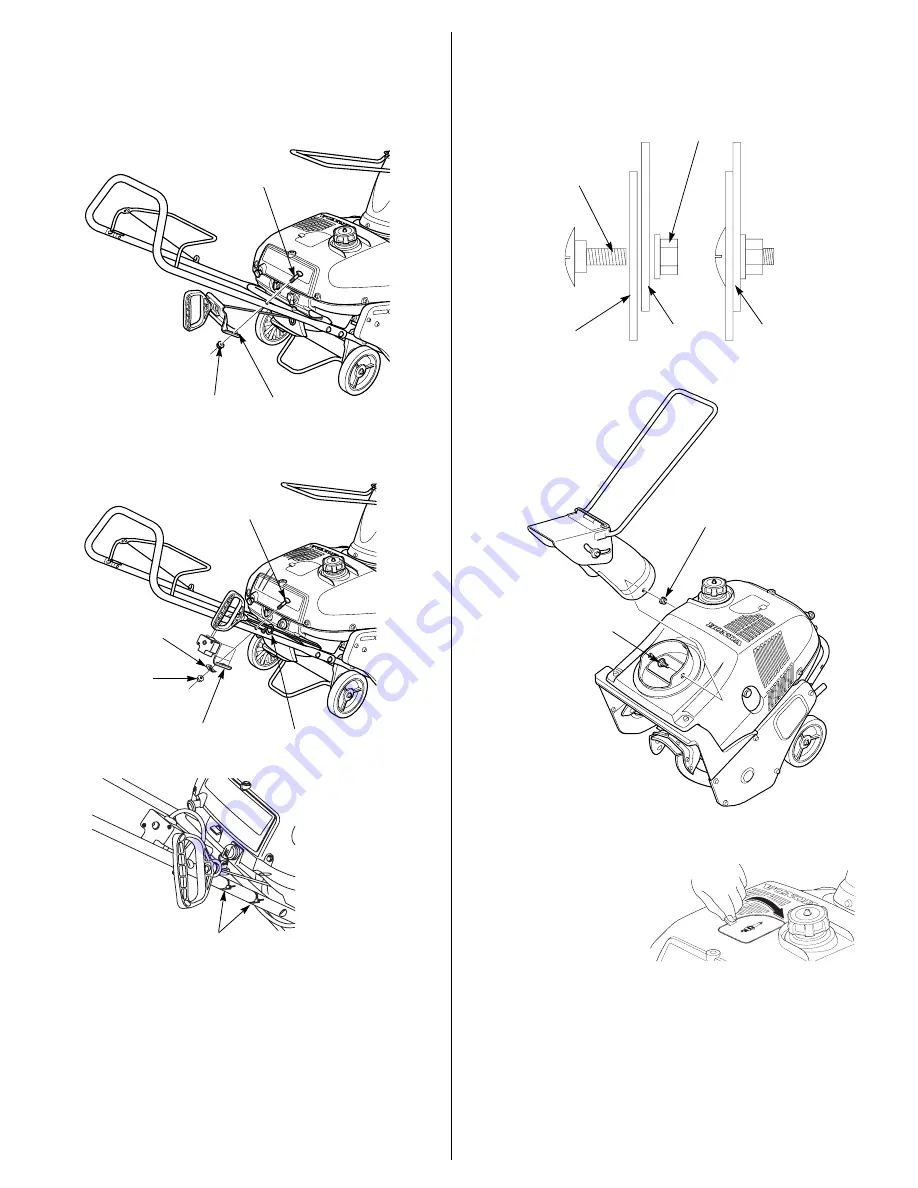
3. Install the starter bracket using the hardware removed from step 2
on the previous page. For the HS520AS, snap the starter rope into
the rope guide on the handlebar and secure the electric start wire
using the two cable ties as shown. Trim the cable ties to a length of
3/8 inch (10 mm).
4. Install the discharge chute using the three 6 mm Phillips-head
screws and 6 mm self-locking nuts. Make sure the screws go on
the inside and the nuts on the outside.
Tighten the nuts securely
:
HEX NUT TORQUE:
7 ft-lbs (10 N•m)
5. Lift the spark plug door and
attach the spark plug cap to
the spark plug.
6. Remove any packing material from the side of the snowthrower.
HS520A
FLANGE NUT
CURVED
HEAD BOLT
STARTER
BRACKET
HS520AS
ELECTRIC
STARTER
BRACKET
FLANGE
NUT
CURVED
HEAD BOLT
ROPE GUIDE
CABLE TIE (2)
9 mm
CURVED
WASHER
PHILLIPS-HEAD
SCREW (3)
6 mm NUT (3)
PHILLIPS-HEAD
SCREW (3)
6 mm NUT (3)
CHUTE BASE
CHUTE
CORRECTLY
ASSEMBLED
Summary of Contents for Harmony HS520A
Page 22: ...NOTES ...


