6.7
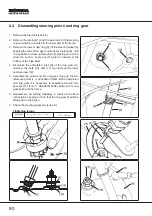
Dismantling rear wheel axle
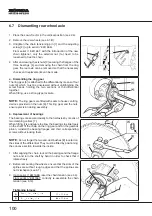
1. Place the Lawn-Tractor in the vertical position (see
2.4).
2. Remove the rear wheels (see 6.1.B)
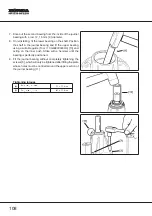
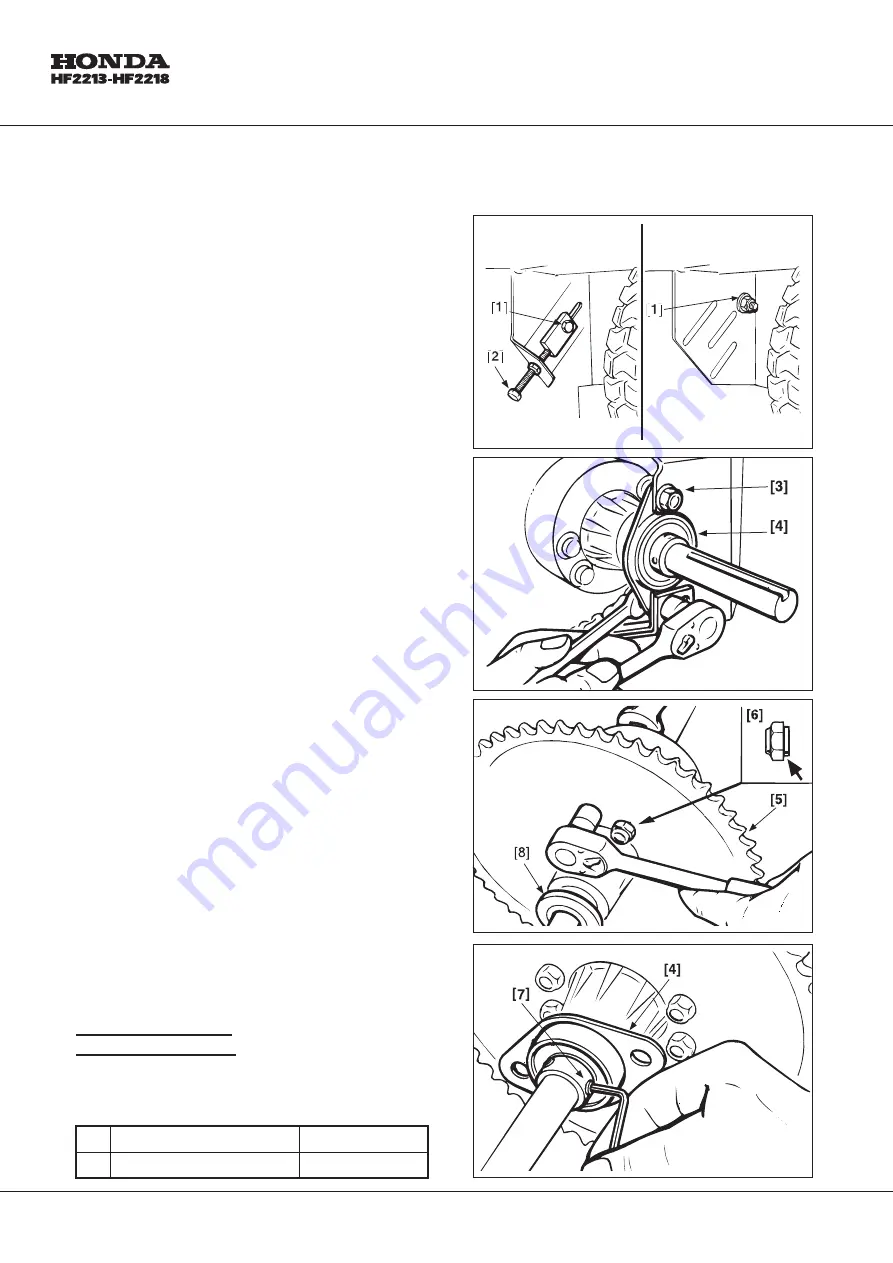
3. Untighten the chain tensioning pin [1] and the adjusting
screw [2] (up to serial n° 8611666).
From serial n° 8611667, with the introduction of the new
chain tightener, only the external nut (1a) need to be
loosened to free the chain.
4. After unscrewing the six nuts [3] securing the flanges of the
three bearings [4] and removing the chain from the ring
gear, the rear axle can be removed so that the necessary
checks and replacements can be made.
a. Dismantling the ring gear
The ring gear [5] is attached to the differential by means of four
nuts [6] which must be unscrewed without untightening the
screw heads holding the two sections of the differential
together.
When fitting, use a strong type lockwire.
NOTE:
The ring gears are fitted with seats to house centring
devices provided on the nuts [6]. This ring gear and the nuts
ensure precision during assembly.
b. Replacement of bearings
The bearings are secured axially to the half-axles by means of
two clamping collars [7].
When fitting, it is advisable to allow the bearings to slide freely
on the shaft: fit the chain on the ring gear and on the gearbox
pinion, reinstall the bearing flanges and their corresponding
screws without locking them.
NOTE:
Do not forget the two anti-dust bushes [8] located on
the sides of the differential. They must be fitted by positioning
the concave section towards the inside.
1. After aligning the chain, lock all the bearings and the flange
nuts, and turn the shaft by hand in order to check that it
rotates freely.
2. Before remounting the wheels, ensure that the slots of the
splines are without rough edges and that the splines are
not misshapen (see 6.1).
3. Up to serial n° 8611666: reset the chain tension (see 4.3).
From serial n° 8611667: correctly re-assemble the chain
tension (see 6.12).
Tightening torques
[3]
Bearing flange fixing nuts
30 ÷ 35 Nm
[5]
Ring gear fixing nuts
28 ÷ 30 Nm
100


