5.6
Removal of the engine
Given that differing engines are used, the stages described
here are those the same as or similar for all engines.
1. Remove the front hood (see 5.1.).
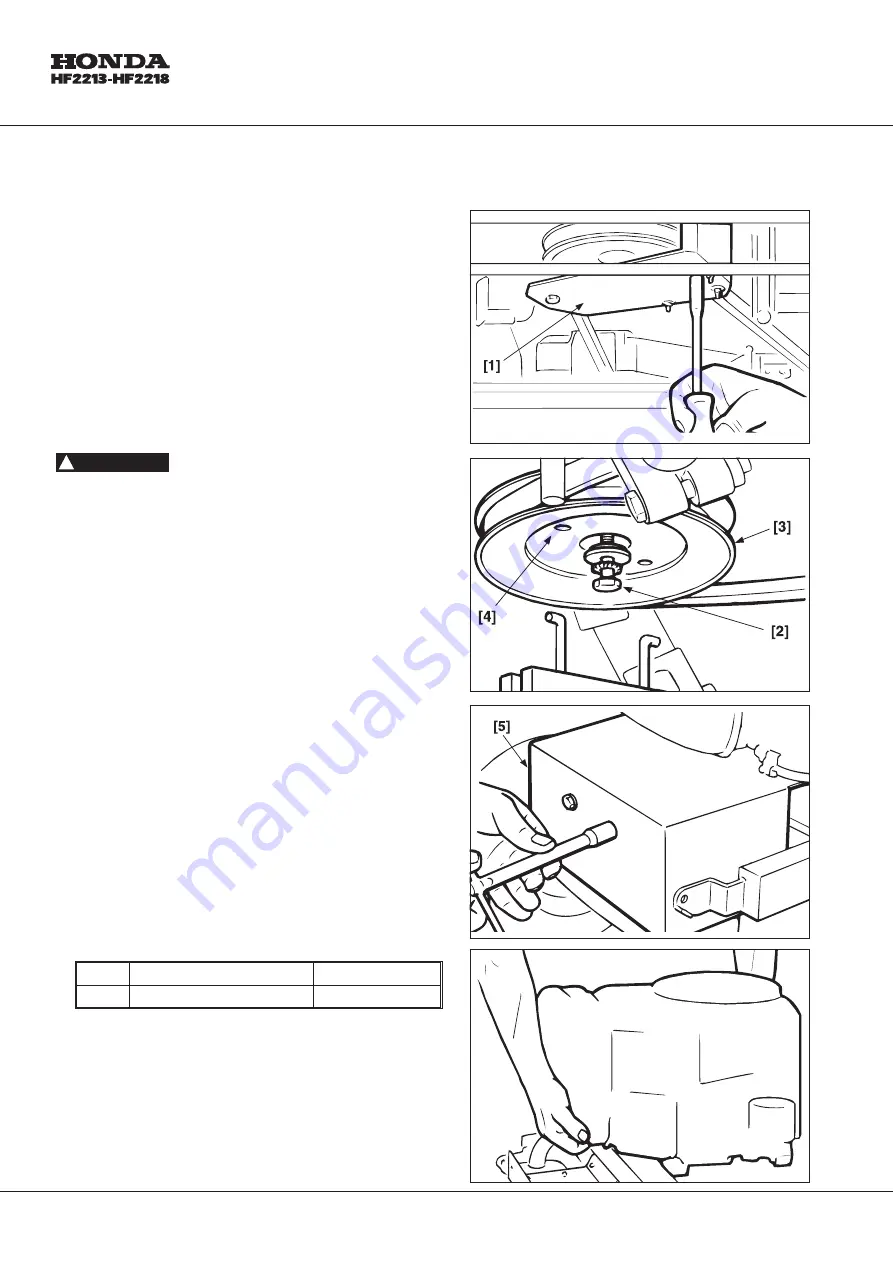
2. Remove the casing [1] attached by two screws (when
provided).
3. Unscrew the central screw [2] and remove the pulley [3]
f r o m t h e s h a f t w i t h a s p e c i a l e x t r a c t o r ( T o o l
n°
CG60253000H0), using the holes [4] in the pulley.
4. Remove the exhaust protector [5], and disconnect all the
cable controls and all the electric wires.
·
Take off the fuel hose, taking care not to allow any
petrol leak.
·
Find and undo all the screws fastening the engine to
the frame. Hold on firmly to the engine and lift, taking
care when doing so.
NOTE:
Some types of engine are provided with attachment
by screws of different lengths and different positions. It is,
therefore, a good idea to mark them to avoid any mistake
during reassembly.
1. On re-assembly, fully tighten the screws for the engine and
pulley to the amounts shown.
2. Carefully reconnect the earth connection and reinstall the
various protective devices.
Tightening torques
[2]
Pulley fixing screw
30 ¸ 35 Nm
_
Engine fixing screws
40 ¸ 45 Nm
!
WARNING :
78


