6.4 DISMANTLING AND REPLACEMENT
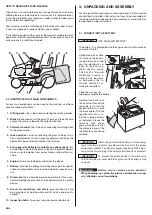
6.4.1 Oil engine
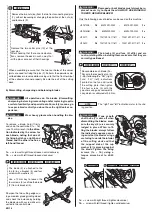
Drain the oil while the engine is still hot to ensure quick, complete
draining.
Remove the filler cap with the dipstick and place a sheet of cardboard
or something similar under the drain tube to prevent the oil from
dripping onto the machine’s chassis.
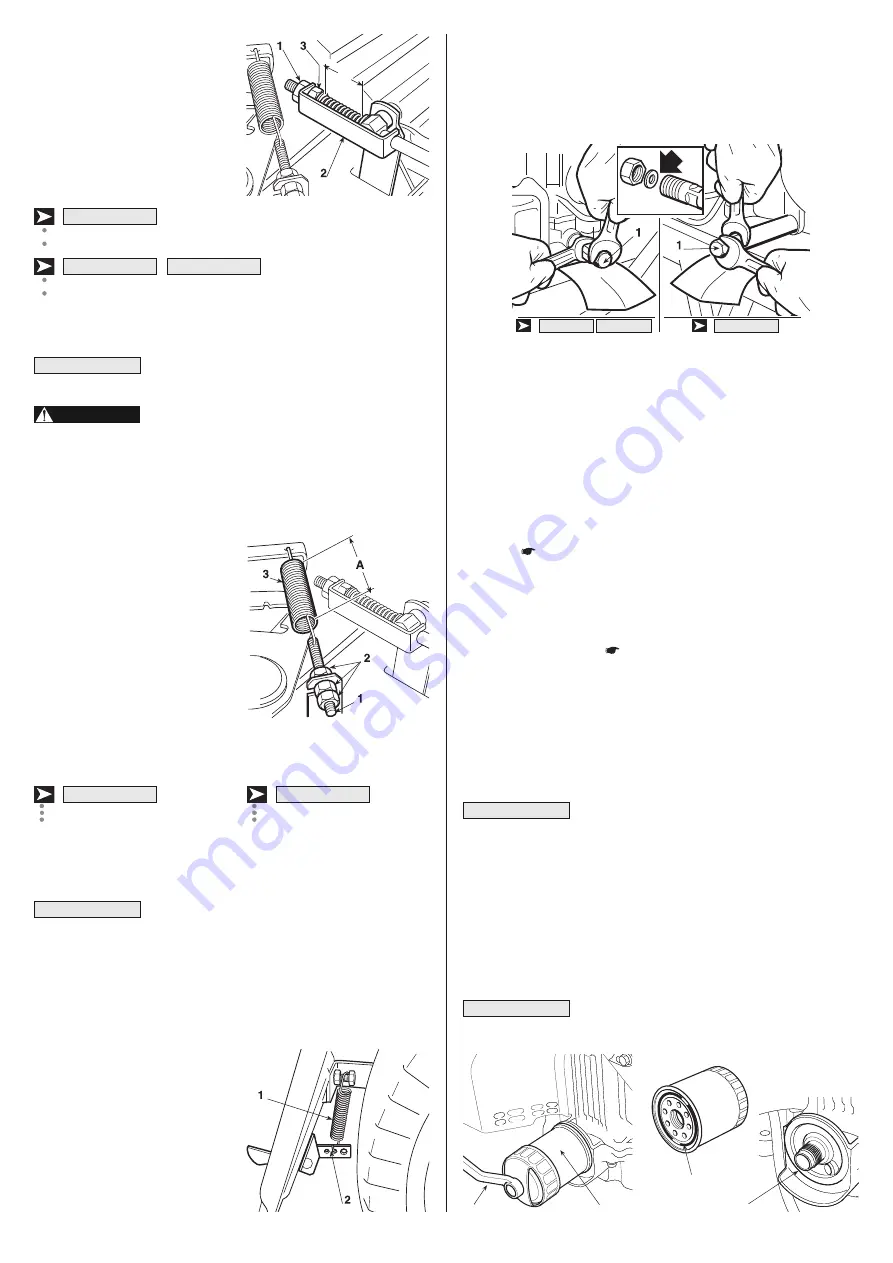
Unscrew plug (1); when refitting the plug take care over the position
of the inner gasket.
Fill with the recommended oil until the upper limit of the dipstick is
reached (
5.3.3). Screw the dipstick cap back on.
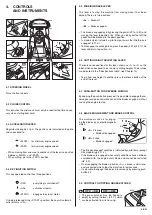
6.4.2 Oil filter change (only
HF2622H
◊
••
)
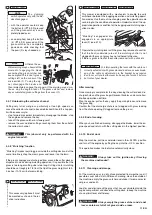
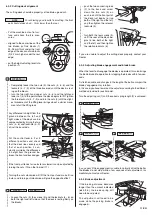
1. Drain the engine oil (
6.4.1).
2. Remove the oil filter (1) with a filter wrench (2) and let the re-
maining oil drain out. Discard the oil filter.
3. Clean the filter base (3).
4. Coat the new O-ring (4) on the new filter with clean engine oil.
5. Install the new oil filter on the filter base and tighten it by hand un-
til the O-ring seats against the filter base.
6. Tighten the oil filter to the specified torque (12 Nm - 1.20 kgm).
Use only a Honda genuine oil filter or a filter of
equivalent quality specified for your model.Using the wrong Honda
filter or a non-Honda filter which is not of equivalent quality may
cause engine damage.
7. Pour the specified amount of recommended oil into the engine.
Start the engine and check the filter for leaks.
8. Stop the engine and recheck the oil level. If necessary, add oil to
bring it up to the proper level.
Ask your authorized Honda dealer for advice on
the filter wrench (special tool).
NOTE
IMPORTANT
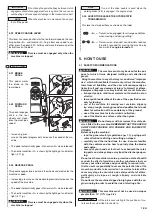
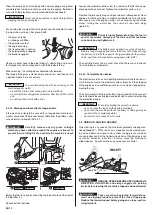
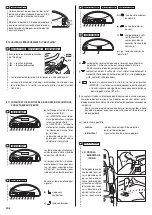
Access for making this adjustment
is by taking off the inspection hatch
on the tunnel beneath the seat.
Loosen the nut (1) which holds the
bracket (2) and turn the nut (3) un-
til the length of the spring is:
A
= 47,5 - 49,5 mm
B
= 45 - 47 mm
measured inside the washers.When the adjustment has been made,
tighten the nut (1).
Do not screw below these levels to avoid over-
loading the brake unit.
If the brake still does not work properly even
after this adjustment, immediately contact your Dealer . DO
NOT ATTEMPT OTHER WORK ON THE BRAKE THAN DE-
SCRIBED HERE.
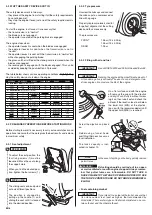
6.3.5 Adjusting the tension of the drive belt
If you should notice that forward
drive power has dropped, it will be
necessary to adjust the tension of
stretcher’s spring to return to top
operational conditions.
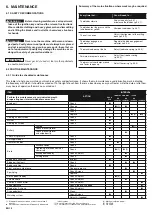
Access for making this adjustment
is by taking off the inspection hatch
on the tunnel beneath the seat.
Loosen the locking nuts (2) and
tighten or loosen the screw (1) as
much as necessary for a length
«A» of the spring (3) of:
A
= 129 - 131 mm
A
= 109 - 111 mm
measured to the outside of the end of the spring. When the adjust-
ment has been made, tighten the nuts (2).
When replacing the belt, take great care when us-
ing for the first few times as engagement may be sudden until the
belt is sufficiently run in.
6.3.6 Adjustment of the spring of the pawl for hooking
the grass-catcher
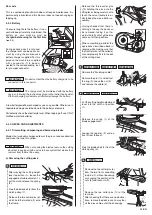
If the grass-catcher tends to jump
about and to open up when going
over rough ground, or if it is difficult
to hook back on after being emp-
tied, the tension of the spring will
need to be adjusted(1).
Change the hooking point by using
one of the holes (2) until the re-
quired result is achieved.
NOTE
HF2315SB•
HF2•••H
♦
•
WARNING!
IMPORTANT
HF2•••HT•
HF2•••HM•
HF2•••SB•
18
EN
1
2
3
4
HF2622
◊
••
HF24••
◊
••
HF23••
◊
••
A
B
B

