background image

Current customer service contact information: 

 
United States, Puerto Rico, and U.S. Virgin Islands: 

Honda Power Equipment dealership personnel are trained professionals. They should 
be able to answer any question you may have. If you encounter a problem that your 
dealer does not solve to your satisfaction, please discuss it with the dealership's 
management. The Service Manager or General Manager can help. Almost all problems 
are solved in this way.  

If you are dissatisfied with the decision made by the dealership's management, contact 
the Honda Power Equipment Customer Relations Office. You can write: 

American Honda Motor Co., Inc. 
Power Equipment Division 
Customer Relations Office 
4900 Marconi Drive 
Alpharetta, GA 30005-8847 

Or telephone: (770) 497-6400 M-F, 8:30 am - 7:00 pm EST 

When you write or call, please provide the following information: 

  Model and serial numbers 

  Name of the dealer who sold the Honda power equipment to you 

  Name and address of the dealer who services your equipment 

  Date of purchase 

  Your name, address, and telephone number 

  A detailed description of the problem 


Summary of Contents for HRA-21

Page 1: ......

Page 2: ......

Page 3: ...Motor Co Ltd reserves the right to make changes at any time without notice and without incur ring any obligation Any powered product can be a potential source of danger if misused or improperly mainta...

Page 4: ...without written permission The Honda rotary mower is designed to give safe and dependable service if operated according to instructions and intended use mowing cutting grass and bagging cut grass whe...

Page 5: ...CONTENTS 3 GENERAL SAFETY 4 COMPONENT IDENTIFICATION 5 THECONTROLS 7 OPERATION 9 TRANSPORTING STORAGE 18 MAINTENANCE 21 TROUBLESHOOTING 33 SPECIFICATIONS 34 3...

Page 6: ...front of self propelled mowers when the engine is running Someone may accid entally engage the drive clutch Keep clear of the discharge opening when the bag is not attached to avoid being hit by a fly...

Page 7: ...ENT IDENTIFICATION GRASS BAG HANDLE FUEL TANK CAP AIR CLEANER 1 SPARK PLUG CAP RECOIL STARTER CUTTING HEIGHT ADJUSTING LEYER MUFFLER ROTO STOP LEVER THROTTLE LEVER GRASS BAG ENGINE OIL DRAIN PLUG SDA...

Page 8: ...DRIVE CLUTCH LEVER 1 HANDLE GRASS BAG GRIP lSC ARGE G OIL FILLER CAP REAR SHIELD 6...

Page 9: ...STOP All TYPES To put the cutting blade into operation press the button on top of the ROTO STOP lever and push the lever forward holding it against the handlebar The blade will stop when the ROTO STO...

Page 10: ...ore either of these levers can be moved forward the cutting blade must be put into operation when ever the mower is to be self propelled When the drive clutch lever is released the drive clutch is dis...

Page 11: ...p the blade from striking them Never delibera tely mow over any object Stop the engine immediately if the blade hits an object or the mower starts to vibrate Remove the spark plug cap keep the wire aw...

Page 12: ...facturers requirements for service classification SE or SF Motor oils clas sified SE or SF will show this designation on the container SAE low 40 is recommended for general all tem perature use If sin...

Page 13: ...with the engine stopped Do not smoke or allow flames or sparks in the area where the mower is refueled or where gasoline is stored Be careful not to spill fuel when refueling Fuel vapor or spilled fue...

Page 14: ...ly without adequate ventilation through the bag Make sure the lock lever is latched securely 4 Check the blade bolts for tightness Torque 455 5 kg m 32 5 39 8 ft lb To be certain that the engine will...

Page 15: ...ever run the mower in an enclosed area Be sure to provide adequate ventilation 1 Move the throttle lever to CHOKE NOTE Do not use CHOKE when the engine is warm or the air temperature is high Move the...

Page 16: ...it by hand 5 After the engine warms up move the throttle lever to HI Squeeze the ROTO STOP to start the blade SDA and SDAW TYPES Engage the drive clutch ROTO STOP Mower will move forward NOTE The thr...

Page 17: ...g When re installing the plug thread it in by hand until it seats Then tighten it an additional l 8 l 4 turn with the spark plug wrench to compress the washer 3 Move the throttle to HI turn on the fue...

Page 18: ...to raise or lower the blade height 3 Release the lever in the appropriate notch 4 Adjust the other three wheels Make sure all four wheels are at the same level Be careful not to touch the muffler when...

Page 19: ...will result in poor grass chuting and a wet bag will clog quickly Removale q Remove the grass bag grip from handle pipe a Push the door latch down q Pull the grass bag rear ward while pushing the doo...

Page 20: ...r it will be stored for longer than 30 Turn the fuel valve OFF when transporting the days mower To avoid fuel and oil spillage do not tilt the unit spilled fuel may ignite 1 Drain the fuel tank and ca...

Page 21: ...explosive un der certain conditions Do not smoke or allow flames or sparks in the area 2 Change the engine oil p 23 NOTE If the mower will be stored for longer than a year remove the spark plug and p...

Page 22: ...5 Cover the mower and store it on a level surface in a dry dust free area Removal From Storage 1 Remove the spark plug check that it is clean and properly gapped p 25 Pull the starter rope sev eral ti...

Page 23: ...performance is to be maintained Regular maintenance will also help to extend service life The required service intervals and the kind of maintenance to be performed are des cribed in the chart on the...

Page 24: ...lts Tightness Check 0 I brass bag Check 0 Throttle cable Adjust I I 0 Drive belt Inspection I 0 Drive clutch cable Adjust 0 XOTO STOP cable Adjust 0 tOTO STOP Check __ 0 gnition timing Check Adjust 0...

Page 25: ...lete draining 1 Remove the tiller cap dipstick using a screwdriver asillustrated 2 Remove the dram bolt drain the oil and retighten the bolt securely 3 Refill to the Upper level mark with the recom me...

Page 26: ...queeze out all the excess The engine will smoke during initial start up if too much oil is left in the foam 3 Paper element Tap the element lightly several times on a hard surface to remove excess dir...

Page 27: ...er gauge it should be 0 6 0 7 mm 0 024 0 028 in If ad justment is necessary bend the side electrode care fully 4 Make sure the sealing washer is in good condition then thread the spark plug in by hand...

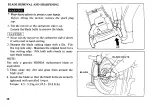
Page 28: ...wn It will result in hard starting 2 Sharpen the blade cutting edges with a file File the top side only Maintain the original bevel for a fine cutting edge File both ends evenly to main tain blade bal...

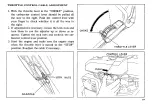
Page 29: ...check whether it is all the way to the right 2 If adjustment is necessary loosen the lock nuts and turn them to run the adjuster up or down as re quired Tighten the lock nuts and recheck the car buret...

Page 30: ...mm 3 16 3 8 in 2 If adjustment is necessary loosen the lock nuts and turn them to run the adjuster up or down as re quired Tighten the lock nuts and reckeck free play 3 Start the engine and operate th...

Page 31: ...ould be between 7 12 mm 9132 l 5132 in 2 If adjustment is necessary loosen the lock nuts and turn them to run the adjuster up or down as required Tighten the lock nuts and recheck free play 3 Start th...

Page 32: ...orized Honda dealer unless the owner has the proper tools and is mechanically proficient 1 Move the throttle lever to IDLE and start the engine 2 Turn the throttle stop screw either in or out as requi...

Page 33: ...ure its upper sides to the upper frame with two nuts 3 Turn the bag upside down Install the lower frame with the lipped edge forward and secure 4 Insert the lower plate into the bag and secure it with...

Page 34: ...GRA 5 Install the grass bag handle onto the upper frame with two cap nuts as shown 6 Install the grass bag grip by putting its ends in the pivot hole on the rear end of the anti sag rod 32...

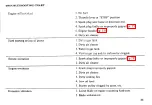
Page 35: ...or loss of power 1 Dirt in gastank 2 Dirty air cleaner 3 Water in gastank Erratic operation Engine overheats 4 Vent in gascap and or carburetor clogged I Spark plug faulty or improperly gapped p 25 2...

Page 36: ...on timing 20 BTDC Fixed Ignition system Flywheel magneto ignition Engine oil capacity 0 6 l 0 63 US qt Fuel tank capacity 1 0 1 0 26 US gal Spark plug BMRdA NGK WQOMR U ND FRAME Dimensions Length x Wi...

Page 37: ......

Page 38: ......

Page 39: ......

Page 40: ...is way If you are dissatisfied with the decision made by the dealership s management contact the Honda Power Equipment Customer Relations Office You can write American Honda Motor Co Inc Power Equipme...

Page 41: ......

Reviews: