HRR216PKA
FUEL SYSTEM
7-7
CHOKE CONTROL ASSEMBLY
Thermowax Removal
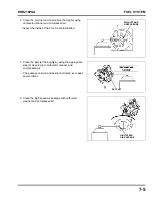
Remove the existing thermowax from the cylinder barrel.
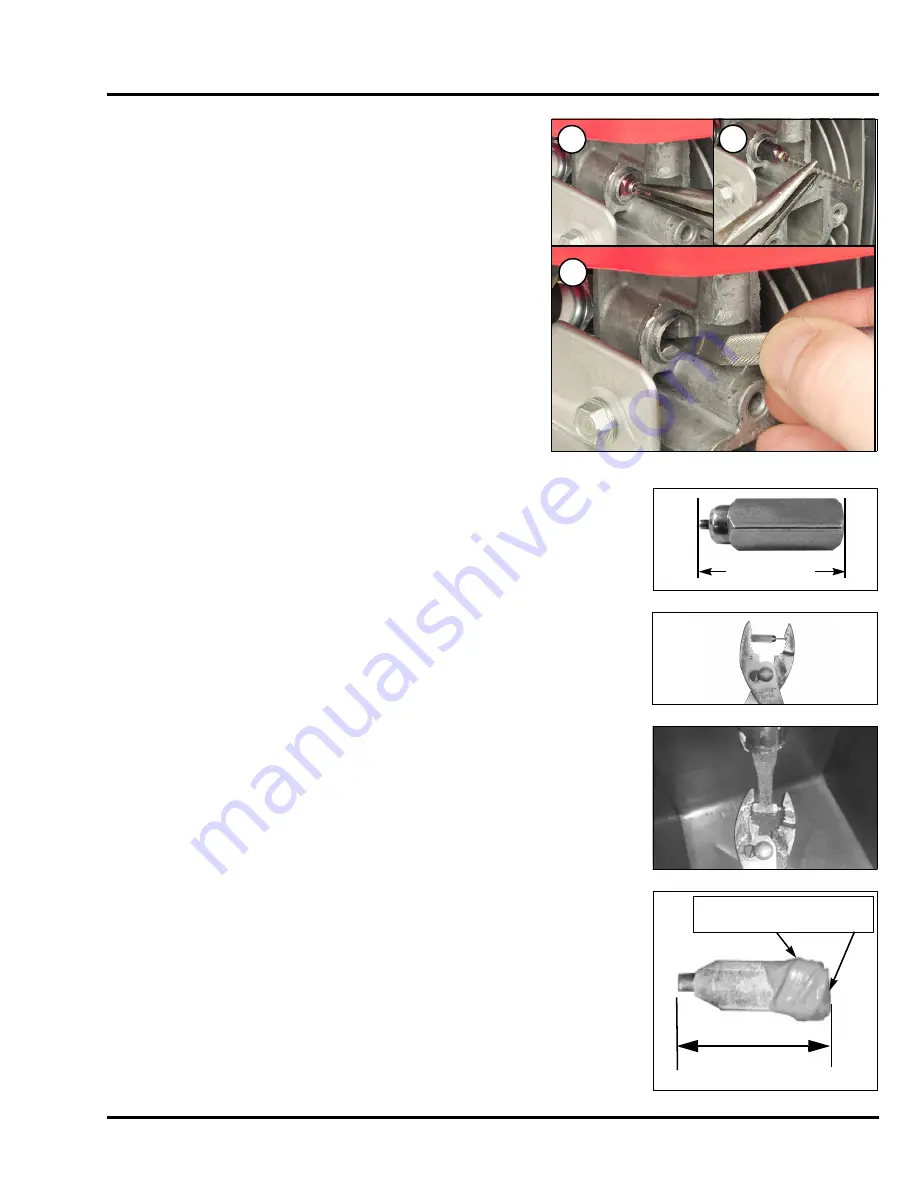
If the existing thermowax is bonded in place with RTV sealant:
a. Using small pliers or wire cutters, pull the center pin out of
the thermowax (a). If you cannot grab the center pin, apply
heat to the thermowax using a heat gun until the center pin
extends.
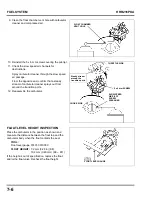
b. Screw a No. 6 sheet metal or drywall screw into the
thermowax body, and then carefully pry the thermowax out
(b). Use the side of the valve cover as a prying surface. Do
not pry against the intake port gasket sealing surface.
c. Use a small scraper, brake cleaner, and compressed air to
remove the remaining sealant from the cavity (c). Remove
as much sealant as possible, especially from the back of
the cavity.
Thermowax Installation
The thermowax plunger MUST be fully retracted and the overall length of the
thermowax must be no more than 23 mm before installation.
If the thermowax plunger is not fully retracted, proceed with the steps below to
fully retract the plunger prior to reassembly.
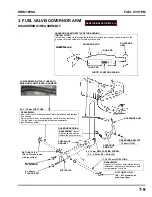
1. Position a pair of pliers on the thermowax assembly as shown.
Do not
apply force yet
.
2. Place the thermowax under warm tap water (not exceeding 40 °C or 104 °F)
and gently squeeze pliers until the plunger is fully retracted.
Be careful not to apply too much force or bend the thermo plunger. Only
15 N (3.4 lbs) of force is required to push the plunger in.
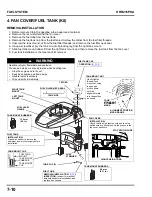
3. Inspect the thermowax for any wax leakage. If any wax is visible, replace the
thermowax.
4. Measure the thermowax’s retracted length. If it measures less than
21.5 mm, it must be replaced
a
b
c
23 mm MAX
Length greater than
21.5 mm (0.846 in)
Hondabond HT application
area; sides and end.
Summary of Contents for HRR216PKA
Page 5: ...iv HRR216PKA NOTES...
Page 9: ...SPECIFICATIONS HRR216PKA 1 4 NOTES...
Page 45: ...MUFFLER HRR216PKA 5 2 NOTES...
Page 49: ...RECOIL STARTER HRR216PKA 6 4 NOTES...

