
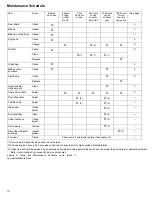
5
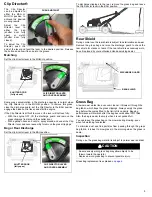
Clip Director®
The Clip Director
can be adjusted to
either the BAG or
MULCH position to
achieve the desired
mowing results.
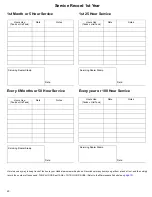
Adjust the Clip
Director lever to
either the bag
(shutter door fully
open) or mulch
(shutter door fully
closed).
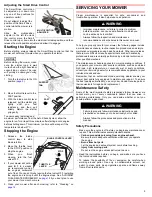
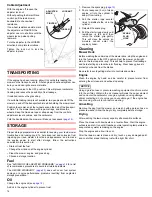
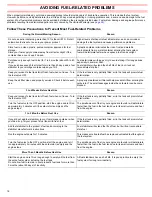
To adjust the Clip
Director, push the
end of the lever and twist the lever to the desired position. Release
the button and allow it to snap into the groove.
Mulching
Set the clip director lever in the MULCH position.
Some grass accumulation in the discharge opening is normal when
the Clip Director is in the MULCH position. To remove this grass,
close the discharge guard, set the Clip Director to the BAG position,
engage the blade control lever, and start the engine
If the Clip Director is difficult to move or the lever will not lock fully:
• With the engine OFF, lift the discharge guard and remove the
grass clippings from around the shutter door
• With a garden hose and nozzle, spray around and under the Clip
Director lever and cover assembly to remove the grass clippings
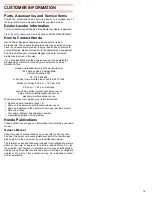
Bag or Rear Discharge
Set the clip director lever in the BAG position.
To discharge clippings to the rear, remove the grass bag and leave
the Clip Director lever in the BAG position.
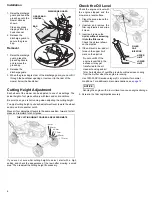
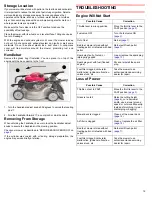
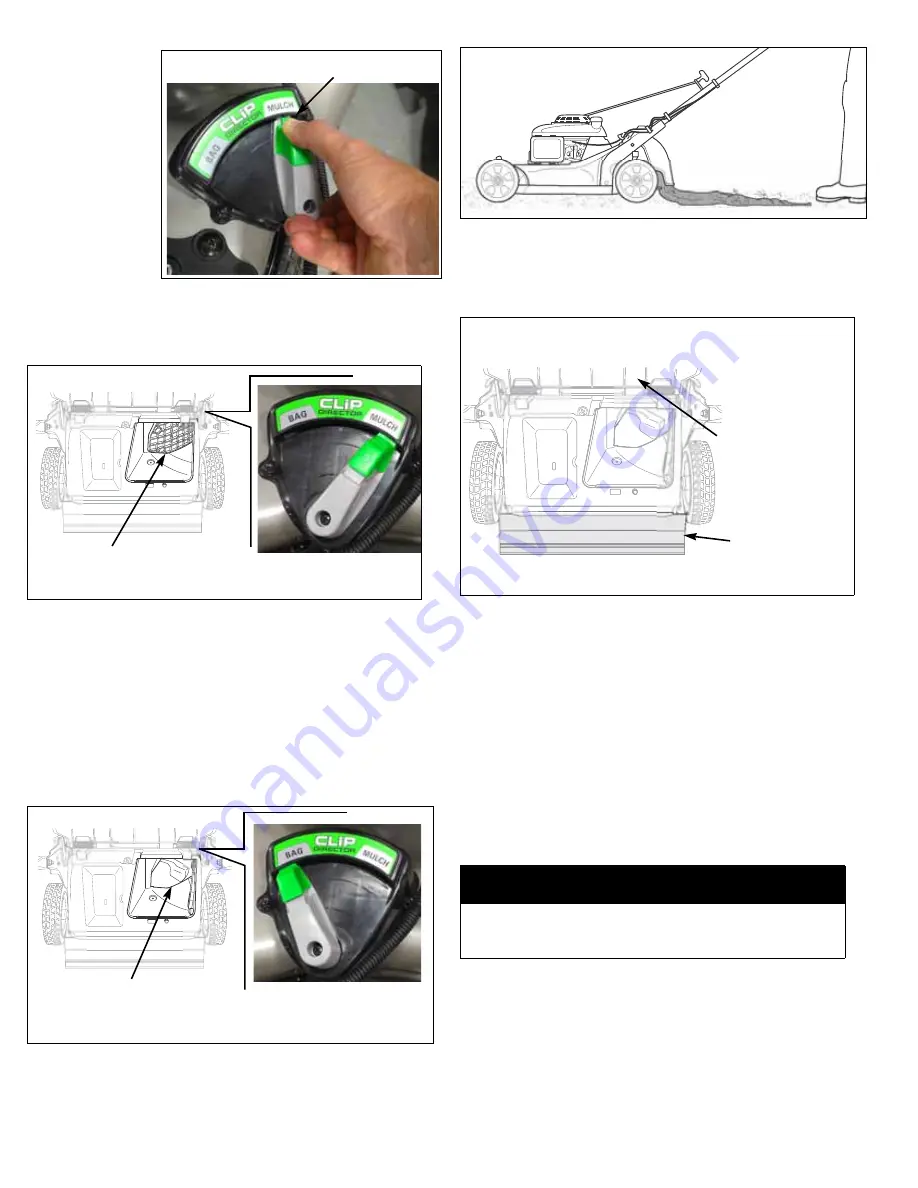
Rear Shield
During normal use the rear shield is subject to deterioration and wear.
Remove the grass bag and raise the discharge guard to check the
rear shield for cracks or tears. If the rear shield is excessively worn,
have it replaced by your authorised Honda servicing dealer.
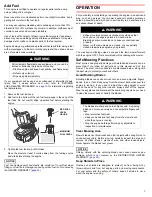
Grass Bag
A lawn mower works like a vacuum cleaner; it blows air through the
bag fabric, which traps the grass clippings. Always empty the grass
bag before it becomes filled to the limit of its capacity. Bagging
performance will diminish after the bag becomes about 90% filled.
Also, the bag is easier to empty when it is not packed full.
You can leave the grass bag on the mower during mowing, even
when full mulching is selected.
To minimize dust and fine particles from passing through the grass
bag fabric, it is best to mow grass in the morning when the grass is
damp.
Inspection
During use, the grass bag material is subject to normal wear and tear.
Grass bag replacement is explained on
PUSH AND TWIST
CLIP DIRECTOR LEVER
AND COVER ASSEMBLY
SHUTTER DOOR
(fully closed)
SHUTTER DOOR
(fully open)
CLIP DIRECTOR LEVER
AND COVER ASSEMBLY
CAUTION
An excessively worn grass bag may allow objects to be
thrown toward the operator.
Replace a worn grass bag to prevent possible injury.
REAR SHIELD
DISCHARGE GUARD
Summary of Contents for HRR216VYUA
Page 23: ...23 ...
Page 24: ...24 www hondampe com au HPE 2014 06 Printed in U S A ...


