

4
BEFORE EACH OPERATION
Your safety is your responsibility. A little time spent in preparation will
significantly reduce your risk of injury.
Read and understand this manual. Know what the controls do and
how to operate them.
Familiarize yourself with the lawn mower and its operation before you
begin using it. Know how to quickly shut off the lawn mower in case of
an emergency.
Check Your Mower
For your safety, and to maximize the service life of your lawn mower, it
is very important to take a few moments before you operate the lawn
mower to check its condition. Be sure to take care of any problem you
find, or have your servicing dealer correct it, before you operate the
lawn mower.
• Make sure the lawn mower is on a level surface
• Look around and underneath the lawn mower for signs of oil or
gasoline leaks
• Look for signs of damage
• Check each control for proper operation
• Check the blade for wear. Replace as necessary (
• Check that the blade bolts are tight (
)
• Check that all nuts, bolts, and screws are tightened
• Check the air filter (
) and oil level (
• Check the fuel level (
). Starting with a full tank will help to
eliminate or reduce operating interruptions for refueling.
Check Your Mowing Area
For your safety and the safety of others, always inspect the area
before operating the lawn mower.
Anything that can be picked up by the blade and thrown is a potential
hazard to you and others. Look for things like stones, sticks, nails, and
wire, and remove them from the lawn area.
People and animals near the lawn area can move into your lawn
mower’s path or into a position where they could be struck by thrown
objects. Clear the area of pets and people, especially children. Their
safety is your responsibility. Use extra care when approaching blind
corners, shrubs, trees, or other objects that may block your view of a
child.
Check the height and condition of the grass. Adjust your lawn mower
cutting height, ground speed, and mowing swath accordingly. See
for mowing tips and recommendations.
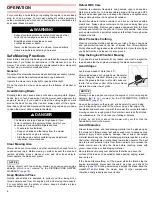
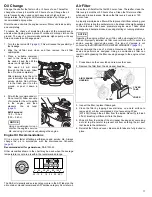
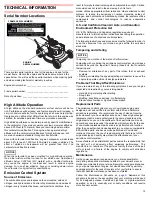
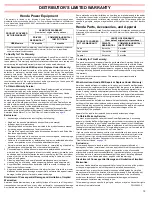
Rear Shield
During normal use the rear shield is subject to deterioration and wear.
Check the rear shield for cracks or tears. If the rear shield is
excessively worn, have it replaced by your authorized Honda
servicing dealer.
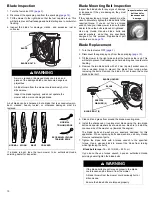
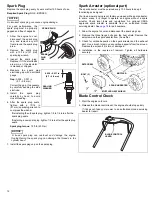
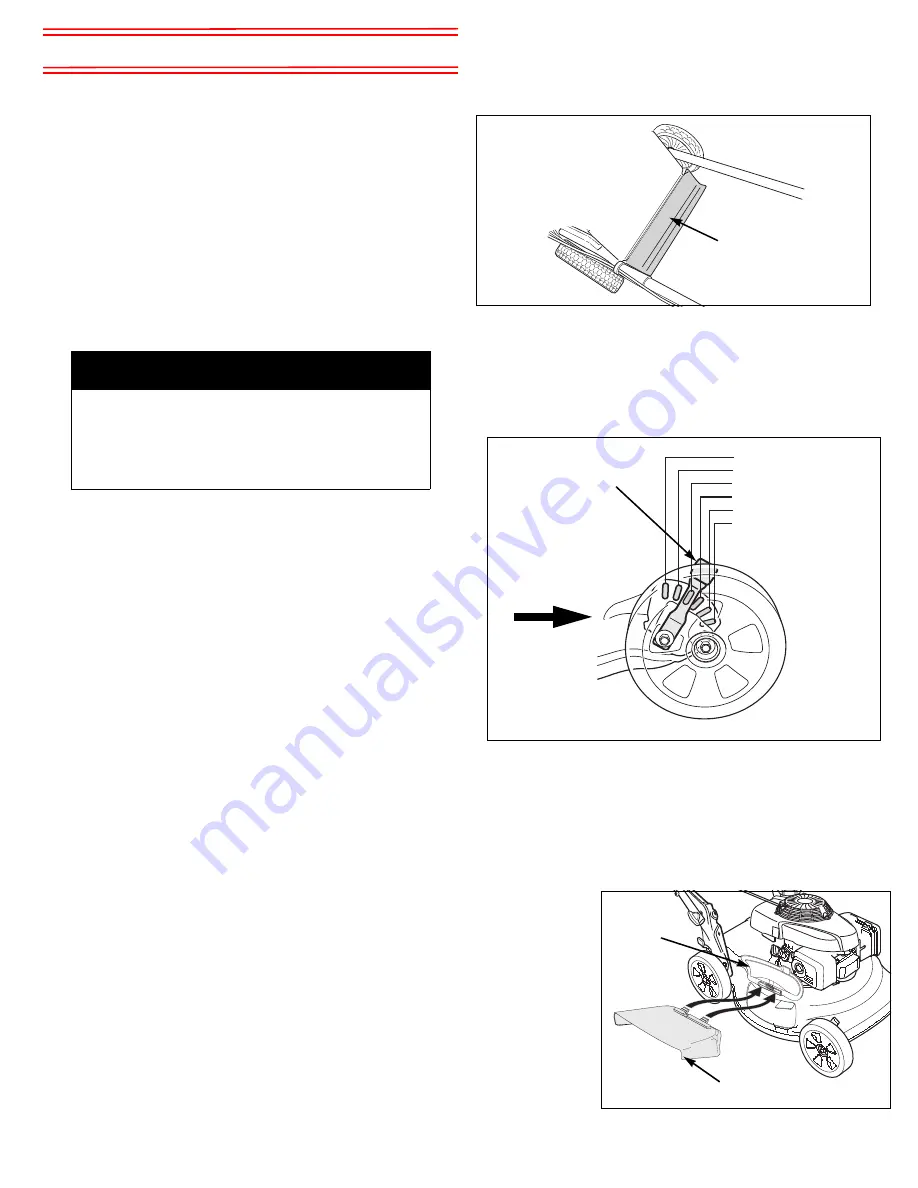
Cutting Height Adjustment
Each wheel of the mower can be adjusted to one of six settings. The
actual height of cut grass will vary with lawn and soil conditions.
Be sure the engine is not running when adjusting the cutting height.
To adjust cutting height, pull each adjustment lever toward the wheel,
and move it into another notch.
Move all four adjustment levers to the same position, forward for tall
grass and rearward for short grass.
If you are not sure what cutting height to select, start with a high
setting and check the appearance of the lawn after mowing a small
area. Then readjust the cutting height if necessary.
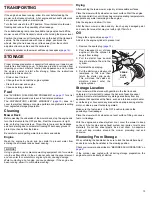
Side Discharge Chute
The mower can be used to mulch or side discharge grass clippings.
To mulch, make
sure the side
discharge chute is
not installed, and
the side discharge
guard on the
mower deck is fully
closed.
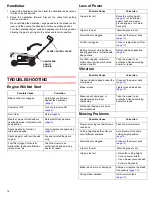
To discharge
clippings to the
side, stop the
engine, lift the side
door up, and install
the side discharge
chute as shown.
WARNING
Failure to properly maintain this lawn mower could
result in a significant malfunction.
Some malfunctions can seriously hurt or kill you.
Always perform a pre-operation inspection before each
operation, and correct any problem.
REAR SHIELD
1-1/8" (28 mm)
1-3/4" (44 mm)
2-1/2" (60 mm)
3" (75 mm)
3-1/2" (90 mm)
4" (102 mm)
FRONT
ADJUSTMENT
LEVER
RIGHT SIDE SHOWN -
FORWARD
SIDE
DISCHARGE
GUARD
SIDE DISCHARGE CHUTE
Summary of Contents for HRS216PKAA
Page 21: ...21 NOTES ...
Page 22: ...22 NOTES ...


