background image

7

Operating the Controls

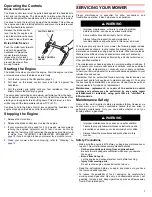
Blade Control Lever

The blade control lever must be pulled back against the handlebar to
start and run the engine. The blade starts to rotate when the lever is
pulled back against the handlebar and the recoil starter grip is pulled.

Continue to hold the lever fully against the handlebar. This will keep
the engine and blade rotating smoothly and prevent premature wear
to the flywheel brake system. 

Release the blade control 
lever to stop the engine and 
stop blade rotation whenever 
you need to leave the mower.

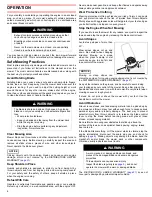
Drive Clutch Lever

Push the clutch lever forward 
and hold it against the 
handlebar to propel the 
mower forward. Always 
release the clutch lever 
before starting the engine to 
prevent the mower from 
moving forward.

Starting the Engine

The blade turns when you start the engine. Start the engine in a clear
or mowed area where the blade can turn freely.

1. Turn the fuel valve to the ON position (

page 3

).

2. Pull back on the blade control lever and hold it against the

handlebar.

3. Pull the starter grip lightly until you feel resistance, then pull

briskly. Return the starter grip gently.

To ensure easy restarting and maximum performance from the Auto 
Choke System, allow the engine to run for at least three minutes after 
starting a cold engine before shutting down. This minimum run time 
will be longer if the temperature is below 70°F (21°C).

Continue to hold the blade control lever against the handlebar; the
engine stops when the blade control lever is released.

Stopping the Engine

1. Release the clutch lever.

2. Release the blade control lever to stop the engine.

3. If your mower will not be used for 3 to 4 weeks, we recommend

running the engine’s carburetor out of fuel. You can do this by
leaving the fuel valve OFF, restarting the engine and running it until
it stops. See “AVOIDING FUEL-RELATED PROBLEMS” on

page 16

 if you don’t plan to use your mower for a month or more.

4. Clean your mower after each mowing; refer to “Cleaning” on

page 12

.

SERVICING YOUR MOWER

Proper maintenance is essential for safe, economical, and
trouble-free operation. It also helps reduce air pollution.

To help you properly care for your mower, the following pages include 
a maintenance schedule, routine inspection procedures, and simple 
maintenance procedures using basic hand tools. Other service tasks 
that are more difficult or require special tools are best handled by 
professionals and are normally performed by a Honda technician or 
other qualified mechanic.

The maintenance schedule applies to normal operating conditions. If
you operate your mower under severe conditions, such as sustained
high load, high temperature, or unusually wet or dusty conditions,
consult your servicing dealer for recommendations applicable to your
individual needs and use.

Remember that an authorized Honda servicing dealer knows your
mower best and is fully equipped to maintain and repair it. To ensure
the best quality and reliability, use only new, Honda Genuine parts or
their equivalents for repair and replacement.

Maintenance, replacement, or repair of the emission control
devices and systems may be performed by any engine repair
establishment or individual, using parts that are “certified” to
EPA standards

.

Maintenance Safety

Some of the most important safety precautions follow. However, we
cannot warn you of every conceivable hazard that can arise in
performing maintenance. Only you can decide whether or not you
should perform a given task.

Safety Precautions

 • Make sure the engine is off before you begin any maintenance or

repairs. This will eliminate several potential hazards:

Carbon monoxide poisoning from engine exhaust.

Be sure there is adequate ventilation whenever you operate
the engine.

Burns from hot parts.

Let the engine and exhaust system cool before touching.

Injury from moving parts.

Do not run the engine unless instructed to do so.

 • Read the instructions before you begin, and make sure you have

the tools and skills required.

 • To reduce the possibility of fire or explosion, be careful when

working around gasoline. Use only a nonflammable solvent, not
gasoline, to clean parts. Keep cigarettes, sparks, and flames away
from all fuel-related parts.

CLUTCH LEVER

BLADE CONTROL 
LEVER

 WARNING

Improper maintenance, or failure to correct a problem 
before operation, can cause a serious malfunction.

Some malfunctions can seriously hurt or kill you.

Always follow the inspection and maintenance 
recommendations and schedules in this owner’s manual.

 WARNING

Improper maintenance can cause an unsafe condition.

Failure to properly follow maintenance instructions and 
precautions can cause you to be seriously hurt or killed.

Always follow the procedures and precautions in this 
manual.

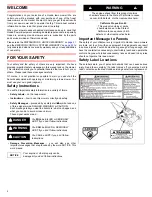
Summary of Contents for HRS216SKA

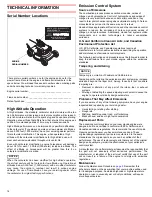
Page 1: ...4 Side Discharge Chute 4 Blade Control Check 11 Air Index 15 Check the Oil Level 5 TRANSPORTING 12 Specifications 15 Add Fuel 5 STORAGE 12 AVOIDING FUEL RELATED PROBLEMS 16 OPERATION 6 Fuel 12 CUSTOMER INFORMATION 17 Safe Mowing Practices 6 Oil 12 Parts Accessories and Service Items 17 Operating the Controls 7 Cleaning 12 Dealer Locator Information 17 Operating the Controls 7 Storage Location 12 H...

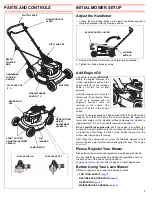
Page 2: ...ges preceded by a safety alert symbol and one of three signal words DANGER WARNING or CAUTION Each message tells you what the hazard is what can happen and what you can do to avoid or reduce injury These signal words mean Damage Prevention Messages you will also see other important messages that are preceded by the word NOTICE This word means California Proposition 65 This product contains or emit...

Page 3: ...oil If the engine is overfilled the excess oil may get transferred to the air cleaner housing and air filter An indication of overfilling is white or blue smoke coming from the muffler when the engine is running After filling the engine with oil screw the filler cap dipstick in and remove the hang tag near the recoil starter grip that says The engine has no oil Please Register Your Mower Please ta...

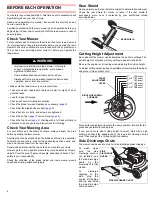
Page 4: ...ck by thrown objects Clear the area of pets and people especially children Their safety is your responsibility Check the condition of the grass Adjust your lawn mower ground speed and mowing swath accordingly Rear Shield During normal use the rear shield is subject to deterioration and wear Check the rear shield for cracks or tears If the rear shield is excessively worn have it replaced by your au...

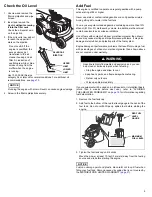
Page 5: ...ethanol or methanol greater than shown above may cause starting and or performance problems It may also damage metal rubber and plastic parts of the fuel system Engine damage or performance problems that result form using a fuel with percentages of ethanol or methanol greater than shown above are not covered under warranty If your equipment will be used on an infrequent or intermittent basis more ...

Page 6: ... the lawn ahead stop the engine by releasing the blade control lever Avoid Slopes Avoid steep slopes of more than 20 Mow across slopes not up and down Be careful when changing direction Mowing on a slope when the grass is damp or wet could cause you to slip fall and lose control of the mower NOTICE Mowing on steep slopes can starve the engine of oil causing engine damage that is not covered by the...

Page 7: ...le maintenance procedures using basic hand tools Other service tasks that are more difficult or require special tools are best handled by professionals and are normally performed by a Honda technician or other qualified mechanic The maintenance schedule applies to normal operating conditions If you operate your mower under severe conditions such as sustained high load high temperature or unusually...

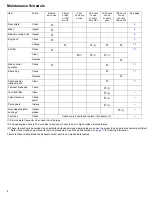
Page 8: ...e failures Item Action Before each use 5 hours of use or first month First 25 hours of use 50 hours of use or every 6 months 100 hours of use or every year 150 hours of use or every two years See page Rear shield Check O 4 Blade Inspect O 9 Blade mounting bolts Inspect O 9 Engine oil Check O 5 Change O O 2 O O 10 Air filter Check O 10 Clean O 1 O 1 O 1 Replace O Blade control operation Check O O 1...

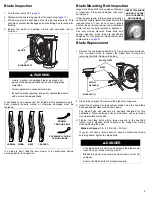
Page 9: ...nch Use a wooden block to prevent the blade from turning when removing the bolts Remove the blade 2 Clean dirt and grass from around the blade mounting area 3 Install the sharpened or replacement blade using the two blade bolts and special washers as shown below The blade bolts and washers are specially designed for this application When replacing bolts and washers use only Honda Genuine replaceme...

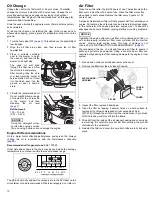
Page 10: ...AE oil viscosity and service category are in the API label on the oil container Honda recommends API service category SJ or later oil Air Filter Clean the air filter after the first 25 hours of use Thereafter clean the filter every 6 months or 50 hours of use Clean the filter more often when used in dusty areas Replace the filter every 2 years or 150 hours of use A properly maintained air filter w...

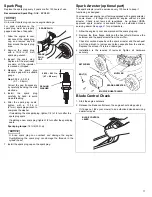
Page 11: ... engine Overtightening the spark plug can damage the threads in the cylinder head 7 Install the spark plug cap on the spark plug Spark Arrester optional part The spark arrester must be serviced every 100 hours to keep it functioning as designed Your lawn mower engine is not factory equipped with a spark arrester In some areas it is illegal to operate an engine without a spark arrester Check local ...

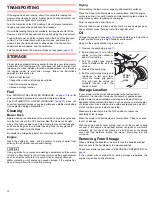
Page 12: ...nter the carburetor or engine cylinder causing damage Water contacting a hot engine can cause damage If the engine has been running allow it to cool before washing Drying After washing the lawn mower wipe dry all accessible surfaces Place the mower with its wheels on a level surface Start the engine outdoors and let it run until it reaches normal operating temperature to evaporate any water remain...

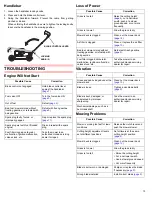
Page 13: ...ore frequently Grass is too wet Allow the grass to dry Mower deck is clogged Clean out the mower deck page 12 Air filter is clogged Clean or replace the air filter page 10 Bad fuel mower stored without treating gasoline or refueled with bad gasoline Refuel with fresh gasoline page 5 Fuel filter clogged carburetor malfunction ignition malfunction valves stuck etc Take the mower to an authorized Hon...

Page 14: ...ditionally Honda fuel systems utilize components and control technologies to reduce evaporative emissions U S and California Clean Air Acts and Canadian Environment Protection Act U S EPA California and Canadian regulations require all manufacturers to furnish written instructions describing the operation and maintenance of emissions control systems The following instructions and procedures must b...

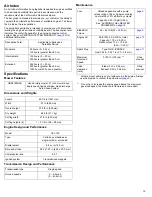
Page 15: ...ower deck single speed flywheel brake side discharge Auto Choke System Length 63 7 8 in 1621 mm Width 23 in 585 mm Overall height 37 3 8 in 948 mm Dry weight 68 6 lb 31 1 kg Cutting width 21 0 in 530 mm Cutting heights 6 1 3 1 2 in 26 88 mm Model GCV160 Type 4 stroke overhead cam single cylinder air cooled Displacement 9 8 cu in 160 cc Bore and stroke 2 52 x 1 97 in 64 0 x 50 0 mm Compression rati...

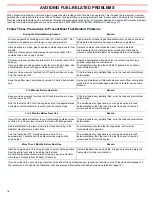
Page 16: ...ced Check it before each use A properly maintained air filter will help prevent dirt from entering the carburetor The small passages inside the carburetor can become blocked 3 to 4 Weeks Before Next Use Reason Keep your lawn mower s fuel tank full of fresh fuel when not in use Turn the fuel valve OFF If the fuel tank is only partially filled air in the tank will promote fuel deterioration With the...

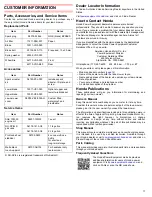
Page 17: ... it to the new owner if you resell the lawn mower The information and specifications included in this publication were in effect at the time of approval for printing American Honda Motor Co Inc reserves the right however to discontinue or change specifications or design at any time without notice and without incurring any obligation whatever No part of this publication may be reproduced without wr...

Page 18: ...18 NOTES ...

Page 19: ...19 NOTES ...

Page 20: ...20 NOTES ...

Page 21: ... implied warranty lasts and or do not allow the exclusion or limitation of incidental or consequential damages so the above exclusions and limitations may not apply to you This warranty gives you specific legal rights and you may also have other rights which vary from state to state Honda Parts Accessories and Apparel This warranty is limited to Honda Power Equipment parts accessories and apparel ...

Page 22: ...nterval only Honda will also replace other engine components damaged by a failure of any warranted part during the warranty period The use of replacement parts not equivalent to the original parts may impair the effectiveness of your engine emission control system If such a replacement part is used in the repair or maintenance of your engine and an authorized Honda dealer determines it is defectiv...

Page 23: ...your lawn mower does not diminish your warranty rights Please complete and mail the postage paid card or register online at powerequipment honda com AMERICAN HONDA MOTOR CO INC ALPHARETTA GA 30005 8847 HRS2165PKA XX MZBZ AMERICAN HONDA MOTOR CO INC ALPHARETTA GA 30005 8847 MEETS CPSC BLADE SAFETY REQUIREMENTS CONFORMS TO ANSI B 71 1 SAFETY STANDARD 1234567 Fill in your mowers serial number here ex...

Page 24: ...click Submit It s that simple Power Equipment Division American Honda Motor Co Inc 4900 Marconi Dr Alpharetta GA 30005 9956 NO POSTAGE NECESSARY IF MAILED IN THE UNITED STATES Product Registration BUSINESS REPLY MAIL FIRST CLASS MAIL ALPHARETTA GA PERMIT NO 117 POSTAGE WILL BE PAID BY ADDRESSEE HPE 2015 04 PRINTED IN U S A EM5 K5 ...

Reviews: