7 EN
ADJUSTING CUTTING HEIGHT
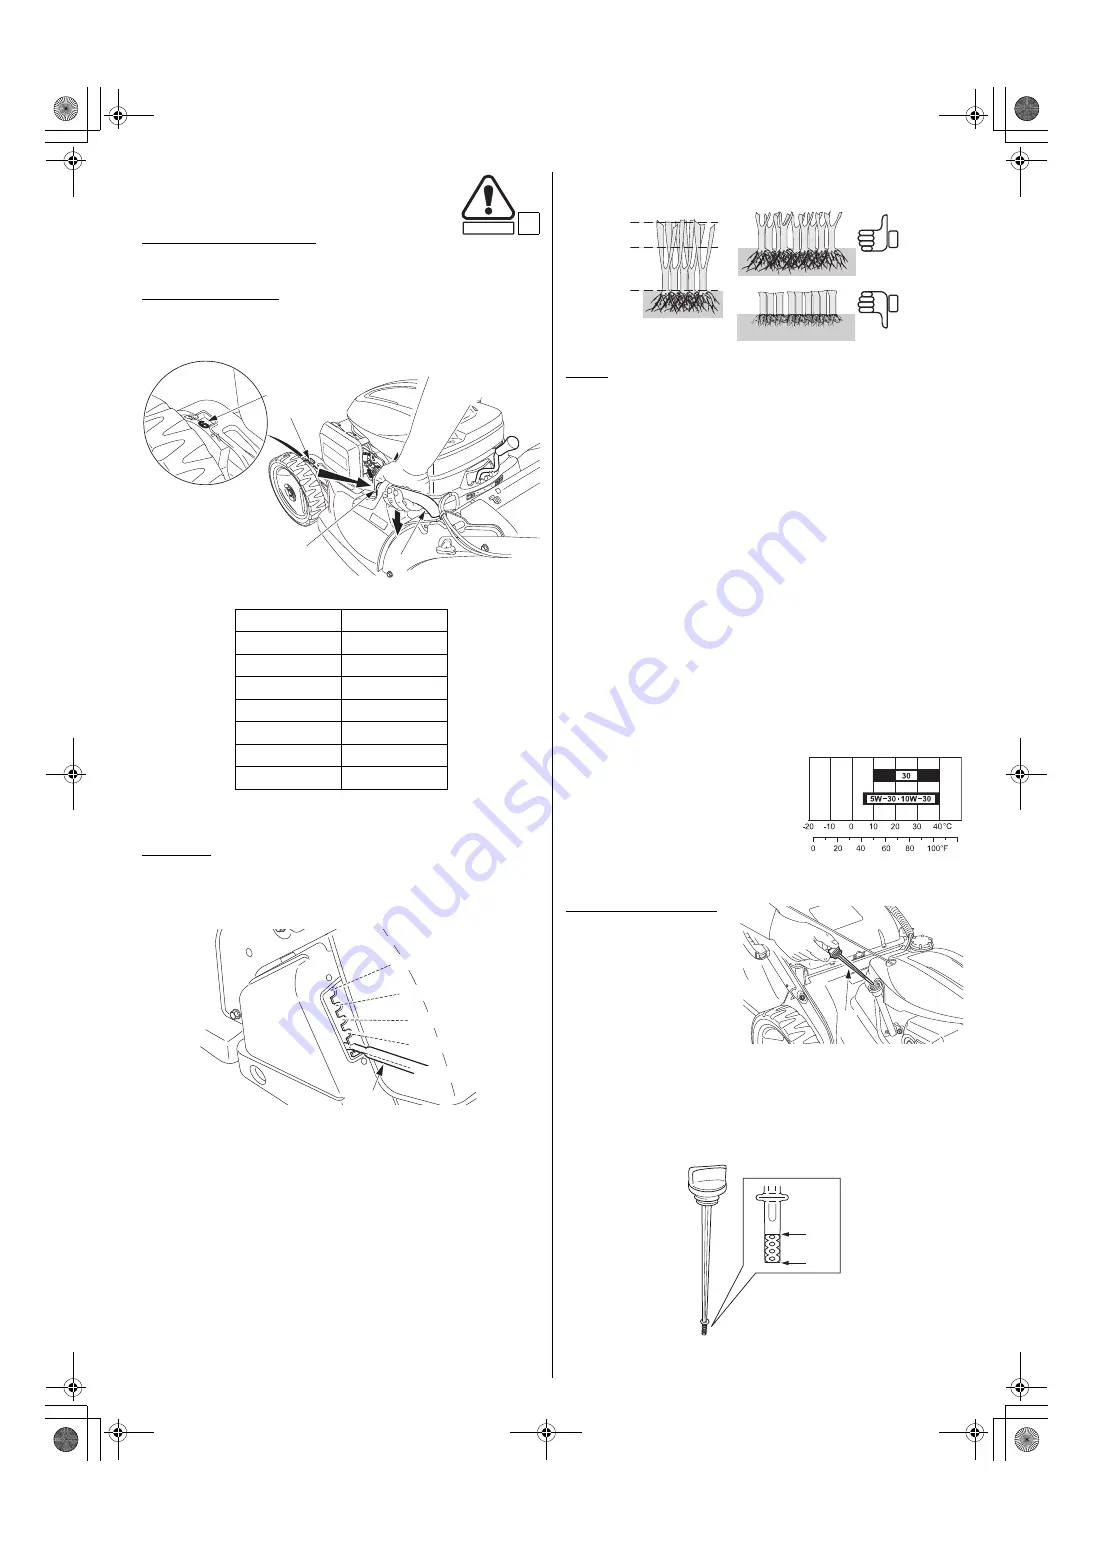
To change the cutting height:
1. Stop the engine.
HYE, VKE, VYE types:
2. Keep the unlocking knob [1] pressed and raise or lower the
lawnmower with the adjustment handle [2]. A height indicator [3]
is near the front left wheel.
QYEJ type:
2. Pull the adjusting lever [4] towards the outside of the machine.
Turn the adjusting lever [4] left or right to raise or lower the
cutting height.
The cutting height settings are approximate values, the actual
height of the cut grass varies with the lawn and ground condition. To
choose the cutting height, check how the lawn looks after mowing a
small area and adjust the cutting height where necessary.
NOTE:
• Do not cut more than 1/3 of the initial height of the grass in one
passage as brown spots will appear. The cut will be cleaner and
this will limit the possibility of cutting means and chute blackage.
• If the lawn is too high, mow at the maximum permissible height of
the lawnmower. Mow the lawn again 2 or 3 days later.
• The depth of the roots is proportional to the height of the grass
cuttings: the shorter the cut, the shallower the roots.
• Choose a cutting height suited to the use of the lawn: leisure,
sport: 5 cm or more, ornamental: 1 to 3 cm.
• Only some species of lawn can endure short cuts. If a lawn is cut
too short, it is fragile and susceptible to dryness. Please ask the
advice of a specialist.
CHECKING ENGINE OIL LEVEL
CAUTION:
• The engine oil is an essential element which affects the
performance and lifetime of the engine.
• The engine may be seriously damaged if run with insufficient oil.
We recommend the use of Honda 4-stroke oil or an equivalent
quality engine oil which is highly detergent. Oil viscosity must be
appropriate for the average temperature in the zone where the
lawnmower is to be used.
Lubrication oil specifications
necessary to maintain the
performance of the emissions
control system: Honda genuine oil.
Types of oil [5] adapted to the
ambient temperature [6].
To check engine oil level:
1. Put the lawnmower on
flat, even ground.
2. Remove and wipe oil
filler cap/dipstick [7].
3. Replace the oil filler
cap/dipstick in the filler
neck but do not screw it
down.
4. Check the level of the oil left on the oil filler
cap/dipstick. If the level is near the low level
mark [8], add the recommended oil up to the
high level mark [9].
5. Screw oil filler cap/dipstick.
Positions
Height (mm)
1
25
2
34
3
43
4
52
5
61
6
70
7
79
SAFETY
C21
[3]
[3]
[2]
[1]
[4]
19 mm
27 mm
36 mm
46 mm
58 mm
1/3 Max
[5]
[6]
[7]
[9]
[8]
3RVK87300.book Page 7 Wednesday, August 8, 2018 11:26 AM


