English |
11
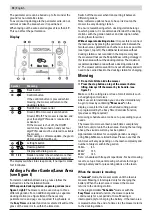
To stop mowing prematurely, press the
Stop
button or
send the mower back to the docking station by pressing
the confirm button
H
.
Energy saving mode
The mower reduces its energy consumption by
automatically switching off the power to the perimeter
wire when it is not mowing and not being charged .
To wake up the mower manually from the energy saving
mode, press the confirm button
H
and afterwards select
either
"Mow now"
or another
"Mowing mode"
, while the
mower is in the docking station .
When a schedule or the Easy Timer Function becomes
active, the wire signal will start up automatically .
Mowing small lawn areas with Place & Mow
Place & Mow
is intended for mowing small areas that
require special treatment without having to mow the
whole lawn, such as the area under a piece of garden
furniture that has been removed . The mower is to be
positioned at the lower left corner of the intended area
to mow . (see figure
H
) . The finally mowed area depends
on the lawn conditions; it will not necessarily be an exact
square . After completion of
Place & Mow
, follow the
instructions on the screen .
Note: For safety reasons, Place & Mow cannot be used
outside the perimeter wire .
Sensors
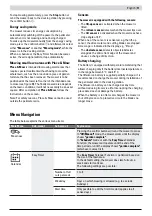
The mower is equipped with the following sensors:
– The
lift-up sensor
is activated when the mower is
lifted .
– The
rollover sensor
detects when the mower tips over .
– The
tilt sensor
is activated when the mower reaches a
slope angle of 32° .
When one of the sensors is activated, e .g . the lift-up
sensor, the drive motors and cutting blades are stopped .
A message is indicated in the display, e .g . "lift-up" .
– The
obstacle sensor
detects objects/obstacles
alongside the entire front edge of the mower and
causes a change of direction .
Battery charging
The battery is equipped with temperature monitoring that
allows charging only if the battery internal temperature is
in the range between 5 °C and 45 °C .
The lithium-ion battery is supplied partially charged . It is
recommended to charge the mower during installation of
the perimeter wire in the docking station .
The lithium-ion battery can be charged at any time
without reducing its service life . Interrupting the charging
procedure does not damage the battery .
When the battery is run flat or discharged, the mower is
shut off by means of a protective circuit: the blades no
longer move .
Menu Navigation
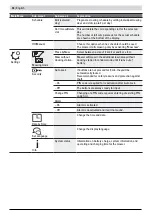
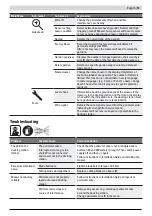
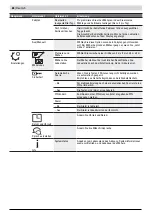
The table below explains the various menu items .
Main Menu
Sub-menu 1
Sub-menu 2
Explanation
Mow now
Pressing the confirm button will send the mower to mow .
In
"Off/Manual"
mode, the mower works until the display
shows
"garden complete"
.
In
"Schedule"
mode or with the
Easy Timer
Calendar
Function, the mower will operate until the end of the
time period or until the display shows
"garden complete"
(whichever comes first) .
Calendar
Easy Timer
The
Easy Timer
Calendar Function is optimised based on
the size of the lawn area .
In the default setting, the mower does two full cuts a
week and starts at 8 am .
The following settings are possible:
Number of full
cuts per week
1 to 3
Weekday
Days on which mowing is allowed (e .g . to exclude
Sundays) .
Start time
Only possible to edit the first time slot (applies to all
active days) .
Summary of Contents for Miimo HRM40
Page 1: ...MIIMO HRM40 ORIGINAL INSTRUCTIONS ...
Page 3: ...2 ...
Page 109: ...108 C 2 m 5 m 125 m 180 x B ...
Page 110: ... 109 1cm 3 0 c m 3 cm 3 cm 3 cm 3 cm E D ...
Page 111: ...110 MAX 50 mm 40 mm MIN 30 mm MAX 50 mm MIN 30 mm STOP G F Mi im o HR M4 0 ...
Page 112: ... 111 H I ...
Page 113: ...112 STOP STOP K J ...
Page 114: ...EN PP xx xxxx xx Printed in Europe 3RY0E600 00X3R Y0E 6000 Honda Motor Europe Ltd 2019 ...

