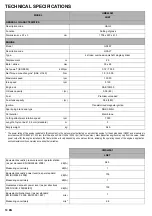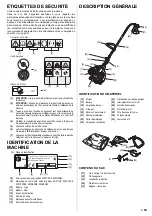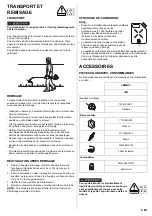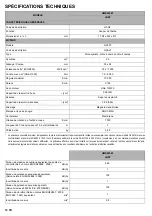
7 EN
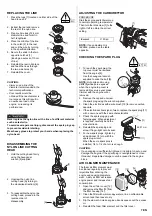
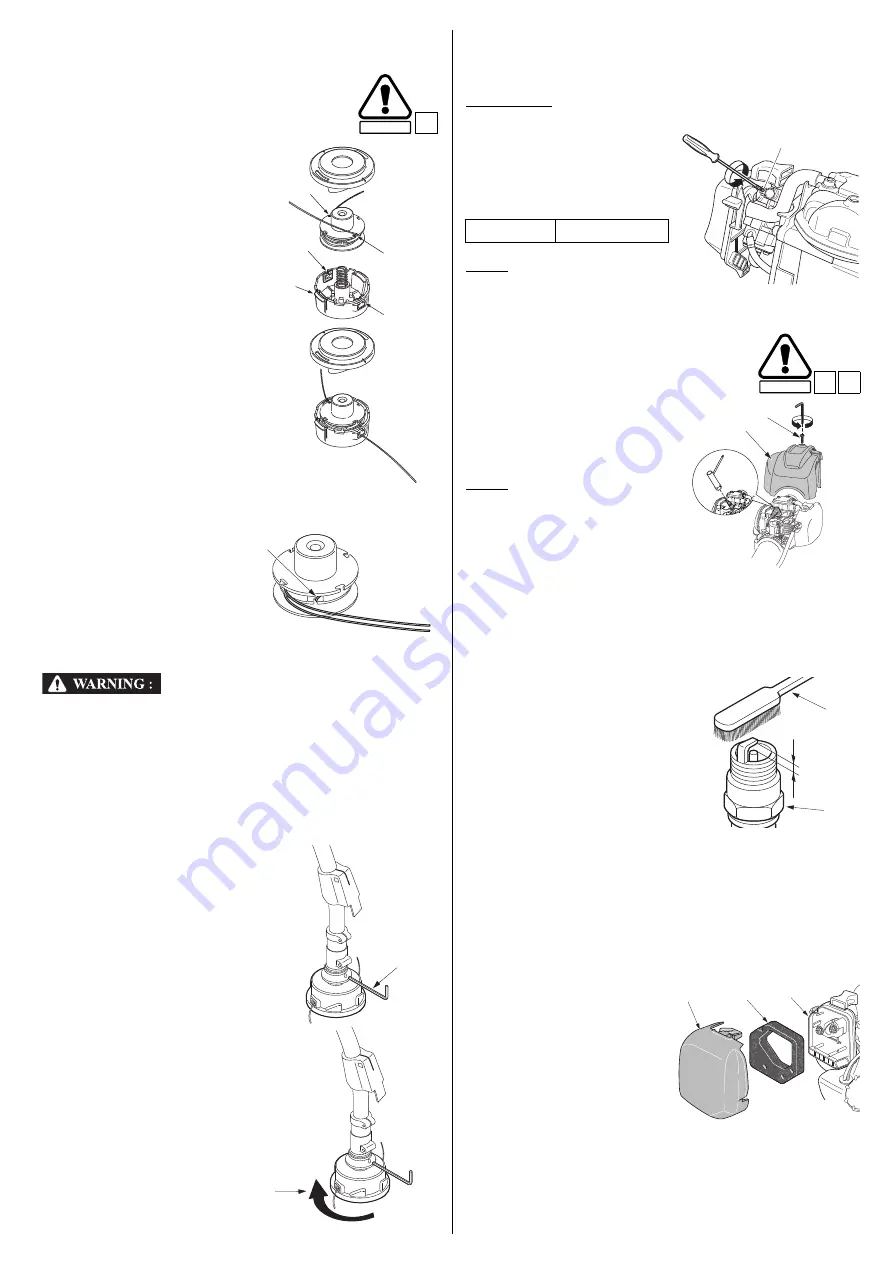
REPLACING THE LINE
1. Press the lugs [1] located on either side of the
head to open it.
2. Extract the reel and remove
the rest of the nylon line.
3. Prepare 3 metres of 2.4 mm
diameter line and fold it in
half, lengthwise.
4. Place the middle of the line
in the notch [2] in the reel
and coil the wire by turning
in the specified direction.
5. Secure the ends in the two
opposite notches [3]
(leaving an excess of 10 cm
of line).
6. Reinstall the reel in its place
and feed the lines through
the two side holes [4].
7. Reinstall the cover.
CAUTION:
• Always use a line of the
diameter recommended in the
technical specifications.
• Poor results would be
obtained if the line diameter is
too large as this will result in
an excessive load on the
engine, so reducing its
performance.
Never replace the nylon line with a line of a different material,
such as steel wire.
To avoid severe personal injury, disconnect the spark plug cap
to prevent accidental starting.
Wear heavy gloves to protect your hands when replacing the
nylon head.
DISASSEMBLING THE
NYLON LINE CUTTING
HEAD
1. Hold the cutting head firmly
using the hexagonal
wrench [5] supplied.
2. Unscrew the nylon line
cutting head (by turning in
the clockwise direction) [6].
3. To reassemble the nylon line
cutting head, proceed in the
reverse order of
disassembly.
ADJUSTING THE CARBURETTOR
PROCEDURE
Start the engine and let it warm up
to normal operating temperature.
Then turn the idle screw [7] to the
right or left to obtain the correct
setting.
NOTE:
If any adjustment is
required, please use the table
opposite.
CHECKING THE SPARK PLUG
1. To reach the spark plug, the
top cover must be removed
from the engine [8].
Use the hexagonal wrench
supplied to undo the bolt [9].
NOTE:
Hot parts and moving
parts (flywheel) are exposed
when the engine top cover is
removed. Never use your grass
trimmer with the engine cover
removed.
2. Remove the cap and unscrew
the spark plug using the wrench supplied.
3. Clean the electrodes with a wire brush [10] to remove carbon
deposits.
4. If the electrodes show signs of wear, replace the spark plug [11]
with a new one with the same characteristics.
5. Check the spark plug gap with
feeler gauges. When adjustment
is required, carefully bend the
side electrode.
6. Reinstall the spark plug and
screw it finger-tight onto its seat.
7. For new spark plugs, tighten by
an additional 1/2 turn with the
spark plug wrench.
When the same spark plus is
installed, 1/8 to 1/4 of a turn is enough.
CAUTION:
• If a spark plug is insufficiently tightened, it is liable to heat up and
damage the engine. If the spark plug is overtightened or cross-
threaded, irreparable damage could be caused to the engine
block.
AIR CLEANER MAINTENANCE
The foam air filter element must
be cleaned regularly to prevent
impurities from entering the
engine and causing premature
wear. A dirty air filter will reduce
engine power and increase fuel
consumption.
1. Open the air filter cover [12]
and remove the filter [13] from
the filter housing [14].
2. Clean the filter with warm soapy water or in a nonflammable
solvent and then leave to dry.
3. Dip the element in clean engine oil and squeeze out the excess
oil.
4. Reinstall the foam filter element and the filter cover.
SAFETY
C11
[4]
[3]
[1]
[3]
[4]
[2]
[5]
[6]
Idle speed
3 100 rpm
[7]
C1
SAFETY
B7
[8]
[9]
0,6-0,7 mm
[10]
[11]
[12]
[13]
[14]
Summary of Contents for UMS425E1
Page 64: ...RCS ORL ANS B 501 736 565...

