


12
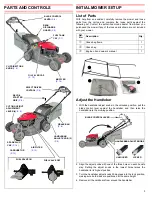
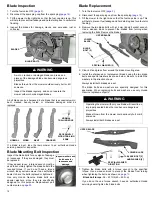
Blade Inspection
1. Turn the fuel valve OFF (
2. Disconnect the spark plug cap from the spark plug (
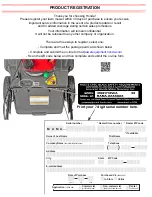
3. Tilt the mower to the right side so that the fuel cap side is up. This
will help to prevent fuel leakage and hard starting due to carburetor
flooding.
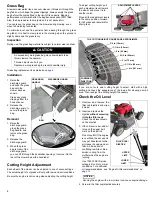
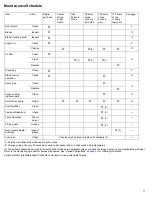
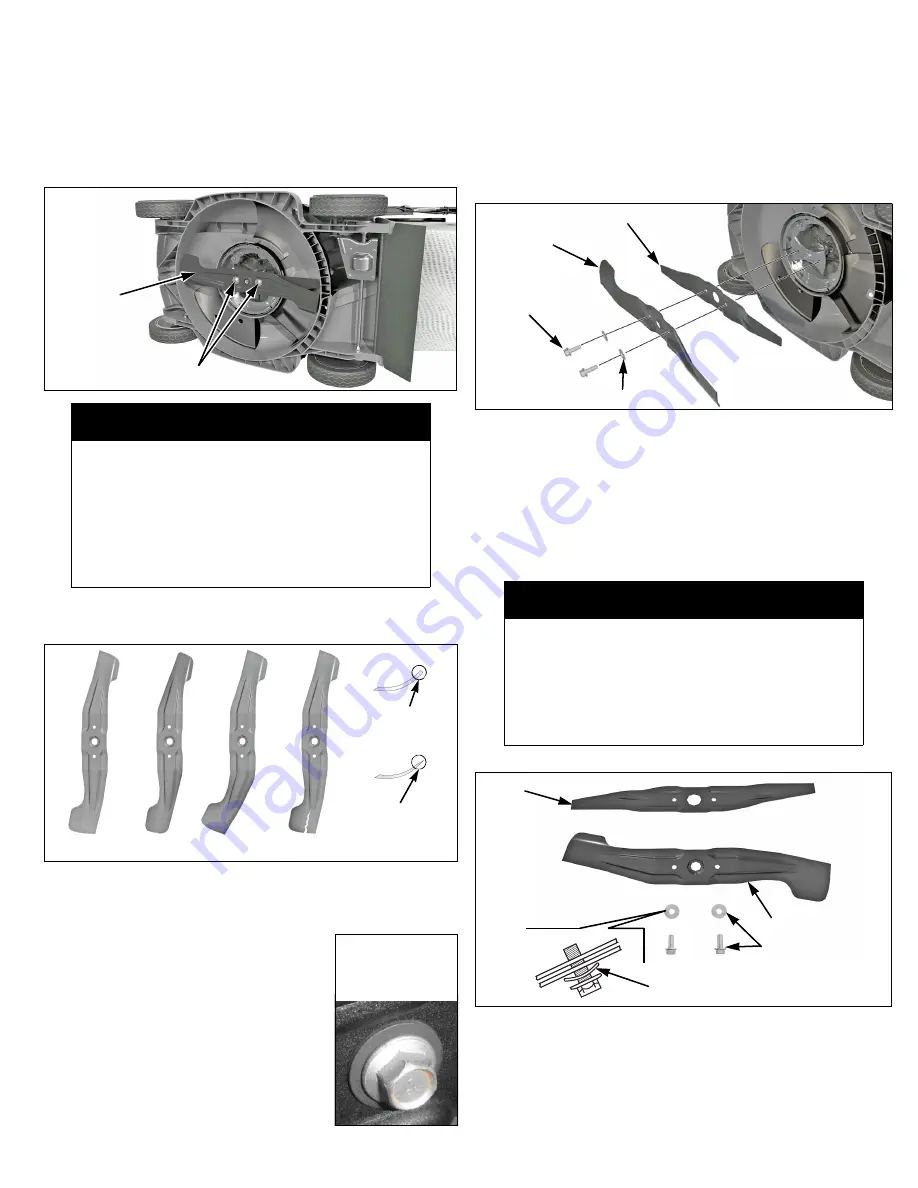
4. Inspect the blades for damage, cracks, and excessive rust or
corrosion.
A dull blade can be sharpened, but a blade that is excessively worn,
bent, cracked, heavily rusted, or otherwise damaged must be
replaced.
If a blade is bent, take the lawn mower to an authorized Honda
servicing dealer for inspection.
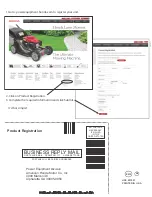
Blade Mounting Bolt Inspection
Inspect the blade bolts for any signs of damage
or looseness. If they are damaged, they must
be replaced.
If they appear loose, a torque wrench must be
used to accurately tighten the blade bolts to the
required torque. If you do not have a torque
wrench, take your lawn mower to an authorized
dealer to have the bolts replaced or tightened.
Use only Honda Genuine blade bolts and
special washers, since they are specifically
designed for this purpose. Replacement part
.
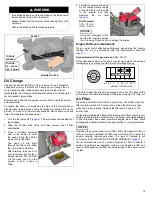
Blade Replacement
1. Turn the fuel valve OFF (
2. Disconnect the spark plug cap from the spark plug (
3. Tilt the mower to the right side so that the fuel cap side is up. This
will help to prevent fuel leakage and hard starting due to carburetor
flooding.
4. Remove the two blade bolts with a 14 mm (6 point) socket wrench.
Use a wooden block to prevent the blades from turning when
removing the bolts. Remove the blades.
5. Clean dirt and grass from around the blade mounting area.
6. Install the sharpened or replacement blades using the two blade
bolts and special washers as shown below. Be sure to install the
washers in the direction shown.
Always install both blades as a set.
The blade bolts and washers are specially designed for this
application. When replacing bolts and washers, use only Honda
Genuine replacement parts.
7. Tighten the blade bolts with a torque wrench to the specified
torque. Use a wooden block to prevent the blades from turning
when tightening the bolts, as shown on
Blade bolt torque:
36 ~ 43 ft-lb (49 ~ 59 N·m)
If you do not have a torque wrench, have an authorized Honda
servicing dealer tighten the blade bolts.
WARNING
A worn, cracked, or damaged blade can break, and
pieces of the damaged blade can become dangerous
projectiles.
Blades thrown from the mower could seriously hurt or kill
someone.
Inspect the blades regularly, and do not operate the
mower with worn or damaged blades.
BLADE BOLTS
BLADES
NORMAL
WORN
BENT
CRACKED
NORMAL
TRAILING EDGE
EXCESSIVELY
WORN TRAILING
EDGE
Inspect washers and
bolt heads for
looseness and
damage.
WARNING
Operating the mower with only one blade will result in an
improperly seated blade that can become dangerous
projectiles.
Blades thrown from the mower could seriously hurt or kill
someone.
Always install both blades as a set.
UPPER BLADE
LOWER
BLADE
BLADE
BOLT (2)
SPECIAL WASHER (2)
BLADE BOLT [2]
AND WASHER [2]
SPECIAL WASHER
DIRECTION
UPPER BLADE
LOWER BLADE


