


Page 90
Honey Bee Manufacturing Ltd.
SDX Header
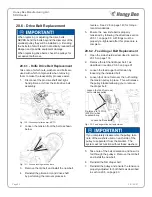
20.6 - Drive Belt Replacement
When replacing or adjusting the drive belts,
NEVER bend the belts beyond the diameter of the
smallest pulley they will be installed on. Bending
the belts too far will result in drastically reduced belt
lifespan and possible equipment damage.
When replacing drive belts, check the pulleys for
excessive tooth wear.
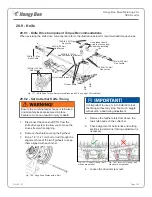
20.6.1 - Knife Drive Belt Replacement
Take note of which nuts, washers and bolts are
used with which components when removing
them to make the reassembly process easier.
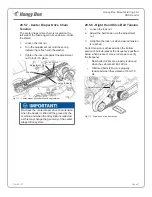
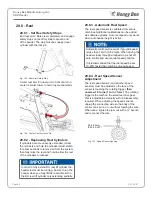
1.
Disconnect the pto driveshaft and right-
hand pitman arm from the knife drive belt
assembly.
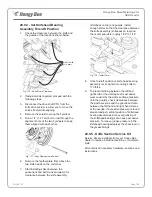
Fig. 120 - Disconnect pitman arm & PTO
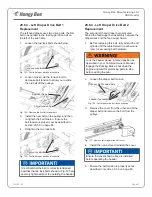
2.
Loosen the tension from the belt as shown
below.
Fig. 121 - Loosen locking mechanisms
Loosen
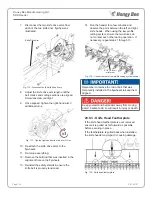
3. Remove the old belt and install the new belt.
4. Reinstall the pitman arm and drive shaft
by performing the removal process in
reverse. See
recommendations.
5. Ensure the new knife belt is properly
tensioned by following the directions section
20.5.11 on page 88. All fittings must be
properly re-tightened after this procedure is
complete.
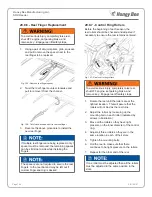
20.6.2 - Feed Auger Belt Replacement
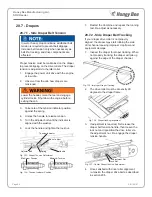
1. Open the side shield as described in section
.
2.
Remove the left hand draper belt 1 as
.
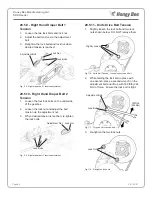
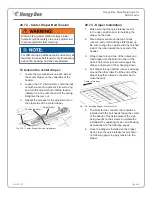
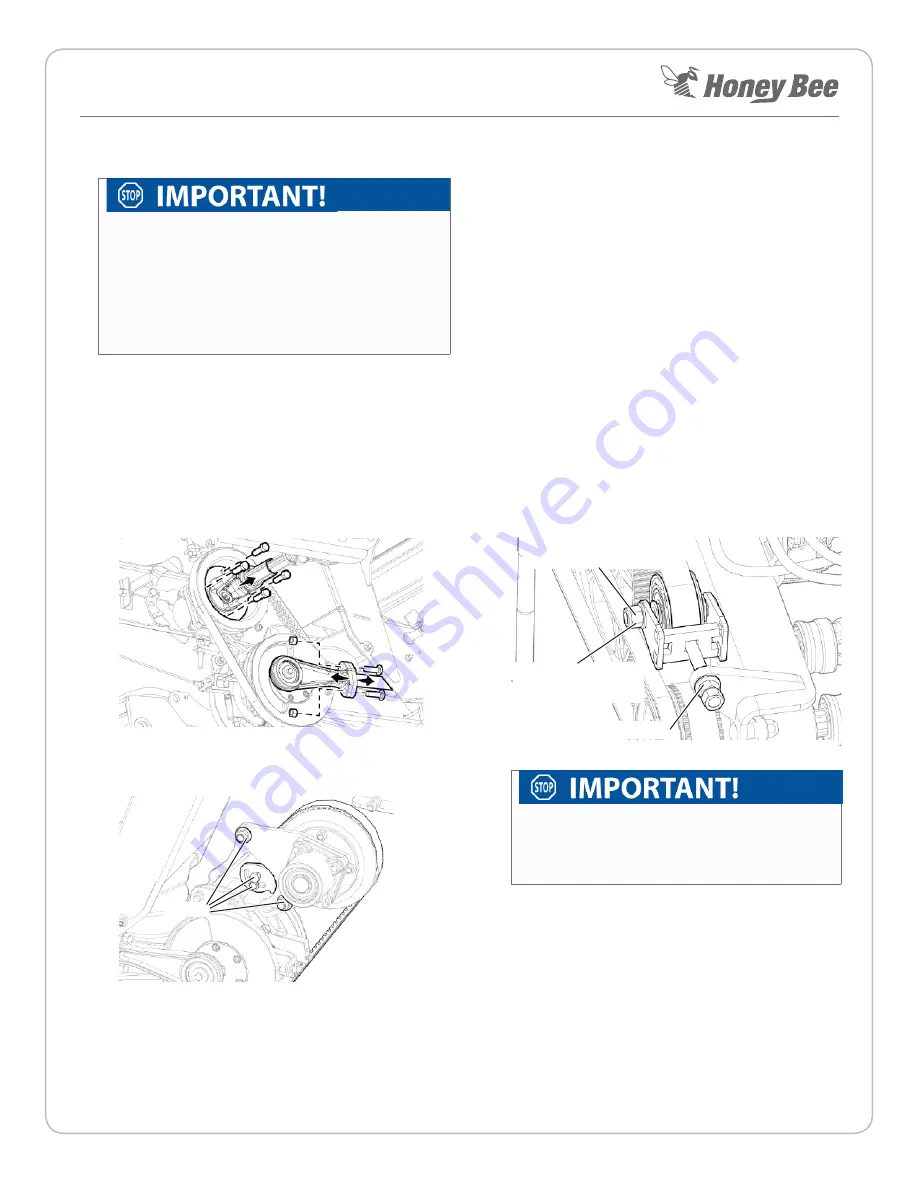
3. Loosen the feed auger belt tension by
loosening the indicated bolt.
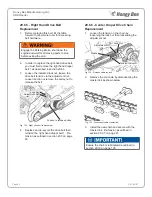
4. Loosen (but do not remove) the nut holding
the tension pulley in place. This will release
the pulley bracket allowing you to remove
the draper belt.
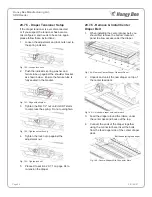
Loosen belt tension
Fig. 122 - Feed auger drive belt adjustment
Loosen (but don’t remove)
nut to release pulley
Re-torque to 150 ft-lb
(203 Nm) when
re-assembling
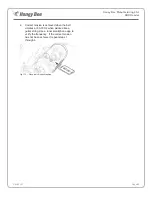
If you completely disassemble the pulley, take
note of the washers used on each side of the
pulley to separate it from the bracket. The
system will not function without these washers.
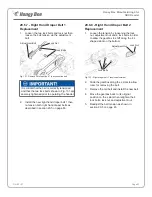
5. Take note of the belt orientation and how it is
fed through the pulleys. Remove the old belt
and install the new belt.
6.
Reinstall the first draper belt.
7. Reinstall the pulley and ensure the tension is
properly adjusted for both belts as described
in section
.
Summary of Contents for AirFLEX SDX 225
Page 1: ...Revision 1 3 P N 95107 FLEX Header Operator Manual 2020 SDX Series...
Page 2: ......
Page 6: ...Page 6 Honey Bee Manufacturing Ltd SDX Header P N 95107...
Page 14: ...Page 14 Honey Bee Manufacturing Ltd SDX Header P N 95107...
Page 16: ...Page 16 Honey Bee Manufacturing Ltd SDX Header P N 95107...
Page 18: ...Page 18 Honey Bee Manufacturing Ltd SDX Header P N 95107...
Page 20: ...Page 20 Honey Bee Manufacturing Ltd SDX Header P N 95107...
Page 24: ...Page 24 Honey Bee Manufacturing Ltd SDX Header P N 95107...
Page 26: ...Page 26 Honey Bee Manufacturing Ltd SDX Header P N 95107...
Page 37: ...Honey Bee Manufacturing Ltd SDX Header Page 37 P N 95107...
Page 57: ...Honey Bee Manufacturing Ltd SDX Header Page 57 P N 95107...
Page 73: ...Honey Bee Manufacturing Ltd SDX Header Page 73 P N 95107...
Page 80: ...Page 80 Honey Bee Manufacturing Ltd SDX Header P N 95107...
Page 124: ...Page 124 Honey Bee Manufacturing Ltd SDX Header P N 95107...


