PROSiXSHOCK
Wireless Shock/Door/Window Sensor
Installation and Setup Guide
The PROSiXSHOCK is a 3-zone wireless
shock/door/window sensor is intended for use with
Honeywell Home controls that support PROSiX™ series
devices.
It provides
•
Reed switch/magnet zone
•
External wired contact zone
•
Built-in shock sensor zone (designed to protect windows
and doors)
Typical shock protection area:
10 - 12 ft. diameter / 5 - 6 foot radius (3.05m – 3.66m
diameter / 1.52m – 1.83m radius)
The coverage area can vary depending on the mounting
surface.
INSTALLATION OPTIONS
The PROSiXSHOCK can be installed with several options:
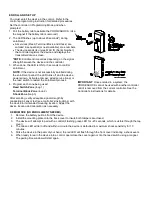
• Loop 1: Normally closed, built-in reed switch, used with
the included magnet
• Loop 2: Externally wired, closed-circuit contact loop
connected to the Terminal Block (unsupervised)
NOTE:
Wiring limit is 3ft.
• Loop 3: Built-in shock sensor. Red LED flashes briefly
upon sensing shock
Magnet Gap specifications
:
a. Make gap is at least 0.8"
b. Break gap is at least 0.95"
(reduced about 30% for steel)
MOUNT THE PROSIXSHOCK
1. To open the device, firmly slide the front and back
housings in opposite directions and pull them apart.
2. The PROSiXSHOCK sensor MUST be mounted as
follows:
• On swinging doors: mount on upper corner of door
(not door frame); opposite hinge is ideal
• On sliding windows and doors: on the frame
(on moving section when magnet is used)
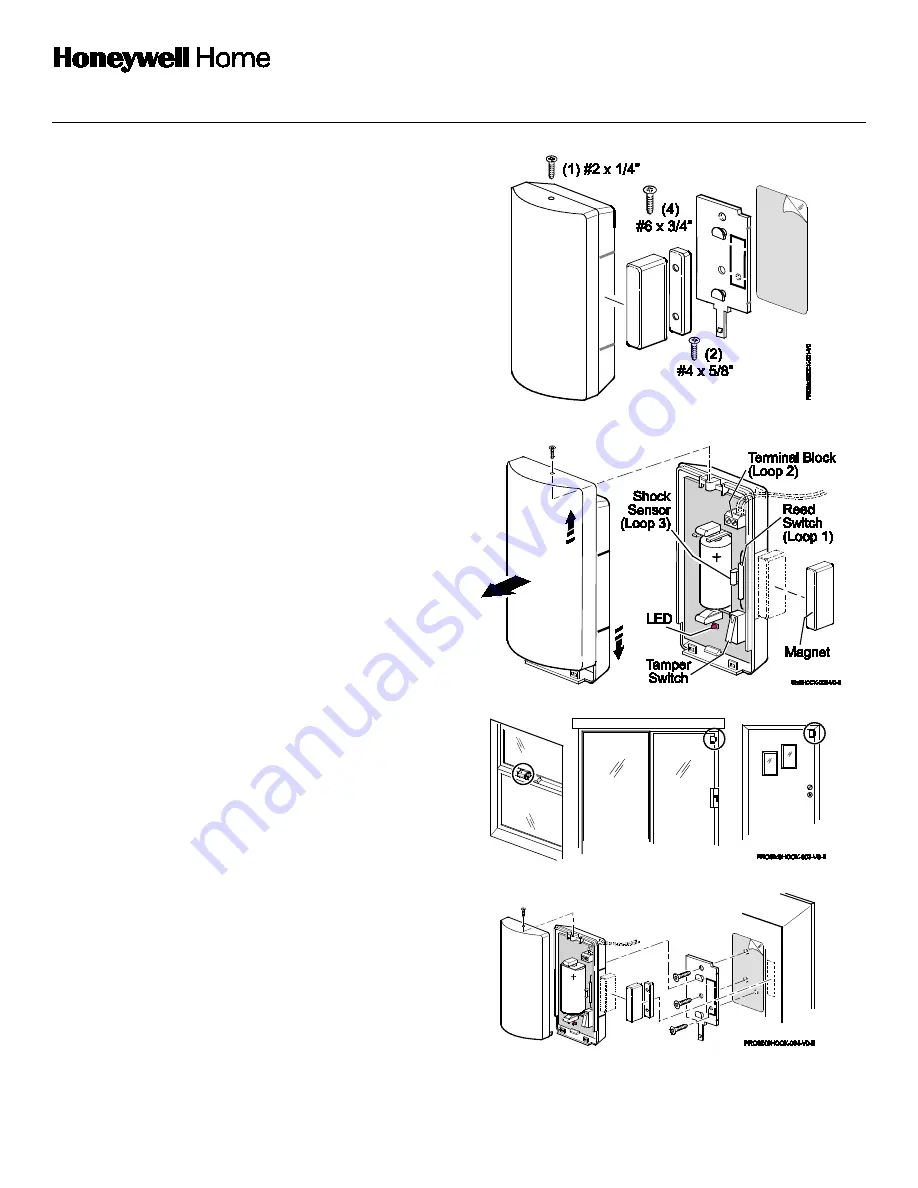
3. Mount sensor as shown, using the double-sided tape
and screws provided.
4. Secure the front cover with the #2 x 1/4” screw.
After enrolling and before mounting, verify adequate signal
strength by conducting a sensor test (see controller’s
instructions) with the device in its intended mounting
location. Adjust the device location and orientation as
necessary.


