background image

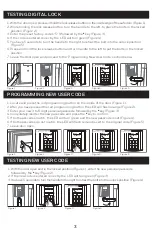
1. With the door open, press and hold the lock release button on the inside edge of the safe door (Figure 1).
2. While holding the lock release button, turn the handle to the left, to place the bolts in the locked  
     position (Figure 2).
3. Enter the preset factory code 1-5-9 followed by the 

*

 key (Figure 3).

4. If the code is entered correctly, the LED will turn green (Figure 4).
5. You have 5 seconds to turn the handle to the right to retract the bolt into the unlock position   
     (Figure 5).
6. Press and hold the lock release button and turn handle to the left to put the bolts in the locked 
     position.
7. Leave the door open and proceed to the “Programming New User Code” section below.

PROGRAMMING NEW USER CODE

TESTING DIGITAL LOCK

Figure 2

Figure 2

Figure 3

Figure 3

Figure 4

Figure 4

Figure 5

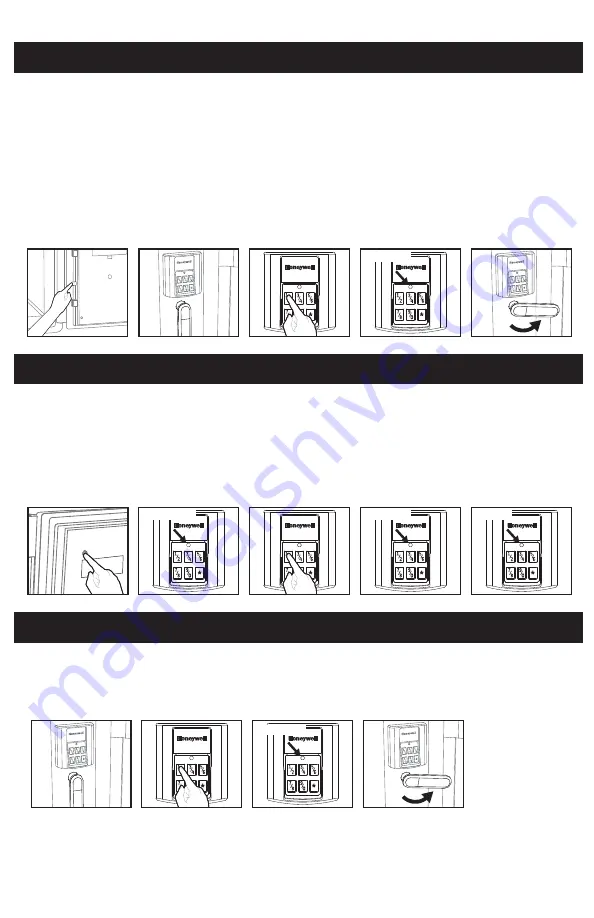
1. Locate and press the red programming button on the inside of the door (Figure 1).
2. After you have pressed the red programming button, the LED will flash orange (Figure 2). 
3. Enter your new 3 to 8 digit personal passcode followed by the 

*

 key (Figure 3.).

4. Immediately reenter the new passcode and press the 

*

 key to confirm.

5. If both passcodes match, the LED will turn green and the new passcode is set (Figure 4).
6. If both passcodes do not match, the LED will flash red and revert to the original code (Figure 5).
7. Leave door open.

3

TESTING NEW USER CODE

1. With the door open and in the locked position(Figure 1) , enter the new personal passcode 
     followed by  the 

*

 key (Figure 2). 

2. If the new code is entered correctly, the LED will turn green (Figure 3).
3. You have 5 seconds to turn the handle to the right to retract the bolt into the unlock position (Figure 4).

Green LED

Figure 2

Figure 3

Figure 4

Figure 5

Figure 1

Green LED

Green LED

Orange LED

Red LED

Figure 1

Figure 1

Summary of Contents for 2901

Page 1: ...tems have been received If any items are missing please contact Consumer Assistance see page 10 for contact information 1 Waterproof Fire Safe 1 Operation Manual 2 Override Access Keys 1 Mounting Kit 1 Removable Shelf 4 Shelf Clips Model 2901 1 Waterproof Fire Safe ENGLISH 1 Operation Manual 1 Mounting Hardware 4 Shelf Clips 2 Override Access Keys 1 Removable Shelf ...

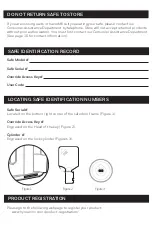
Page 2: ...e page 10 for contact information Please go to the following webpage to register your product www hymaninc com product registration Safe Serial Located on the bottom right corner of the safe door frame Figure 1 Override Access Key Engraved on the Head of the key Figure 2 Cylinder Engraved on the lock cylinder Figures 3 Safe Model Safe Serial Override Access Key User Code LOCATING SAFE IDENTIFICATI...

Page 3: ...OGRAMMING NEW USER CODE PAGE 3 TESTING NEW USER CODE PAGE 3 LOCKING AND UNLOCKING PAGE 4 ANCHORING SAFE TO A FLOOR PAGE 5 SECURE LOCKOUT PERIOD PAGE 7 LOST OR FORGOTTEN USER CODES PAGE 7 OVERRIDE ACCESS KEY PAGE 7 REMOVABLE SHELF PAGE 7 ORDERING ADDITIONAL OVERRIDE ACCESS KEYS PAGE 8 LOCATING SAFE IDENTIFICATION NUMBERS PAGE 8 CONSUMER ASSISTANCE PAGE 10 WARRANTY PAGE 11 INDEX ...

Page 4: ...MPORTANT Before using your new safe it should be opened and aired out for at least 30 minutes to allow the waterproof seal to decompress and perform as intended WARNING This safe is not intended for the storage of medications pearls firearms ammunition or combustible items of any kind When properly maintained your safe will continue to operate for many years In order to ensure optimum performance ...

Page 5: ... 2 Figure 3 Figure 4 Figure 5 2 The batteries must be installed before using your safe The battery compartment is inside the safe and opened by lifting the tab located at the bottom 1 Remove battery compartment cover Figure 1 2 Insert 4 AA batteries Make sure that the batteries are installed in the correct direction and with regard to polarity Figure 2 3 Replace the battery cover Figure 3 4 Leave ...

Page 6: ...4 Figure 5 1 Locate and press the red programming button on the inside of the door Figure 1 2 After you have pressed the red programming button the LED will flash orange Figure 2 3 Enter your new 3 to 8 digit personal passcode followed by the key Figure 3 4 Immediately reenter the new passcode and press the key to confirm 5 If both passcodes match the LED will turn green and the new passcode is se...

Page 7: ...nlocked position IMPORTANT IF YOU DO NOT RETURN THE KEY TO THE LOCKED POSITION THE SAFE WILL REMAIN UNLOCKED 1 In the locked position Figure 1 enter the personal passcode followed by the key Figure 2 2 If the new code is entered correctly the LED will turn green Figure 3 3 Youhave5secondstoturnthehandle to the right to retract the boltintotheunlockposition Figure4 4 YoumayalsousetheincludedOverrid...

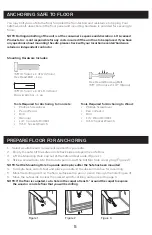
Page 8: ...or concrete floor that you will be drilling You may bolt your safe to the floor for added theft protection and resistance to tipping Your safe has a bolt down hole in the floor panel and mounting hardware is provided for securing to floors NOTE Bolting unbolting of the unit is at the consumer s expense and discretion LH Licensed Products Inc is not responsible for any costs incurred if the unit ha...

Page 9: ...e back into position lined up over the hole Figure 5 6 Insert the supplied Hex Head Bolt through the bolt hole from the inside of the safe and into the Drop in Anchor Figure 6 7 Secure the Hex Head Bolt tightly using a socket wrench Figure 7 8 Replace the Mounting Hole Cap and press firmly into place Figure 8 Figure 5 Figure 1 Figure 8 Figure 4 Figure 3 Figure 6 Figure 2 6 ANCHORING SAFE TO A WOOD...

Page 10: ...iate access in case you forget your user codes or the batteries need to be installed or replaced Figure 1 Figure 2 Figure 3 1 Slide the override key cover up Figure 1 2 Insert the Override Access key into the lock Figure 2 3 With the key inserted turn clockwise to the right Figure 3 4 Turn handle to the right and pull safe door open Figure 4 5 Turn key counterclockwise to return to locked position...

Page 11: ...fication Form 2 CONTACT PRODUCT INFORMATION CONTACT INFORMATION PRODUCT INFORMATION Name Mailing Address Safe Model E mail address If Available Safe Serial Telephone Number Best Time to Contact You 3 METHOD OF PAYMENT Telephone Visa or MasterCard Mail Check or Money Order NOTE For pricing please contact Consumer Assistance Contact information is located on the back cover of this manual Terms subje...

Page 12: ...NOTES 9 ...
Page 13: ...ONSUMER ASSISTANCE LHLPCustomerService LHLPinc com www honeywellsafes com Consumer Assistance Dept LH Licensed Products Inc 860 East Sandhill Avenue Carson CA 90746 USA US Canada 1 877 354 5457 Toll Free Mexico 01 800 288 2872 After English voice recording stops you must then enter 800 860 1677 to complete your call Toll Free Australia 0011 800 5325 7000 Toll Free Germany New Zealand 00 800 5325 7...

Page 14: ...canes and tornadoes LHLP Inc shall not be liable for any incidental or consequential damages caused by the breach of any express or implied warranty or otherwise relating to the sale of this product LHLP Inc is also not responsible for costs associated with removing or installing the product damage or loss of the contents of the product nor for the unauthorized removal of the contents or damages i...

Page 15: ... East Sandhill Avenue Carson CA 90746 www honeywellsafes com M2901 E V2 The Honeywell Trademark is used under license from Honeywell International Inc Honeywell International Inc makes no representations or warranties with respect to this product ...

Reviews: