Precision Platform 4022 Scanner
Scanner Maintenance
10/18/07
p/n:
6510020208
9-32
6.
Check the pins mating surfaces where the pins seat in the inner 2.8
inch pulley. The seats can be polished, but not deformed or gouged.
Replace the inner 2.8 inch pulley if worn.
9.7.2.3. Clutch
reassembly
1.
Clean the shaft and the inner diameter of the pulley bearings.
2.
Apply Lubriplate 930-AA to the clutch pin shafts and springs, and
install them in the outer 2.8 inch pulley. Install the inner retaining
rings on each pin.
3.
Apply a thin film of Lubriplate 930-AA to the two facing surfaces of
the 2.8 inch pulleys.
4.
Install the outer 2.8 inch pulley and retaining ring.
5.
Install the clutch bar after applying Lubriplate to the clutch bar
shaft.
6.
Install the retaining rings on the end of the clutch pins to retain the
clutch bar.
9.7.2.4.
Installing the clutch pulley assembly on the scanner
1.
Install the clutch pulley assembly back on the scanner cable end
support.
2.
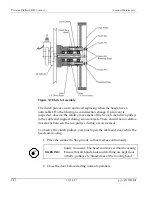
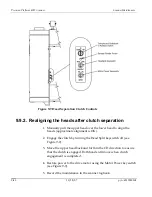
Check that the clutch works by turning on the head separation
clutch keyswitch. When the switch is on, the air cylinder will
activate and the clutch bar will move to the right, disengaging the
clutch. The two 2.8 inch pulleys will turn freely relative to each
other.
3.
Turn off the head separation clutch keyswitch and twist the outer
2.8 inch pulley until the clutch pins insert. There should be no
visible movement when the two 2.8 inch pulleys are twisted
relative to each other.
4.
Install the motor and drive belts. Reset belt tensions and realign the
heads using the procedures described earlier in this chapter.
5.
Reinstall the beam covers as described in Subsection 9.1.7.
Summary of Contents for 4022
Page 1: ...Precision Platform 4022 Scanner System Manual 6510020208 ...
Page 2: ......
Page 3: ...Precision Platform 4022 Scanner October 2007 ...
Page 22: ......
Page 72: ......
Page 94: ......
Page 126: ......
Page 162: ......
Page 170: ......
Page 234: ......
Page 239: ...Glossary p n 6510020208 10 18 07 11 5 VIO Virtual Input Output ...

