background image


– 70 – 

LIMITED WARRANTY 

Honeywell International Inc. acting through its Security & Custom Electronics business ("Seller"), 165 
Eileen Way, Syosset, New York 11791, warrants its products to be in conformance with its own plans and 
specifications and to be free from defects in materials and workmanship under normal use and service for 24 
months from the date stamp control on the product or, for products not having an Ademco date stamp, for 12 
months from date of original purchase unless the installation instructions or catalog sets forth a shorter 
period, in which case the shorter period shall apply. Seller's obligation shall be limited to repairing or 
replacing, at its option, free of charge for materials or labor, any product, which is proved not in compliance 
with Seller's specifications or proves defective in materials or workmanship under normal use and service. 
Seller shall have no obligation under this Limited Warranty or otherwise if the product is altered or 
improperly repaired or serviced by anyone other than Honeywell factory service. For warranty service, 
return product transportation prepaid, to Honeywell Factory Service, 165 Eileen Way, Syosset, New York 
11791. 

THERE ARE NO WARRANTIES, EXPRESS OR IMPLIED, OF MERCHANTABILITY, OR FITNESS FOR 
A PARTICULAR PURPOSE OR OTHERWISE, WHICH EXTEND BEYOND THE DESCRIPTION ON THE 
FACE HEREOF. IN NO CASE SHALL SELLER BE LIABLE TO ANYONE FOR ANY CONSEQUENTIAL 
OR INCIDENTAL DAMAGES FOR BREACH OF THIS OR ANY OTHER WARRANTY, EXPRESS OR 
IMPLIED, OR UPON ANY OTHER BASIS OF LIABILITY WHATSOEVER, EVEN IF THE LOSS OR 
DAMAGE IS CAUSED BY THE SELLER'S OWN NEGLIGENCE OR FAULT. 

Seller does not represent that the products it sells may not be compromised or circumvented; that the 
products will prevent any personal injury or property loss by burglary, robbery, fire or otherwise; or that the 
products will in all cases provide adequate warning or protection. Customer understands that a properly 
installed and maintained alarm may only reduce the risk of a burglary, robbery, fire or other events 
occurring without providing an alarm, but it is not insurance or a guarantee that such will not occur or that 
there will be no personal injury or property loss as a result. CONSEQUENTLY, SELLER SHALL HAVE NO 
LIABILITY FOR ANY PERSONAL INJURY, PROPERTY DAMAGE OR OTHER LOSS BASED ON A 
CLAIM THE PRODUCT FAILED TO GIVE WARNING. HOWEVER, IF SELLER IS HELD LIABLE, 
WHETHER DIRECTLY OR INDIRECTLY, FOR ANY LOSS OR DAMAGE ARISING UNDER THIS 
LIMITED WARRANTY OR OTHERWISE, REGARDLESS OF CAUSE OR ORIGIN, SELLER'S MAXIMUM 
LIABILITY SHALL NOT IN ANY CASE EXCEED THE PURCHASE PRICE OF THE PRODUCT, WHICH 
SHALL BE THE COMPLETE AND EXCLUSIVE REMEDY AGAINST SELLER. This warranty replaces 
any previous warranties and is the only warranty made by Seller on this product. No increase or alteration, 
written or verbal, of the obligations of this Limited Warranty is authorized. 

Summary of Contents for ADEMCO LYNXR Series

Page 1: ...LYNXR LYNXR24 and LYNXR EN Installation and Setup Guide AWAY OFF STAY AUX LIGHTS ON RECORD LIGHTS OFF STATUS TEST VOLUME CODE NO DELAY BYPASS PLAY CHIME FUNCTION DELETE ESCAPE ADD SELECT ARMED READY 4 5 6 7 8 9 0 1 2 3 K5963V3bx 5 04 Rev A ...

Page 2: ...the hallway outside may not wake up the sleeper if the door is closed Install a smoke detector inside bedrooms where electrical appliances such as portable heaters air conditioners or humidifiers are used Install a smoke detector at both ends of a hallway if the hallway is more than 40 feet 12 meters long Install smoke detectors in any room where an alarm control is located or in any room where al...

Page 3: ...ONE LIST MENU MODE 34 83 ENHANCED SEQUENTIAL MODE 35 84 ASSIGN ZONE VOICE DESCRIPTORS 38 85 RECORD CUSTOM VOICE DESCRIPTORS 40 VOICE PROMPT PROGRAMMING 41 REMOTE PROGRAMMING CONTROL DOWNLOADING 45 SYSTEM OPERATION 47 TESTING THE SYSTEM 53 SYSTEM COMMUNICATION 54 TROUBLESHOOTING GUIDE 56 CONTACTING TECHNICAL SUPPORT 58 REGULATORY AGENCY STATEMENTS 59 SPECIFICATIONS 60 LYNXR LYNXR24 PROGRAMMING DEFA...

Page 4: ...larm and exit alarm caused by leaving a door open after the exit delay expires Event log stores up to 84 events Macro 1 button paging RF Jam Detection Remote phone control Compatible with 5842 Wireless Dialer Compatible with encrypted high security devices ALARM OUTPUT Built in sounder Piezo output 30mA max Bell output 120mA max Steady output for burglary panic Temporal pulse output for fire alarm...

Page 5: ...disconnect the ribbon cable from the front assembly leaving the ribbon cable connected to the terminal block PC board The back plate contains the terminal block for making wiring connections 3 Mount the back plate to a sturdy wall feeding the field wiring through the appropriate openings in the back plate 4 After wiring connections are made carefully reconnect the ribbon cable to the front assembl...

Page 6: ...r the plug in jacks or the screw terminals HARDWIRE ZONE Supports 1 EOLR supervised zone using either closed circuit or open circuit sensors SOUNDERS The system includes a built in sounder in the master keypad If desired an external bell or piezo sounder can be connected Bell Use a 6 14V bell with maximum current drain of 120mA Piezo Use a 6 14V piezo sounder with maximum current drain of 30mA Thi...

Page 7: ...s and has a response time of 350msec Maximum zone resistance 300 ohms plus EOLR Note The hardwire zone cannot be used as a fire zone a Connect sensors contacts to the hardwired zone terminals 6 and 7 Refer to the Summary of Connections diagram b Connect closed circuit devices in series in the high side of the loop The EOL resistor must be connected in series with the devices following the last dev...

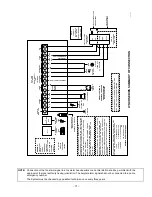
Page 8: ...LRR TRIGGER LYNXR EN SOUNDERS PLCD AC EARTH GROUND EARTH GROUND HARD WIRED ZONE INCOMING TELEPHONE LINE RING TIP RING TIP PIEZO 6 14VDC 120mA max e g WAVE2EX 6 14VDC 30mA max DATA OUT SYNC IN POWERLINE CARRIER DEVICES RJ11 8 POS JACK AC AC SYNC COM DATA 9 BELL TRIGGER SIGNAL NEG THE LYNX SERIES CONTROLS ARE EQUIPPED WITH AN INTEGRAL RECHARGEABLE BATTERY PACK LYNXR P N LYNXRCHKIT SC LYNXR24 P N LYN...

Page 9: ... a report is sent to the central station In addition the system will beep once every 45 seconds to audibly indicate a low battery condition press any key to stop the beeping AC Power and Rechargeable Backup Battery Connecting AC Power and backup battery 1 Connect wires from the 1332 1332X10 1332CN in Canada AC Transformer to terminals 15 and 16 as shown in the wiring diagram 2 Remove battery retai...

Page 10: ...e the control panel assembly is snapped closed prior to applying AC power 1 When battery replacement is required unplug the transformer from the wall outlet and open the control panel cover 2 Remove the battery retainer and disconnect the battery pack connector from the receptacle on the terminal block PC board 3 Remove the battery pack from the back plate 4 If required replace the tape that secur...

Page 11: ...ouse ID 00 disables all wireless keypads An RF House ID is not necessary for other 5800 Series transmitters the entry should be left at 00 default in those cases The 5827 reports low battery status as zone 00 Transmitter Supervision Except for some transmitters keypads that may be carried off premises 5804 5804BD 5804BDV 5804E 5804WATCH and 5827 each transmitter is supervised by a check in signal ...

Page 12: ...e they do not automatically send check in signals 3 When one button of a transmitter RF UR or BR is activated all zones assigned to other buttons on that transmitter are cleared This also applies to 5816 and 5817 transmitters that have multiple loops zones 4 Any transmitter that is not entered will not turn off its zone number Go No Go Test Mode Note Encrypted high security devices must be activat...

Page 13: ...hether or not the loop is used UL The 5800RL 5802MN 5802MN2 5804 5804BD 5804BDV 5804E 5804WATCH 5814 5816TEMP 5819 5819S WHS BRS and 5850 GBD wireless transmitters are not intended for any UL installations Setting DIP Switches on the 5800RL and 5827 Transmitter s Set the 5800RL and 5827 Transmitters to the programmed House ID by using the DIP switches OFF position is indicated by Notes 1 The 5827 ...

Page 14: ... Data Field 1 Press Field No for example 21 followed by the required entry 2 When you have completely programmed a data field the keypad will beep three times and then automatically display the next data field in sequence To go to a different field press plus the desired field number 3 If the number of digits that will be entered in a data field is less than the maximum number of digits available ...

Page 15: ...nt an intruder has hidden on the premises before the system is armed or gains access to the premises through an unprotected area Zone Characteristics Delayed alarm using the programmed entry exit time if entry exit types 01 or 02 or interior with delay type 10 zone is faulted first Instant alarm in all other situations Active when armed in AWAY or AWAY NO DELAY mode Bypassed automatically when arm...

Page 16: ...ay when armed in the AWAY NO DELAY mode Exit delay regardless of the arming mode selected Type 20 Arm Stay Zone type 20 is a special purpose zone type used with 5800 Series wireless pushbutton units Zone Characteristics Exit delay regardless of the arming mode selected System is armed in the STAY mode when the zone is activated Zone number is sent to the central station as a user number when armin...

Page 17: ...ller to define the specific zones intended to chime when faulted while the system is in Chime mode If enabled these zones are defined in zone list 3 see 81 Zone List Menu Mode 27 Real Time Clock Display 0 do not display the time 1 display the time Refer to the User s Manual for setting the clock time and date 29 Daylight Savings Time Start End Month 0 0 no daylight saving time used 1 12 start mont...

Page 18: ...11 for 12 for 13 for a pause 2 seconds NOTE Whenever AAV is used primary field 41 and secondary field 42 phone numbers should be preceded with the call waiting disable command Otherwise there is the possibility of connection of the third party to LYNX during AAV mode 40 PABX Access Code Enter up to 6 digits if PABX is needed to access an outside line If fewer than 6 digits need to be entered exit ...

Page 19: ...uring one armed period is determined by field 92 2 If Option 5 is selected a 10 digit account number must be entered in Fields 43 or 44 3 Option 5 or 7 ADEMCO Contact ID Reporting must be selected for AVM 4 Option 5 or 7 ADEMCO Contact ID Reporting must be selected if installing the 5842 Wireless Dialer 49 Split Dual Reporting To Primary To Secondary 0 All reports None unless primary fails then al...

Page 20: ...on report if trouble restore report is enabled in fields 60 71 For Event Logging Option 2 must be selected If the control detects an RF jam condition a FAULT message appears for zone 90 The Contact ID code for RF Jam is 344 Note This feature cannot be used in conjunction with the 5827 wireless keypad SYSTEM STATUS AND RESTORE REPORT CODES PROGRAMMING 59 76 89 Program Report Codes using the interac...

Page 21: ... See notes above This will be sent when a zone is manually bypassed 62 AC Loss Report Code See notes above Timing of this report is random with up to a 4 hour delay If AC restores before the report goes out there is no AC restore report 63 Low Battery Report Code See notes above This will be sent when a low battery condition exists in the system s standby battery 64 Test Report Code See notes abov...

Page 22: ...g These digits can consist of a PIN number account number pauses or special digits needed by the pager these types of characters are not displayed or any other characters the user chooses that will be displayed eg using a character code to distinguish between control panel messages and other pager messages You do not need to fill all 16 digits Press next field number to exit the field To clear the...

Page 23: ...d to enable the Audio Alarm Verification and or the Remote Phone Control features Notes 1 In order to activate the Remote Phone Control feature and defeat an answering machine ensure that the correct ring detection count 15 has been programmed in field 95 2 Remote phone session will be terminated if a report must be sent 3 Alarm Audio Verification will only function when Contact ID is selected AAV...

Page 24: ... for detailed procedure 83 ENHANCED SEQUENTIAL MODE Interactive menu mode used to enter RF transmitter serial numbers Refer to the 83 Enhanced Sequential Mode section for detailed procedure 84 ASSIGN ZONE VOICE DESCRIPTORS Interactive menu mode used to assign descriptors to each zone These descriptors will be announced whenever the system announces an event involving a zone 85 RECORD CUSTOM VOICE ...

Page 25: ... prepare the dialer for setup refer to the Installation Instructions provided with the 5842 Wireless Dialer Note 1 It takes about 95 seconds for Lynx to transmit the setup information after power has been applied to the control 2 Entering Programming mode may take up to 18 seconds if the 5842 Wireless Dialer has been enabled The system will display until the Lynx enters Programming mode You must r...

Page 26: ...ing installed Enter 1 to enable 5842 Wireless Dialer trouble reports Press to advance to next field or to return to the previous prompt Ln Response to phone line tamper continue return to previous prompt 0 enable trouble sounder 1 enable alarm sounder Select the Lynx response to detection of a line cut at the 5842 Wireless Dialer If the trouble sounder is enabled the system will sound a trouble ev...

Page 27: ...se instructions or to the Program Form while programming the system because the keypad display does not show prompt titles Instead prompts are indicated by a number letter combination The prompts for 56 are as follows A 01 Zone Number for entering the zone number b Zone Type for entering zone type C Report Code for entering the zone s report code d Input Type for entering the transmitter s input t...

Page 28: ...sting of 2 numerical digits For example for a report code of 3C enter 0 3 for 3 and 1 2 for C If this is Zone 1 95 96 or 99 the system skips to the VOICE DESCRIPTOR prompt 1C d i Input type 3 RF supervised RF sends periodic check in signals faults restore and low battery signals Note RF type transmitters must remain within range of the receiver otherwise a supervision failure signal will occur 4 U...

Page 29: ...med IA LC Enroll mode 0 advance to the VOICE DESCRIPTOR prompt 1C Note This will save all zone parameters 1 enter now and proceed to SERIAL NUMBER prompt 1b Note Not applicable if the serial number is already present 2 copy the last serial number entered into local ram Note If this is the 1st zone none will be in the buffer and the panel will emit a long tone Not valid if serial number is already ...

Page 30: ...ved along with the last digit that was entered entering 123456789 yields the serial number 1234569 IC Voice descriptor 0 skip to next zone A 1 enter descriptor mode existing descriptor for this zone will be announced Each zone can have a voice descriptor of up to 3 words that will be announced whenever the system announces status for that zone Id vi Descriptor 1 Enter 2 digit vocabulary index numb...

Page 31: ...trouble that must occur to a zone or group of zones zone list in order to activate the device These conditions apply only when a zone list is used The different choices for EVENT are listed below and in the Programming Powerline Carrier Devices paragraph that follows ALARM Device activates upon any alarm in an assigned zone in the zone list FAULT Device activates upon any opening or short in an as...

Page 32: ...uring normal system operation any devices may be manually started by keypad entry of Code 4 n or manually stopped by keypad entry of Code 7 n where n the device number to be controlled Code is required for devices 7 and 8 For devices 1 6 code is not required See User Manual for more information Programming Powerline Carrier Devices While in program mode press 80 to enter Output Device Menu Mode Th...

Page 33: ...ue return to previous prompt If a zone list will be used to start the device action enter the zone list number at this prompt E zt Start zone type 01 58 zone type to start this device action select only those that are applicable 00 zone type not used for this device continue return to previous prompt If a zone type or system operation will be used to start the device action enter the appropriate 2...

Page 34: ... or 03 to program or 00 if no zone lists are used b zz Zone entry to list 01 41 95 96 99 zone numbers to add to zone list accept zone number and enter the next zone number 00 accept zone number s and continue to next prompt Enter each zone number to add to the zone list by first entering the zone number then the key for example 01 02 03 The system will announce the Voice Descriptor for the selecte...

Page 35: ... column provides a further explanation of the entries Notes 1 Entry of a number other than one specified will give unpredictable results 2 In Enhanced Sequential Mode 4 button type keys will always be enrolled simultaneously They will be stopped at the 4 button boundaries of 26 30 34 and 38 provided the zone is free of a serial number If the first zone of the key has a serial number enrolled the r...

Page 36: ...r has already been entered however it may still be confirmed viewed or deleted If the transmitter s serial number has not been previously entered you may enter the enroll serial number mode 1A by entering 1 or copy the last serial number that was entered by entering 2 If the transmitter s serial number has been previously entered you may view the present serial number by entering 3 If view is sele...

Page 37: ...tor if it is programmed followed by three beeps and return to Prompt 1A and LC will be displayed No additional transmissions are needed for confirmation Manual Entry Enter the 7 digit serial number printed on the transmitter If you enter an incorrect digit press the key to backup to prompt 1A and start over When all 7 digits are entered press the key If less than 7 digits are entered the keypad wi...

Page 38: ...ndex number of first descriptor word for this zone 6 accept word and advance to descriptor 2 descriptor 2 will be announced 8 accept word and advance to prompt A for next zone Press any other key to repeat the selected word Enter the first word of the descriptor for the selected zone Use the 6 or 8 key to advance as described To change the entered index number before pressing 6 or 8 simply press d...

Page 39: ...TIO 62 POLICE 18 POOL R 63 REAR 19 ROOM S 64 SECOND FLOOR 65 SEVEN 20 SHED 21 SHOP 66 SIDE 67 SILENT POLICE 68 SIX 69 SLIDING 22 SMOKE 23 SOUTH 24 STORAGE 85 SYSTEM T 25 THIRD FLOOR 75 THREE 76 TRANSMITTER 77 TWO U 78 UPSTAIRS 26 UTILITY 79 UTILITY ROOM W 27 WEST 80 WINDOW Y 28 YARD Z 81 ZERO 86 ZONES 29 1ST 30 2ND 31 3RD 70 Custom Word 1 71 Custom Word 2 72 Custom Word 3 73 Custom Word 4 74 Custo...

Page 40: ...prompt blinks indicating the mode is inactive A 7d Custom descriptor number Enter 7 d Where d 0 4 each representing custom word 70 71 72 73 or 74 respectively Any existing word will be announced Press to start recorder Begin speaking immediately after the third beep Speak the desired word clearly near the microphone Recording stops after 1 5 seconds 6 accept word and ready to record next descripto...

Page 41: ...long rejection beep and repeat the previous voice prompt 3 Phone numbers and account numbers can be left blank by pressing the ADD AWAY key without entering any data 4 LYNXR automatically saves phone and account number data once all available digits are entered ENTERING VOICE PROMPT PROGRAMMING 1 Power up the control and enter the Installer Code 4 1 1 2 8 8 8 2 Once you have entered into the Voice...

Page 42: ... delay door location See 1 Press SELECT Activate transmitter twice Press ADD System announces descriptors for the programmed sensor 1 Delay Door Location Front Basement Back Sliding Side Hall Garage Kitchen Patio To add a Window Motion Detector or Fire Detection Sensor Select Add Sensors Press SELECT Select sensor type See 2 Press SELECT Select sensor location See 3 Press SELECT Select location mo...

Page 43: ...mitter twice Press ADD System announces the key number LYNXR automatically saves phone and account number data once all available digits are entered To Add First Central Station Phone Number Select First Central Station Phone Number Press SELECT Enter first central station phone number up to 20 digits Press ADD Enter first central station account number up to 4 digits Press ADD All four digits of ...

Page 44: ...tral station account number up to 4 or 10 digits Press ADD Refer to the LYNXR Series Installation and Setup Guide to view the complete set of Template default table selections To Program a Template Default Table Select Templates Press SELECT Select template See 6 Press SELECT 6 Template selections Template 1 Template 2 Template 3 Template 4 To Enter Expert Programming Mode Once you have entered th...

Page 45: ...romising information Equipment required to download to a system at the premises An IBM PC compatible computer and appropriate interconnecting cables Either a HAYES brand SMARTMODEM 1200 Level 1 2 or higher external or Level 1 1 or higher with 4 position DIP switch internal style a HAYES brand Optima 336 external a HAYES brand Optima 24 Plus FAX96 or an Ademco CIA Modem Compass Downloader for Windo...

Page 46: ...active and will display CC 2 The keypad will become active after the download communication is terminated 3 The detailed operation of the download functions is covered in the installation instructions for the Compass Downloader for Windows Remote Programming Advisory Notes Keypad entries are ignored during the time interval stated above A copy of the program downloaded may be printed using the IBM...

Page 47: ...access to the system for arming disarming etc The Installer Code can disarm the system only if it was used to arm it In addition the Installer Code cannot disarm the system if it was armed by pressing and holding a Quick Arm button The Babysitter Code User Code No 7 can disarm the system only if it was used to arm it In addition the Babysitter Code cannot disarm the system if it was armed by press...

Page 48: ...rm if Quick Arm is programmed AWAY or STAY hold down for at least 2 seconds To disarm the system and silence alarms OFF To bypass a zone s BYPASS 2 digit zone number s To turn Chime mode on or off FUNCTION CHIME Message Center To record a message FUNCTION RECORD FUNCTION RECORD To stop recording before end of 20 seconds OFF To play back a message FUNCTION PLAY To skip a message To delete all messa...

Page 49: ... is not entered or the eight 8 second period expires a modem tone will be generated for remote programming Compass Downloading If a valid User Code has been entered the control will announce the current system status and or beeping sounds Keypad Functions Remote Phone Control Feature To remotely disarm system 1 To remotely arm in AWAY mode 2 To remotely arm in STAY mode 3 To remotely arm in AWAY o...

Page 50: ...he call will be terminated Operator Commands The Central Station operator begins the session which last 5 minutes by entering one of the valid AVM commands shown in the table below The session may be extended 5 minutes without changing the operating mode by pressing the 7 key on the touch tone phone Selecting another operating mode also resets the session an additional 5 minutes During the last mi...

Page 51: ...rminate acknowledge the message The system will dial the secondary phone number a maximum of eight times The Follow Me alarm functions may be triggered by a variety of events depending upon the selections made during programming in field 49 Note The follow me system announcement will be terminated if any other event requires the system to dial out or if an audible alarm has occurred Powerline Carr...

Page 52: ...g installed Fault Zone 93 along with a single beep indicates that setup information from the 5842 Wireless Dialer has not been properly received Power Failure If there is no display at all and both indicators are not lit operating power for the system has stopped and the system is inoperative If the display is lit and the AC display is off the system is operating on battery power only During an AC...

Page 53: ... pressing OFF Check entry exit delay zones 2 Check the keypad initiated alarms that are in the system by pressing the Panic key pairs If the system has been programmed for audible emergency the keypad will emit a steady alarm sound and ALARM and zone number will be displayed Silence the alarm by entering the security code and pressing OFF If the system has been programmed for silent emergency ther...

Page 54: ...ake kissoff frequencies that the panel supports and the different formats that can be sent for each FORMAT HANDSHAKE TRANSMITS DATA KISSOFF TRANSMIT TIME Low Speed 1400Hz 1900Hz 10PPS 1400Hz Under 15 seconds 3 1 Standard report 4 1 4 2 Sescoa Rad 2300Hz 1900Hz 20PPS 2300Hz Under 10 seconds 3 1 Standard report 4 1 4 2 Express 1400 2300Hz DTMF 10 cps 1400Hz Under 3 seconds 4 2 Contact ID 1400 2300Hz...

Page 55: ...ID EVENT CODES Code Definition 110 Fire Alarm 121 Duress 122 Alarm 24 hour Silent 123 Alarm 24 hour Audible 131 Alarm Perimeter 132 Alarm Interior 134 Alarm Entry Exit 135 Alarm Day Night 145 Wireless Dialer Tamper plus Zone 93 Alarm 146 Silent Burglary 150 Alarm 24 Hour Auxiliary 301 AC Power 338 Wireless Dialer Low Battery plus Zone 93 341 Wireless Dialer Tamper plus Zone 93 Trouble 342 Wireless...

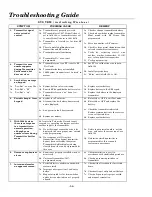
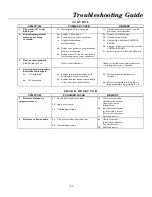
Page 56: ...odic beep s from keypad 4a System is in Test mode 4b A transmitter low battery has occurred and is displayed 4c A supervision fault has occurred 4d System low battery 4a Enter Code OFF to exit Test mode 4b Enter Code OFF and replace the battery 4c Check the transmitter indicated Restore communication to the receiver to cancel the condition 4d Replace system battery 5 With 5800 System there is no r...

Page 57: ...lted zone s Check for faulted zones and make intact or use Bypass arming if desired 4 System doesn t respond to keystrokes on keypad 4a CC displayed 4b d1 displayed 4a System is in communication with downloader at central station 4b System has just been powered and is in its one minute initialization 4a Wait until download session is finished 4b Wait for initialization to finish or bypass this tim...

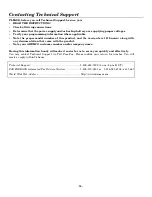
Page 58: ...sion level if known along with any documentation that came with the product Note your ADEMCO customer number and or company name Having this information handy will make it easier for us to serve you quickly and effectively You may contact Technical Support via Toll Free Fax Please include your return fax number You will receive a reply within 24 hours Technical Support 1 800 645 7492 8 a m 8 p m E...

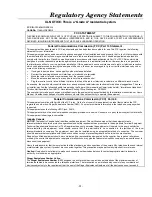
Page 59: ...lation Instructions or User s Manual Unauthorized changes or modifications could void the user s authority to operate the equipment Federal Communications Commission FCC Part 68 This equipment complies with Part 68 of the FCC rules On the front cover of this equipment is a label that contains the FCC registration number and Ringer Equivalence Number REN You must provide this information to the tel...

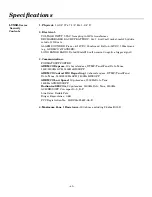
Page 60: ...nominal negative trigger signal 3 Communication FORMATS SUPPORTED ADEMCO Express 10 characters sec DTMF TouchTone Data Tones 1400 2300Hz ACK 1400Hz KISSOFF ADEMCO Contact ID Reporting 10 characters sec DTMF TouchTone Data Tones 1400 2300Hz ACK 1400Hz KISSOFF ADEMCO Low Speed 10 pulses sec 1900Hz Data Tone 1400Hz ACK KISSOFF Radionics SESCOA 20 pulses sec 1800Hz Data Tone 2300Hz ACK KISSOFF Can rep...

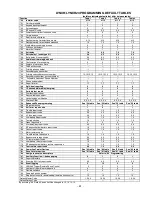
Page 61: ...5 Wireless Dialer 0 0 0 0 0 0 0 0 0 0 0 0 0 0 0 0 56 Enhanced Zone programming See 56 table See 56 table See 56 table See 56 table 58 RF jam detection 0 0 0 0 59 Exit error report code 1 0 1 1 60 Trouble report code 1 0 1 0 1 0 1 0 61 Bypass report code 0 0 0 0 0 0 0 0 62 AC loss report code 0 0 0 0 0 0 0 0 63 Low battery Report code 1 0 1 0 1 0 1 0 64 Test report code 1 0 1 0 1 0 1 0 65 Open repo...

Page 62: ...5 Wireless Dialer 0 0 0 0 0 0 0 0 0 0 0 0 0 0 0 0 56 Enhanced Zone programming See 56 table See 56 table See 56 table See 56 table 58 RF jam detection 0 0 0 0 59 Exit error report code 1 0 1 1 60 Trouble report code 1 0 1 0 1 0 1 0 61 Bypass report code 0 0 0 0 0 0 0 0 62 AC loss report code 0 0 0 0 0 0 0 0 63 Low battery Report code 1 0 1 0 1 0 1 0 64 Test report code 1 0 1 0 1 0 1 0 65 Open repo...

Page 63: ...1 56 MOTION DETECTOR 6 9 1 0 3 RF 1 22 02 SMOKE DETECTOR 26 21 1 0 5 BR 3 27 22 1 0 5 BR 2 28 20 1 0 5 BR 4 29 23 0 0 5 BR 1 30 21 1 0 5 BR 3 31 22 1 0 5 BR 2 32 20 1 0 5 BR 4 33 23 0 0 5 BR 1 92 1 0 95 08 1 0 96 09 1 0 99 07 1 0 NOTE Zone 1 is a hardwire zone Zone 2 to 41 are RF zones Zone 92 is Duress Zone 99 is keypad panic 56 ZONE ASSIGNMENT ALARM REPORT CODES FOR TABLES 3 4 Zone No Zone Type ...

Page 64: ...house Security SH10A siren as device 8 you must change the device action default to 3 if using default table 4 80 DEFAULT TABLE APPLIES TO DEFAULT TABLE 1 and 2 devices 1 7 have no default values Start Stop Device Number Action Event Zone List Zone Type System Operation Restore of Zone List Zone type System operation 8 2 33 36 81 ZONE LIST FOR OUTPUT DEVICES DEFAULT TABLE Applies To Default Table ...

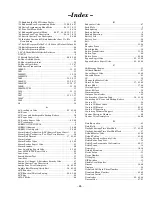
Page 65: ... Stay 16 Assign Or Change A Secondary Security Code 47 Assign Custom Voice Descriptors 40 Assign Zone Voice Descriptors 38 61 62 Audible Exit Warning Quick Exit 18 61 62 AUX Function 48 AUX Function 1 Button Paging 22 61 62 AUX Key 22 AWAY Mode 48 B Babysitter Code 47 Back Plate 5 Backlighting 17 Backup Battery 9 Backup Reporting 18 Battery Life 12 Battery Low 52 Bell 60 BR 11 28 Burglary Zones 17...

Page 66: ...Phone Control 23 Loop Number 28 63 LOW BAT 52 Low Battery Report Code 61 62 Low Battery Report Code 21 Low Battery Restore Report Code 21 61 62 Low Speed 54 LYNX DM 5 LYNXR LYNXR24 Programming Default Tables 61 LYNXRCHKIT HC 10 LYNXRCHKIT SC 10 LYNXR EN Programming Default Tables 62 M Macro Function 22 Master Code 47 Master Security Code 17 Memory Of Alarm 48 Message Center 48 Modem Comm 52 Mounti...

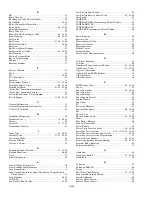
Page 67: ...e Programming 45 STAY Mode 48 Stop Recording 48 Stop Zone List 33 Stop Zone Type 33 Supervised Fire 16 Supervised RF 11 28 System Battery 56 System Communication 54 55 System Features 4 System Operation 31 32 47 48 49 50 51 52 64 System Power 4 System Words 39 T Technical Support 58 Telco Handoff 45 Temporal Pulse 17 Test Mode 48 53 56 57 Test Report Code 21 61 62 Test Restore Report Code 61 62 Te...

Page 68: ... 68 Notes ...

Page 69: ...oors closed doors glass partitions glass doors or windows Mechanical tampering masking painting or spraying of any material on the mirrors windows or any part of the optical system can reduce their detection ability Passive Infrared Detectors sense changes in temperature however as the ambient temperature of the protected area approaches the temperature range of 90 to 105 F 32 to 40 C the detectio...

Page 70: ...IN NO CASE SHALL SELLER BE LIABLE TO ANYONE FOR ANY CONSEQUENTIAL OR INCIDENTAL DAMAGES FOR BREACH OF THIS OR ANY OTHER WARRANTY EXPRESS OR IMPLIED OR UPON ANY OTHER BASIS OF LIABILITY WHATSOEVER EVEN IF THE LOSS OR DAMAGE IS CAUSED BY THE SELLER S OWN NEGLIGENCE OR FAULT Seller does not represent that the products it sells may not be compromised or circumvented that the products will prevent any ...

Page 71: ...H THE NATIONAL FIRE PROTECTION ASSOCIATION S STANDARD 72 CHAPTER 2 NATIONAL FIRE PROTECTION ASSOC BATTERYMARCH PARK QUINICY MA 02269 PRINTED INFORMATION DESCRIBING PROPER INSTALLATION EVACUATION PLANNING AND REPAIR SERVICE IS TO BE PROVIDED WITH THIS EQUIPMENT 1332X10 ONLY CONNECTIONS FCC ID CFS8 DLLYNX LYNXR LYNXR24 AND CFS8DLLYNXREN 1 LYNXR EN COMPLIES WITH FCC RULES PART 68 FCC REGISTRATION No ...

Page 72: ... K5963V3oŠ K5963V3bx 5 04 Rev A 165 Eileen Way Syosset New York 11791 Copyright 2004 Honeywell International Inc www honeywell com security ...

Reviews: