background image

Installation and Setup Guide 


5-18


Zone List Programming  

Zone List programming involves: 

1.  Selecting an appropriate zone list number; 
2.  Adding the desired zone numbers to be included in that list. 


Start Zone List Program Mode by pressing 

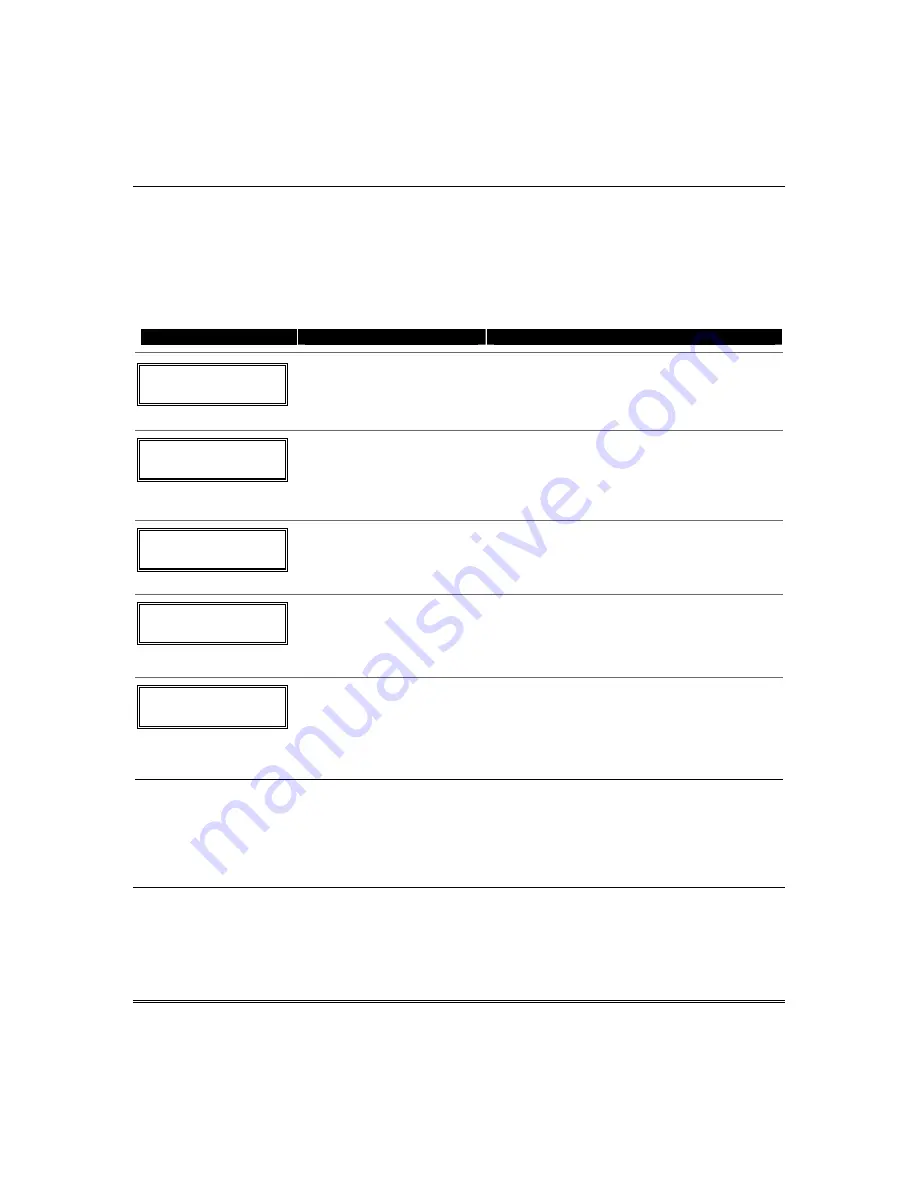
81 while in Data Programming mode. The following 

prompts are displayed:  


*81 Menu Mode 

PROMPT 

VALID ENTRIES


EXPLANATION


Zone List No.


(00 = Quit) 

01


Zone List Number


01-12 = zone list number 
[

] to continue 

Enter the Zone List Number to program (or 00 to 
end these entries). Press [

] to advance. 

In the following displays, zone list 01 has been 
selected for programming.  


01  Enter Zn Num.


(00 = Quit) 

00


Zone Number


01-06, 9-24, 49-64 = zone 

numbers followed by [

] to 

accept each zone 

00 to continue 

Enter each zone number to add to the zone list, 
followed by pressing [

] (example, 01

, 02

, 03

). 

After all zones are entered, press 00 to continue. 

IMPORTANT:

 Do not include fire zones in zone 

lists that are used to STOP device actions. 


01 Del Zn List?


0 = No  1 = Yes 

0


Deleting Zone Lists


0 = don’t delete list 
1 = delete this zone list 
[

] to continue 

To delete the zone list, enter 1. All zones in the 
zone list will be deleted automatically and the 
system returns to the Zone List No. prompt. 

To save the zone list, enter 0.  


01 Delete Zone?


0 = No  1 = Yes 

0


Deleting a Zone


0 = don’t delete zones 
1 = go to next prompt to delete 

zones  

[

] to continue 

To save the entire zone list, enter 0 and the 
system returns to the Zone List No. prompt. 

To delete a zone or zones in a zone list enter 1 to 
continue. 


01 Zn to Delete?


(00 = Quit) 

00


Delete the Zone


01-06, 9-24, 49-64 zones to be 

deleted from list followed 
by [

] to accept each zone 

00 to continue 

Enter each zone to be deleted from the list, 
followed by [

]. After all zones to be deleted are 

entered, enter 00 to return to the Zone List No. 
prompt. so that another list can be programmed, if 
desired. 


Notes: 

 Any list may include any or all of the system's zone numbers. 

 A zone list can be assigned to more than one output relay. 

 When creating zone list 4 for linked zones, include only zones assigned to zone types 3, 4, or 5.  Do not 

include zones that have delays (entry/exit zones, interior w/delay) or 24-hour zones, as these zone types 
may produce unpredictable operation and may not function as intended. 


About Function Key Programming (

∗∗∗∗

57 Menu Mode) 

The system provides the ability to program each of the four keypad function keys to perform one of 12 
system operations. The end user can then activate the function by simply pressing and holding the 
programmed key for 2 seconds. Typical functions (listed below) include single-button arming, turning 
lights on/off, or single-button paging.  


Summary of Contents for ADEMCO VISTA-12A

Page 1: ...K10022 1V1 10 05 Rev A ADEMCO VISTA 12A ADEMCO VISTA 12E Security Systems Installation and Setup Guide ...

Page 2: ...ii ...

Page 3: ... Module 2 13 Installing the Transmitters 2 13 Installing a Keyswitch 2 14 Connecting Relay Modules 2 15 Powerline Carrier Devices 2 16 Trigger Module and On Board Triggers 2 17 Phone Line Connections 2 18 Alternative Communications Media ACM Connections 2 18 Audio Alarm Verification Connections AAV Listen In 2 19 Programming Overview 3 1 About Programming 3 1 Zones and Partitions 3 2 Keypads 3 3 W...

Page 4: ...g 57 Menu Mode 5 18 Programming Function Keys 5 19 About Descriptor Programming 82 Menu Mode 5 20 Configurable Zone Type Programming 83 Menu Mode 5 22 Programming Installer and User Schedules 5 23 System Communication and Operation 6 1 Panel Communication with Central Station 6 1 Report Code Formats 6 1 Robofon 8 Format 6 4 ADEMCO Contact ID 6 5 Security Codes 6 6 Keypad Functions 6 7 Panic Keys 6...

Page 5: ...o arm disarm or allow disarm the system Up to 2 Keypad macros which can be activated by wired wireless keypads Paging feature allows certain system conditions to be reported to up to 2 pager phone numbers can use a dedicated key on keypads to send a signal to a pager User programmable telephone number for audio beeps reporting of alarms to the user follow me feature Built in Telephone Line Monitor...

Page 6: ...net TCP IP Internet Intranet Network Modules or other network interfaces e g EUREKA AC Power Supply VISTA 12A Plug in 230VAC power pack XF1 Model No 60844CK Ap11V 99090 E148 36 VISTA 12E 220VAC wired in transformer 16 5VAC 25VA Important Installation Highlights Installer Please Read This system uses addressable keypads and a Zone Expander Module see table of addresses in Programming Overview secti...

Page 7: ...asteners or anchors not supplied with the four cabinet mounting holes 2 Remove cabinet door then remove the lock knockout from the door Insert the key into the lock 3 Position the lock in the hole making certain that the latch will make contact with the latch bracket when the door is closed When correctly positioned push the lock until it is held securely by its snap tabs Notes The cabinet can be ...

Page 8: ...of the cabinet so that it will align behind the lower left mounting hole in the PC board 4 Insert top of circuit board into slots at top of cabinet Make sure that circuit board rests in slots as indicated in the diagram shown below 5 Swing base of circuit board onto the raised cabinet tab and standoff 6 Secure the sides of the PC board to the enclosure using the 2 screws provided Notes Before inst...

Page 9: ...d Word Display 6128RF 6148 6150 6150RF 6150V Typical Alpha Display 6160 6160V 6164 The system supports up to 8 keypads which can be assigned to partitions in any combination see program fields 190 196 For single 4 wire runs determine the current drain of all units then refer to the Wiring Run chart to determine the maximum length that can be safely used for each wire size Use supplementary power i...

Page 10: ... DRAIN OF ALL DEVICES CONNECTED TO A SINGLE WIRE RUN Wire Size 50mA or less 100mA 300mA 500mA 600mA 0 6mm O D 152m 76m 24m 15m 13m 0 8mm O D 228 6m 116m 40m 24m 20m 1mm O D 396m 198m 67m 40m 35m 1 2mm O D 457m 305m 100m 70m 52m Includes Keypads RF Receivers Zone Expander Relay Units or TeleCommand Phone Module Maximum wire lengths for any device that is wired directly to the control can also be de...

Page 11: ...a battery since the battery supplies this current Do NOT perform steps 2 and 3 if using a self activated siren Wiring the AC Transformer Transformer Connect the Transformer to terminals 1 and 2 on the control board See wiring table at bottom of page for wire size to use Use wired in or plug in 110 e g 1321 220VAC transformer with 16 5VAC 25VA output VISTA 12A XF1 Model 60844CK Ap11 V 99090 E148 36...

Page 12: ...ct the battery Operating on Battery Power Alone To operate the control on battery power only connect a jumper between the negative battery terminal and control PCB terminal 4 aux power Earth Ground Metal Cold Water Pipe or Earth Ground Rod Use a non corrosive metal strap copper is recommended firmly secured to the pipe rod to which the ground lead is electrically connected and secured Notes This p...

Page 13: ...splay Voice Keypad 60mA standby 160mA alarm 6160V Alpha Display Voice Keypad 60mA standby 190mA alarm 6164 Keypad w 4 Zone Expander and Relay 115mA standby 190mA alarm 5881 RF Receiver 35mA 5883 RF Transceiver 80mA 4219 Zone Expander 35mA 4204 Relay Unit 15 180mA 4229 Zone Expander Relay Unit 35 100mA TeleCommand 55mA standby 119mA local phone 85mA remote phone TOTAL Current available from Aux ter...

Page 14: ...emergency zones only Do not use double balanced zones as fire zones Zone Doubling Connections as shown resistors provided 2k 2k 2k ZONE 3 2k 2k 2k ZONE 4 12 13 14 zone 002 V0 TAMPER CONTACTS TAMPER CONTACTS 10 11 6 2k ZONE 10 3k ZONE 2 zone 004 V0 Double Balanced Zones Zone Doubling Figure 5 Configuring Zones Notes EOLR If the EOLR is not at the end of the loop the zone is not properly supervised ...

Page 15: ...ll occur This feature eliminates false alarms from smoke detectors due to electrical or physical transients Maximum current for trigger 17 output for 4 wire smoke detectors is 300mA Figure 6 4 Wire Smoke Detector Connections 2000 OHMS EOLR HEAT DETECTOR RED EOL POWER SUPERVISION RELAY MODULE A77 716B USE N O CONTACT WHICH CLOSES WHEN POWER IS APPLIED VIOLET AUX PWR OUTPUT TERMINALS 5 4 _ _ _ BLK _...

Page 16: ...ors at the end of loops connected to the 4219 4229 modules End of line resistors used on the control terminals are 2000 ohms Expansion zones have normal response time 400 500 msec except zone connected to each module s loop A which can be set for fast response 10 15 msec BRN GRN BLK GROUND RED 12VDC YEL 4 3 2 1 ZONES A B C D F G H DIP SWITCH FOR SETTING ADDRESS AND ZONE A RESPONSE TAMPER JUMPER PO...

Page 17: ...164 Keypad Instructions for other mounting wiring and programming information Notes Each 6164 keypad supports up to 4 wired expansion EOLR or double balanced zones and one relay output Use 2000 ohm end of line resistors at the end of loops connected to the 6164 keypads Enter 6164 keypad program mode by pressing and holding down both the 1 and 3 keys within 60 seconds of power up Enable the keypad ...

Page 18: ...er Supervision Connections paragraph in the Wiring to Keypads section page 2 3 Notes The receiver is supervised and a trouble report is sent CHECK 100 displayed if communication between the panel and receiver is interrupted or if no valid RF signals from at least one supervised transmitter are received within 12 hours Only one receiver can be installed in a system If the receiver is mounted remote...

Page 19: ...rammed House ID field 24 using its DIP switches 5827 or follow the instructions provided with the device Notes Refer to the table of compatible devices at the back of this manual Supervised transmitters send check in signals to the receiver at 70 90 minute intervals If at least one check in message is not received from each transmitter within a 12 hour period the missing transmitter number s and C...

Page 20: ...system is armed an alarm will occur Notes Use 4146 keyswitch or any normally open keyswitch Use only one keyswitch per partition If using a keyswitch in more than one partition you must use relays not the on board triggers for the Red Green LED functions step 2 When using a keyswitch the zone it is connected to is no longer available for use as a protective zone Use 56 Menu mode to program the key...

Page 21: ...from the control s terminals or if the module cover is removed and the tamper jumper is installed Alpha CHECK xx Wire Expansion FAULT xx Wire Expansion TAMPER xx Wire Expansion ALARM xx Wire Expansion Fixed Glass lxx or 91 if field 199 set for 2 digit display where xx is the module s address If communication tamper failure occurs on a device with zones wired to it all zones on the device will be d...

Page 22: ...nu Mode Notes When using Powerline Carrier devices you must use a Powerline Carrier Device Modulator It supplies signals from the control panel through the premises AC mains wiring to the Powerline Carrier devices which are plugged into AC outlets You can then make devices that are plugged into Powerline Carrier devices perform various functions in response to commands you enter at the security sy...

Page 23: ...er Module by aligning its 8 pin header over the main PC board s 8 pin connector orient the Trigger Module as shown on the Summary of Connections diagram then press down firmly until the Trigger Module s standoffs are seated on the main PC board Notes There are two on board triggers that can be used to activate output devices These outputs are normally high and go low upon programmed condition The ...

Page 24: ...r mounted on the PC board Notes If you are using an Audio Alarm Verification AAV unit refer to Audio Alarm Verification AAV section for special wiring connections CAUTION To reduce the risk of fire use only 0 6mm O D or larger telecommunication line cord for phone line connections Alternative Communications Media ACM Connections Connect the data in data out terminals and voltage input terminals of...

Page 25: ...n in 80 Menu mode as ZT 60 P 0 Action 1 Device 18 ON ON 1 2 3 4 5 6 7 8 1 2 3 4 5 6 7 8 1 2 3 4 5 6 7 8 9 10 11 29 30 31 32 33 34 NOTE REFER TO UVCM MODULE INSTRUCTIONS FOR CONNECTIONS TO AUDIO SPEAKERS AND MICROPHONE UVCM MODULE ZONE TERMINALS EARTH GROUND RED R GREEN T GREY R BROWN T TRIGGER CONNECTOR OUTPUT 18 EOL RING TIP OPTIONAL MONITORING ZONE CONNECTION USE ZONE TYPE 81 FALLING VOICE TRIG ...

Page 26: ...Installation and Setup Guide 2 20 ...

Page 27: ... descriptors and serial numbers for RF transmitters 57 Function Key Programming Program each of the four function keys to perform one of several system functions 58 Zone Programming Assign zone attributes similar to 56 mode but provides a faster Expert Mode programming procedure and is intended for those more exper ienced in programming controls of this type 79 Output Device Mapping Assign device ...

Page 28: ...artition 3 is so designated which is an area shared by users of the other two partitions such as a lobby in a building Common area partition allows either of the independent partitions to arm while leaving the common area partition disarmed for access into the other partition The following describes the functioning of the common area partition if used The common area sounds and reports alarms only...

Page 29: ...ypad Sabotage Options 84 Auto STAY Arm 197 Exit Time Display Interval 86 Exit Options NOTE Do not use this option if Telecommand is installed to permit remote end user control of the system Wireless Receiver Transmitters and Wireless Keys keyfobs Receiver Set the receiver s address to 00 using its DIP switches then set the following options 22 RF Jam Option 24 RF House ID Code if using DIP switch ...

Page 30: ...se 81 Zone List menu mode to assign the zones associated with each pager zone lists 9 11 Function Keys To assign functions to the function keys use 57 Function Key menu mode To assign emergency key functions function key option 00 first program the respective emergency zone number 95 for A key 96 for C key 99 for B key with the desired zone type using 56 Zone Programming mode then use 57 Function ...

Page 31: ...elay is the same as described for Type 01 Type 03 Perimeter Burglary Assign to all sensors or contacts on windows and infrequently used exterior doors Provides an instant alarm if the zone is faulted when the panel is armed in the Away Stay Night Stay Instant or Maximum modes Type 04 Interior Follower Assign to a zone covering an area such as a foyer lobby or hallway through which one must pass up...

Page 32: ...anel is armed in the Stay or Instant modes if armed in Night Stay mode zones assigned to zone list 05 night stay zone list are not bypassed when system armed in Night Stay mode Type 12 Monitor Zone Works as a dynamic monitor of a zone fault trouble not alarm In the case of a short open the message ALARM 24 Hr Non Burg XXX where XXX is the zone number will be sent to the Central Station The system ...

Page 33: ...en an output relay action is desired but with no accompanying alarm e g lobby door access Zone faults restores are event logged The system can still be armed when these zone types are in a faulted condition Zone Type Description Type 24 Silent Burglary Usually assigned to all sensors or contacts on windows and infrequently used exterior doors where siren sounding is NOT desired for alarms Provides...

Page 34: ...e Allows for various custom responses Options include response to entry exit delays response to opens shorts types of alarm trouble sounding dial delay and unique Contact ID report codes Use 83 Menu mode to program these configurable zone types NOTE All of the zone types described are available for the wireless portion of the system if used Mechanics of Programming To program the system from a key...

Page 35: ...tem and Zone Defaults The VISTA 12A and VISTA 12E each have two unique sets of default entries The complete default tables are listed in the Programming Guide Press 97 while in Program Mode then press 1 or 2 to load the desired set of factory defaults default set 1 or default set 2 This resets all data fields to the respective default set values shown in the Programming Guide User Code Defaults To...

Page 36: ...164 13 113 entered at device address prompt Keypads keypad 1 keypad 2 keypad 3 keypad 4 keypad 5 keypad 6 keypad 7 keypad 8 16 17 18 19 20 21 22 23 116 117 118 119 120 121 122 123 data field programming as listed below always enabled for partition 1 all sounds enabled data field 190 data field 191 data field 192 data field 193 data field 194 data field 195 data field 196 5800TM Module 28 n a autom...

Page 37: ...arm 1 allow quick arm If enabled a user code is not needed to arm the system Instead users can press the followed by an arming key to arm the system However the user code is always needed to disarm the system 22 RF Options Entry 1 Jam detection 0 no RF Jam detection 1 detect RF Jam Entry 2 supervision interval 0 12 hours 1 2 hours 2 20 minutes when disarmed 2 hours when armed 3 12 hrs for burg zon...

Page 38: ...ny entry exit or perimeter zone when chime mode on 1 use zone list chimes on fault of specific zones programmed in zone list 3 when Chime mode on If enabled you can define the specific zones intended to chime when faulted while the system is in Chime mode Use zone list 3 to assign these zones see 81 Zone List Programming section for details 27 Powerline Carrier Device X 10 House ID 0 A 6 G 11 L 1 ...

Page 39: ...mines whether the external sounder will shut off after time allotted or continue until manually turned off 34 Exit Delay 00 96 0 96 seconds 97 120 seconds The system waits the time entered before arming entry exit zones If the entry exit door is left open after this time expires an alarm will occur or the zone will be auto bypassed depending on the selection in field 88 Common area zones use same ...

Page 40: ...n any other functions to trigger 2 39 Power Up In Previous State 0 always power up in a disarmed state 1 assume the system status prior to power down When the system powers up armed an alarm will occur 1 minute after arming if a zone is faulted at that time Note that if the previous state was armed AWAY or STAY the system will not respond to sensor changes for 1 minute which allows time for sensor...

Page 41: ...adic Pulse Dial 1 Multifrequency Tone Dial If Central Station Receiver is on satellite link 2 Decadic Pulse Dial 3 Multifrequency Tone Dial Dialer Attempts 1 10 for 10 enter 10 Phone System Select Select the type of telephone service Dialer Attempts Enter the number of times the system should attempt to dial the central station 1 10 times for 10 enter 10 48 Report Format Primary Secondary 0 3 1 4 ...

Page 42: ...SCOA 0 9 only reporting Contact ID Codes 0 disable both Time Date Inaccurate and Successful Download Access reports 1 enable Time Date Inaccurate report code 626 2 enable Successful Download Access report code 412 3 enable both Time Date Inaccurate and Successful Download Access SESCOA Radionics Select SESCOA or Radionics format Select 0 for all other formats Contact ID CID Codes If desired enable...

Page 43: ...odes and restore codes are entered in the following data fields The actual report code digits that you enter depend upon the particular installation and should agree with the Central Station office receiving the signals To disable a report code enter 0 in the first entry 3 1 4 1 Standard or Robofon 8 Format Enter a code in the first entry 1 9 A B C D E or F Enter 10 for A this reports a 0 on some ...

Page 44: ... description above 59 Sent if a zone has a trouble condition 61 Bypass Report Code 0 disable 1 F see description above 59 Sent when a zone is manually bypassed or is automatically bypassed at the end of exit delay 62 AC Mains Loss Report Code 0 disable 1 F see description above 59 Timing of this report is random with up to a 1 hour delay If AC mains restores before the report goes out there is no ...

Page 45: ...disarmed 73 AC Mains Restore Report Code 0 disable 1 F see description above 59 Sent when AC mains has been restored after an AC mains outage 74 Low Battery Restore Report Code 0 disable 1 F see description above 59 Sent when a system low battery condition is restored to normal 75 RF Low Battery Restore Code 0 disable 1 F see description above 59 Sent when a transmitter s low battery condition is ...

Page 46: ...n 15 15 min 4 90 secs 10 6 min 5 2 min 11 7 min Up and About Timer Entry 1 through 15 for number of hours Linked Zone Timer Sets the maximum amount of time in which two linked zones must be tripped in an armed system to send an alarm message to the Central Station If only one linked zone is tripped during this time a trouble message CID code 380 for that zone is sent to the Central Station Assign ...

Page 47: ...n exit path zone list 12 must be intact before arming Once armed exit delay remains on indefinitely until the last zone as defined in zone list 8 is restored then there is 5 second exit delay before arming state is active Select the desired option NOTE Must be 0 if system uses zone type 82 Blockschloss 89 Event Log Full Report Code 0 disable 1 F see description above 59 If an Event Logging selecti...

Page 48: ...l of the telephone line and the AAV Listen in session cannot take place 92 Telecom Monitor Enable Entry 1 Timeout 0 disabled 1 15 1 minute to 15 minutes respectively 2 2 min 3 3 min etc 10 10 min 11 11 min 12 12 min 13 13 min 14 14 min 15 15 min Entry 2 Display Sound 0 keypad display only when phone line is faulted 1 keypad display plus keypad trouble sound when line is faulted Each partition turn...

Page 49: ...et this field to 5 This allows access via the phone module if the answer fax machine is turned off yes no yes 1 14 not 0 yes yes yes 15 bypasses answer fax machine no no no 0 no yes no 0 no no yes 1 14 no yes yes 15 NOTE If 15 is entered to bypass an answering machine and a TeleCommand Phone Module is included in the system you should note the following When calling in from an off premises phone t...

Page 50: ...epending on type of event The first digit indicates partition followed by 0 then the 2 digit user or zone number Example 1 Pager displays 9 1 1 1 0 0 4 This indicates that the system is reporting an alarm 911 caused by a fault in zone 4 in partition 1 Example 2 Pager displays 1 0 2 2 0 0 5 This indicates that the system is reporting a closing system arming 102 by User 5 in partition 2 162 Pager 1 ...

Page 51: ...TION 173 RF REPORTING OPTIONS 0 none 1 RF Tamper reports during disarm 2 RF keyfobs send low battery 3 RF Tamper reports during disarm and RF keyfobs send low battery Select desired option 175 Tamper Options Entry 1 0 standard tamper detection 1 detect tamper from bypassed zones 2 detect tamper when in Test mode 3 detect tamper both when in Test mode and from bypassed zones Entry 2 0 all users can...

Page 52: ...supervision and RF jam detection reporting 1 Report RF supervision failure as tamper alarm when armed 2 Report RF Jam as tamper alarm when armed 3 Report RF Jam and RF supervision failure as tamper alarm when armed NOTES RF Jam must be enabled in field 22 in order for any RF reporting to be enabled in this field Alarm restore reports must be enabled field 70 in order for RF Supervision RF Jam alar...

Page 53: ...for AC Loss disp Clock disp 0 60Hz clock backup no no 1 50Hz clock backup no no 2 60Hz clock no no 3 50Hz clock no no 4 60Hz clock backup yes no 5 50Hz clock backup yes no 6 60Hz clock yes no 7 50Hz clock yes no 8 60Hz clock backup no yes 9 50Hz clock backup no yes 10 60Hz clock no yes 11 50Hz clock no yes 12 60Hz clock backup yes yes 13 50Hz clock backup yes yes 14 60Hz clock yes yes 15 50Hz cloc...

Page 54: ...ed to trigger 1 to mimic keypad sounding NOTE If using this option trigger 1 must be dedicated to only this function do not assign any other functions to trigger 1 188 Keypad Sabotage Options Entry 1 Keypad Lockout 0 disable 1 enable 15 minute lockout Entry 2 Keypad Supervision and Tamper Fault Detection 0 no 1 yes Entry 1 If selected will lockout the keypad for 15 minutes if 30 keystroke entries ...

Page 55: ...LD TITLE and DATA ENTRIES EXPLANATION 190 Keypad 2 Device Address 17 Entry 1 Partition Assignment 0 keypad disabled 2 partition 2 1 partition 1 3 common Entry 2 Sound Option 0 no suppression 1 suppress arm disarm and E E beeps 2 suppress chime beeps only 3 suppress arm disarm E E beeps and chime beeps Keypad 2 Entry 1 enter the partition in which the keypad is located Entry 2 Enter the desired sou...

Page 56: ...98 Display Partition Number 0 no 1 yes If selected the partition number is displayed in the upper left corner of the display This is useful when using the GOTO partition function 199 ECP Device Fail Display 0 3 digit display 1 device address 1 2 digit fixed display as 91 Select 0 if using Alpha keypads and or 3 digit Fixed Word Display keypads 6148 6150 6160 6164 ECP faults for keypads and or othe...

Page 57: ...rming the serial number of wireless transmitter zones Start Zone Programming mode by pressing 56 while in Data Programming mode The following prompts are displayed PROMPT VALID ENTRIES EXPLANATION SET TO CONFIRM 0 NO 1 YES Set to Confirm 0 no 1 yes If 1 Yes is entered the XMIT TO CONFIRM prompt appears later in this procedure after entering RF transmitter serial and loop numbers and lets you confi...

Page 58: ...Y 05 Trouble Day Alarm Night 21 Arm AWAY 06 24 Hr Silent 22 Disarm 07 24 Hr Audible 23 No Alarm Resp 08 24 Hr Aux 24 Silent Burglary 09 Fire 77 Keyswitch 10 Interior w Delay 81 AAV Monitor Zone 12 Monitor Zone 82 Blockschloss 5800 button type transmitters only 90 93 Configurable 17 Partition 1 Partition No P 1 3 partition to continue Enter the Partition number for this zone Partition 1 is shown en...

Page 59: ...re and low battery signals The transmitter must stay within receiver s range UR Unsupervised RF Sends all the signals that the RF type does but the control does not supervise the check in signals The transmitter may therefore be carried off premises BR Unsupervised Button RF Sends only fault signals It does not send a low battery signal until it is activated The transmitter may be carried off prem...

Page 60: ... when programming a transmitter with several input loops 17 INPUT S N L A022 4064 Loop Number Change to continue NOTE If the C key is used to copy the previously enrolled serial number the cursor will move to the Loop column L with the previous serial number displayed and display a highlighted question mark for the loop number Enter the loop number and press The system will now check for a duplica...

Page 61: ...l appear showing that zone s programming Note that an s indicates that a transmitter s serial number has been enrolled Press to accept the zone information and continue PROGRAM ALPHA 0 NO 1 YES 0 Alpha Descriptors 0 no 1 yes to continue If you want to program descriptors for zones now enter 1 Yes and refer to the Alpha Descriptor Programming section for the procedure to use ENTER ZN NUM 00 QUIT 11...

Page 62: ...m every transmitter If 0 No is entered the XMIT TO CONFIRM prompt is automatically skipped This option is ignored if programming wired zones only Zn ZT P RC HW RT 01 09 1 10 EL 1 Zn ZT P RC IN L 10 Summary Screen 01 06 9 24 49 64 zone number 00 quit to continue OR D to go to prompts for wireless key programming templates A summary screen will appear showing zone 1 s currently programmed or default...

Page 63: ...to the prompt shown except that HW or AW will be displayed under IN If RF BR or UR is entered a prompt for Serial and Loop number will be displayed as follows 10 INPUT S N L AXXX XXX Serial number S N serial number L loop number to continue Manually enter the serial number found on the transmitter label by typing digits in the X locations using the A advance or B back keys as required You can also...

Page 64: ...the correct serial number Zn ZT P RC In L 10 03 1 10 RF 1s Note that an s indicates that a transmitter s serial number has been enrolled Summary Screen to continue If the serial number transmitted matches the serial number entered the keypad will beep 3 times and a summary display will appear showing the programmed information for that zone Press to begin programming the next zone See first Summar...

Page 65: ... lowest zone number of the group If you want to start at a different zone enter the zone desired and press If that zone number is displayed the system has the required number of consecutive zones available beginning with the zone you entered If not the system will again display a suggested zone that can be used If the required number of consecutive zones is not available at all the system will dis...

Page 66: ...oes not match the serial number entered a display similar to the one shown will appear If the loop number does not match it will also be displayed If so activate the button on the wireless key once again If a match is not obtained i e summary display does not appear press the key and then enter the correct serial number If the serial number transmitted matches the serial number entered the keypad ...

Page 67: ...3 2 Disarm 22 2 No Response 23 3 Arm Away 21 3 Arm Away 21 4 No Response 23 4 Disarm 22 TEMPLATE 2 Loop Function Zone Type TEMPLATE 5 Loop Function Zone Type 1 No Response 23 1 No Response 23 2 Disarm 22 2 Arm Stay 20 3 Arm Away 21 3 Arm Away 21 4 Arm Stay 20 4 Disarm 22 TEMPLATE 3 Loop Function Zone Type TEMPLATE 6 Loop Function Zone Type 1 24 hour audible 7 1 24 hour audible 7 2 Disarm 22 2 Arm ...

Page 68: ... programming involves 1 Use 79 Menu Mode to assign module and output numbers and map them to device addresses NOTE You must map output devices using 79 Menu Mode before you can use 80 Menu Mode 2 Use 80 Menu Mode to create output definitions which control the output devices 79 Menu Mode Output Device Mapping Use this menu to assign Relay Module device addresses and specific relay numbers and Power...

Page 69: ...X OUTPUT TYPE DELETE 0 Output Type 0 delete 1 relay on 4204 4229 module or 6164 keypad 2 Powerline Carrier device to continue Select whether this is a relay or a Powerline Carrier X 10 device If relay is selected skip to B prompt If X 10 is selected go to A prompt A XX UNIT No yy Unit Number 01 04 predefined address to continue If X 10 is selected a prompt for the unit number appears Enter the uni...

Page 70: ...ned duration set in data field 177 Output No Assigns this function to a specific output number defined in 79 Menu Mode This is the output number that will perform this function upon the triggering event Note that each defined function is associated with only one output number This means that if more than one output device needs to perform this particular function you need to define another output ...

Page 71: ...e deletes the output function and any previous programming see prompt below 1 zone list go to A prompt 2 zone type go to B prompt 3 zone number go to C prompt If you enter 0 the following prompt appears Delete Press 1 to delete this 0 NO 1 YES output definition A 01 Zn List 1 Zone List 01 12 zone list to continue If zone list was selected this screen appears Otherwise skip to the next row Enter th...

Page 72: ...ng Stay 41 AC Mains Failure 67 Siren Fail 21 Arming Away 42 System Batt Low 68 Telecom Line Cut 22 Disarming 43 Comm Failure 69 Telecom Line Rstore 31 End of Exit Time 46 Sys Batt Restore 70 AC Mains Restore 32 Start of Entry Time 52 Kissoff 71 System Startup Clock Not 33 Any Burglary Alarm 54 Fire Zone Reset Set 36 At Siren Timeout 58 Duress 72 Clock Set 38 Chime 60 AAV 78 Keyswitch Red LED 39 An...

Page 73: ... data field 177 3 Continuous Pulse on off 1 sec ON 1 sec OFF Enter Output No R02 02 Output Number 01 04 output no 17 18 on board triggers Enter the device output number programmed in 79 Menu Mode you want associated with this output Press to continue 02 A E P TRIG R02 1 1 3 ZL 1 Summary Screen A summary screen appears showing the programmed settings Press to continue About Zone Lists 81 Menu Mode ...

Page 74: ...list enter 0 01 Delete Zone 0 No 1 Yes 0 Deleting a Zone 0 don t delete zones 1 go to next prompt to delete zones to continue To save the entire zone list enter 0 and the system returns to the Zone List No prompt To delete a zone or zones in a zone list enter 1 to continue 01 Zn to Delete 00 Quit 00 Delete the Zone 01 06 9 24 49 64 zones to be deleted from list followed by to accept each zone 00 t...

Page 75: ...ENTRIES EXPLANATION Press Key to Pgm 0 Quit 0 Function Key Press the desired function key A D to continue Press the desired function key A D you want to program NOTE A key programmed as a function key is no longer available to be used as an end user macro key or panic key 3 2 1 6 5 4 9 8 7 0 READY INSTANT MAX OFF CODE AWAY TEST CHECK STAY BYPASS A B C D keypad_keys 00 001 V0 Partition 1 Partition ...

Page 76: ... then AWAY 07 Output Device Command for device programmed as system operation type 66 function key in 80 Menu Mode 08 Communication Test sends Contact ID code 601 09 Macro Key 1 define macro by user code 6 6 command 10 Macro Key 2 define macro by user code 6 6 command About Descriptor Programming 82 Menu Mode The system lets you directly enter zone descriptors for each protection zone so when an a...

Page 77: ...cter Chart below Press followed by the 3 digit entry for the first letter you want to display e g 0 6 5 for A Press 6 to move the cursor to the right 2 Repeat Step 1 to enter the next characters until the desired descriptor is entered Descriptors can be up to a maximum of 16 characters You can use the 4 key to move the cursor to the left if necessary 3 When done press the 8 key to save the descrip...

Page 78: ...rt Armed 0 DArmd 0 Response to Shorts 0 none 2 trouble 1 Alarm 3 fault to continue Select the type of response when zones assigned to this zone type are shorted when the system is armed NOTES 1 For double balanced zones this entry must be 0 2 For zone doubled zones both zones of the doubled pair must be assigned the same response to a short 90 Resp to open Armed 0 DArmd 0 Response to Opens 0 none ...

Page 79: ...s for faults and troubles occurring on zones assigned to this zone type IMPORTANT Make sure the code does not conflict with existing predefined Contact ID report codes See the System Communication section for a list of standard Contact ID codes Zone alarm report code prompt in 56 Zone Programming and Trouble report code 60 and relevant restore codes 70 71 must be enabled in order for the Configura...

Page 80: ... event 04 and Auto Away Arm event 5 cannot be used if partition 3 is set as a common partition To use these scheduling features field 30 must be 0 making partition 3 a separate partition If either of these options is selected Forced Bypass is automatically enabled regardless of setting in field 23 the system will automatically bypass any open burglary zone when it arms at the scheduled time IMPORT...

Page 81: ...following events 1 relay on off 2 user access 3 child not home report use 00 23 if 24 hour time is enabled REPEAT OPTION 0 4 X Repeat Option 0 do not repeat 1 repeat schedule weekly 2 repeat schedule biweekly every other week 3 repeat schedule every third week 4 repeat schedule every fourth week to continue Enter the desired repeat option for this schedule e g To make a schedule that happens every...

Page 82: ...Installation and Setup Guide 5 26 ...

Page 83: ... panel the panel sends its message If there is an error in the transmission the receiver does not receive a valid message the kissoff frequency is not given by the Central Station receiver The panel makes a total of eight attempts to the primary telephone number and eight attempts to the secondary telephone number if programmed to get a valid message through If the panel is not successful after it...

Page 84: ...ubscriber number 1 digit event qualifier new or restore 3 digit event code 2 digit partition number and 3 digit zone number user number or system status number see the following page The following table lists codes for reports sent in different formats Type of Report Code for 3 1 4 1 Standard Code for 3 1 4 1 Expanded Code for 4 2 Robofon 8 Alarm SSS S A SSS S A AAA A Z SSSS SS AZ Trouble SSS S T ...

Page 85: ...Bypass Code 1st 2nd digits RTt Restore Code Trbl 1st 2nd digits EAC AC Loss Code 1st 2nd digits RBb Restore Code Byps 1st 2nd digits LLB Low Battery Code 1st 2nd digits RAAC Restore Code AC 1st 2nd digits O Open Code 1st Digit RLLB Restore Code Bat 1st 2nd digit Zone numbers for or B 99 Duress 92 1 or A 95 3 or C 96 For 4 2 Robofon 8 formats 2 digit zone numbers can be reported by assigning the A ...

Page 86: ...digit report code as in 4 2 format Signal flow Receiving equipment Dialing equipment Send start char w 77h Send message described above Acknowledge ACK 06h Delay greater than 500ms Send new start char w 77h Send next message if available Acknowledge ACK 06h etc Dialer should start sending the message no more than 200ms after start char If no response is detected the receiver retries sending start ...

Page 87: ... Jam Detect 351 Telecom Line Fault 353 Alternative Comm Media Trouble 354 Failure to Communicate log only 373 Fire Loop Trouble 374 Exit Error Alarm 380 Trouble Zone Type 5 381 RF Sensor Supervision 382 Supervision Auxiliary Wired Zone sent after code 333 is sent 383 RF Sensor Tamper and Double Balanced Zone Tamper 384 RF Sensor Low battery Code Definition 393 Clean Me ESL smoke detectors only 401...

Page 88: ...add delete users view event log set system clock or program scheduled events 1 Arm Only see user arm system only 2 Guest see user can disarm the system only if it was used to arm the system 3 Duress see user performs security functions but also silently sends a duress message to the central station reports as duress code user number 4 Partition see user See Partition Master paragraph above used to...

Page 89: ...used no security code is required to arm the system Alarm Memory When the system is disarmed any zones that were in an alarm condition during the armed period will be displayed To clear this display simply repeat the disarm sequence enter the security code and press the OFF key again Arming Away Enter code AWAY 2 or simply press appropriate lettered key on the keypads see Single Button Arming abov...

Page 90: ... user are included If programmed these entries can be used to manually activate or deactivate the device s for starting or stopping some action such as turning lights on or off etc These keypad entries are Security Code 7 2 digit Device activates starts that device Security Code 8 2 digit Device deactivates stops that device Panic Keys There are three Panic keys A B and C that if programmed can be...

Page 91: ...tones a series of eight tones or beeps followed by a pause of about four seconds then the tones are repeated b The user must press the key on the telephone to acknowledge hearing the tones then wait for the control to disconnect the line before hanging up IMPORTANT The key should be pressed during a pause between tone cycles Otherwise the control may not hear or respond to the key if pressed while...

Page 92: ... three times The system also automatically exits this mode if no keys are pressed within 30 seconds Setting Adjusting the Real Time Clock The real time clock is used to time stamp events recorded in the event log and for scheduling mode The time display can be set for 12 AM PM or 24 hour format and can show day month or month day field 183 Time Date Format If the system is using the built in cryst...

Page 93: ...Check the wiring and CHECK 1xx 1xx DIP switch settings on the units 91 If field 199 is set to 1 all ECP module problems are displayed as 91 If there are wireless sensors in the system the Check condition may also be caused by some change in the environment that prevents the receiver from receiving signals from a particular sensor TAMPER 1xx 1xx Appears when a tamper switch at the device address sh...

Page 94: ...l s power will shut down to minimize deep discharge of the battery The display may also be blanked intentionally except during exit delay and for 30 seconds after disarming or during a mains power loss if field 186 Display Options entry 2 is enabled Comm Failure FC A communication failure has occurred Open Circuit OC The keypad is not receiving signals from the control and sees an open circuit Lon...

Page 95: ... displayed 1 Enter Installer Code 5 TEST then press 0 at the prompt to start Walk Test mode 1 DIAL 0 WALK no special display on Fixed Word keypads The following will be displayed TEST IN PROGRESS dd displayed on Fixed Word Display Keypads A Contact ID report will also be sent code 607 2 Upon entering the system test mode the outside sounder should sound for 1 second If the backup battery is discha...

Page 96: ... Any transmitter not enrolled or any zone that is not faulted will not turn off its zone number Go No Go Test Mode The Go No Go Test verifies adequate RF signal strength from the proposed transmitter location and allows you to reorient or relocate transmitters if necessary before mounting the transmitters permanently This mode is similar to the Transmitter Test mode except that the wireless receiv...

Page 97: ...ar the display and exit Automatic Standby Battery Tests 1 An automatic test is conducted every 3 minutes to ensure that a standby battery is present and properly connected If a battery is not present or is not properly connected a LOW BATTERY message is displayed and if so programmed will be reported to the central station 2 A battery capacity test is automatically conducted for 2 minutes every 4 ...

Page 98: ...Installation and Setup Guide 7 4 ...

Page 99: ...2VDC 600mA max FUSE Battery 3A No 90 12 3 Communication FORMAT SUPPORTED ADEMCO Express 10 characters sec DTMF multi frequency Data Tones 1400 2300Hz ACK 1400Hz KISSOFF ADEMCO Low Speed 10 pulses sec 1900Hz Data Tone 1400Hz ACK KISSOFF Radionics SESCOA 20 pulses sec 1800Hz Data Tone 2300Hz ACK KISSOFF Can report 0 9 B F Robofon 8 See description in Communication section ADEMCO Contact ID 10 charac...

Page 100: ...ne Expansion 4219 WIRED EXPANSION MODULE 4229 WIRED EXPANSION RELAY MODULE 6164 KEYPAD w WIRED EXPANSION and RELAY Relay Module 4204 RELAY MODULE Internet Intranet Communicator 7845i EUREKA Network Interface AI4164RS RS484 LAN AI4164ETH ETHERNET LAN WAN Transformers VISTA 12A XF1 Model 60844CK Ap11 V 99090 E148 36 VISTA 12E 16 5VAC 25VA wired in transformer Sounders ADEMCO AB 12M 25cm Motorized Be...

Page 101: ...1 INTERNAL SHOCK SENSOR LOOP 2 REED 5819 ENROLL AS RF LOOP 2 REED LOOP 3 TERMINALS LOOP 1 TERMINALS 5801 ENROLL AS UR OR RF LOOP 3 LOOP 1 LOOP 2 LOOP 4 YOU MUST ENROLL THIS BUTTON LOOP 1 LOOP 2 LOOP 4 YOU MUST ENROLL THIS BUTTON LOOP 3 NOTE For information on any transmitter not shown refer to the instructions accompanying that transmitter for details regarding loop numbers etc Compatible 5800 Ser...

Page 102: ...osed circuit contact loop the other for its built in reed switch used with a magnet 5816TEMP Low Temp Sensor RF Transmits a fault condition when temperature drops below 45 F 5817 Multi Point Universal Transmitter RF Has three unique input loop codes one for a Primary contact loop with programmable options the others for two auxiliary closed circuit contact loops 5818 Recessed Transmitter RF Reed s...

Page 103: ...tions as wired keypads The keypad is identified as zone 00 on wired keypads when it transmits with a low battery 5827BD Wireless Two Way Keypad Uses House ID only Requires 5800TM Transmitter Module Operates the system similarly to wired keypads including panics Can indicate system status via its 3 LEDs and sounder Includes 3 panic keys 5849 5852 Glassbreak Detector RF House ID must also be set 584...

Page 104: ...Installation and Setup Guide 8 6 ...

Page 105: ...ed Smoke detectors may not sense fires that start where smoke cannot reach the detectors such as in chimneys in walls or roofs or on the other side of closed doors Smoke detectors also may not sense a fire on another level of a residence or building A second floor detector for example may not sense a first floor or basement fire Finally smoke detectors have sensing limitations No smoke detector ca...

Page 106: ...ong as 10 years the electronic components could fail at any time The most common cause of an alarm system not functioning when an intrusion or fire occurs is inadequate maintenance This alarm system should be tested weekly to make sure all sensors and transmitters are working properly The security keypad and remote keypad should be tested as well Wireless transmitters used in some systems are desi...

Page 107: ...CE HEREOF IN NO CASE SHALL SELLER BE LIABLE TO ANYONE FOR ANY CONSEQUENTIAL OR INCIDENTAL DAMAGES FOR BREACH OF THIS OR ANY OTHER WARRANTY EXPRESS OR IMPLIED OR UPON ANY OTHER BASIS OF LIABILITY WHATSOEVER EVEN IF THE LOSS OR DAMAGE IS CAUSED BY THE SELLER S OWN NEGLIGENCE OR FAULT Seller does not represent that the product s it sells may not be compromised or circumvented that the product s will ...

Page 108: ...Installation and Setup Guide 9 4 ...

Page 109: ...vice address 2 3 2 11 2 15 3 1 3 11 4 2 4 20 5 12 6 11 Device number5 1 5 2 5 3 5 4 5 5 5 6 5 7 5 8 5 9 5 10 5 13 5 14 5 15 5 16 5 17 5 18 5 19 5 20 5 24 DIP Switches 2 13 Disarm 3 7 Disarming 5 16 6 7 6 8 Double Balanced 2 8 Enrolling 2 13 5 1 entering serial number 5 7 Entry Delay 3 6 4 8 6 7 6 11 Entry Delay 02 4 3 Entry Exit Burglary 3 5 EOLR 2 8 8 1 Event Logging 1 1 4 11 Exit Error Alarm 6 5...

Page 110: ... 2 7 2 12 6 5 Ring Detection Count For Downloading 4 13 RJ31X Jack 2 18 Schedules 5 23 Secondary Phone No 4 5 Security Codes 1 1 6 6 Silent Burglary 3 7 5 16 6 5 Silent Panic 6 8 Single Alarm Sounding Per Zone 4 3 Smoke Detectors 8 4 Sniffer Mode 5 5 7 1 7 2 sounder connections 2 5 Supervised Fire 3 6 Supplementary Power 2 3 Swinger Suppression 4 12 System Communication 5 2 6 1 System Operation 4 ...

Page 111: ...EOLR 2000 OHMS EOLR 2000 OHMS EOLR SYNC BLK COM VIO DATA BLU TO X 10 TRANS 16 15 14 13 10 9 6 5 4 1 2 3 4 5 6 SET RECEIVER S DIP SWITCH FOR DEVICE ADDRESS OF 0 SEE INSTRUCTIONS SET UNIT S DIP SWITCH FOR DEVICE ADDRESSES 7 15 SEE INSTRUCTIONS ZONE PAIRS 1 9 2 10 3 11 4 12 5 13 6 14 TYPICAL WIRING FOR ZONE DOUBLING TYPICAL WIRING FOR DOUBLE BALANCED ZONE REMOTE KEYPADS CAN USE 6128RF 6148 6150 6160V...

Page 112: ...165 Eileen Way Syosset New York 11791 Copyright 2005 Honeywell International Inc www honeywell com security ÊK10022 1V1CŠ K10022 1V1 10 05 Rev A ...

Reviews: