background image


– 3 – 

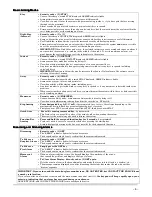
Burglary System Overview

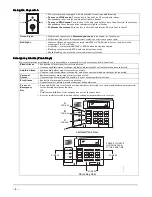
Burglary System Overview

Burglary System Overview

Burglary System Overview    


Basic Features

Basic Features

Basic Features

Basic Features    

Partitions 

  Partitions provide three independent areas of protection, with each partition containing a group of 

zones that can be armed and disarmed without affecting other zones or users. 

  Partitioned systems can include a common area, which is an area shared by users of two other 

partitions (such as a lobby in a building). 

  Some users may be given the authority to view status and arm/disarm other partitions. 

 See 

Accessing Other Partitions

 section for details.


Zones 

  Each partition consists of specific protection points known as zones.  

  When a zone is faulted, its zone number is displayed on the keypad for easy identification. 

Keypads  

  The system is controlled from the keypad, and the keypad displays system status. 

  Each keypad is assigned a default partition for display purposes, and will show only that partition's 

information. 

  When entering codes and commands, sequential key depressions must be made within 4-5 seconds of 

one another. If 4-5 seconds elapse without a key depression, the entry will be aborted and must be 
repeated from its beginning. 

  If you make a mistake while entering a security code, stop, press the [

] key, and then start over. If you 

stop in the middle while entering a code, and then immediately start the entry over, an erroneous code 
might be entered. 


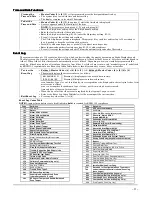
Keypad Lockout:

 The system may have been programmed to lockout the keypads for 15 minutes if 

more than 30 keystrokes (within a 15 minute period) are made without a valid user code plus 
command being entered. The message “Code Sabotage” is displayed during the lockout period. 

Voice Keypads 

  Voice Keypads (if installed), are functionally the same as other keypads. 

  Voice announcements of system status (see Before Arming section) 

  Voice chime, which can alert you to the opening of doors and windows while the system is disarmed 

(see Voice Chime in Chime mode section) 

  Message center, which lets you record and playback messages (see Using the Voice Message Center in 

the 

System Overview 

section).


Security Codes 

  Your installer assigned you a security code at the time of installation. This code is required to perform 

most system functions. 

  Each security code can have a different authority level, which defines the functions each user can 

perform. Refer to the Security Code section for details on adding and changing security codes.


Arm/Disarm 

  You can arm your system in several different modes, depending on whether you are staying in or 

leaving the premises. 

  To arm the system, simply enter your security code followed by the desired arming mode key. 

  To disarm the system, enter your security code followed by [1] OFF. 

  Refer to the Arming/Disarming sections for specific arming commands. 


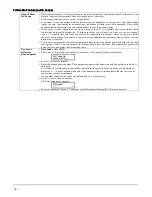
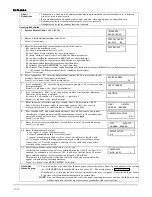
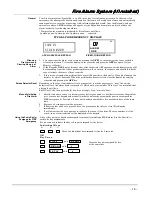
Exit/Entry Delays

Exit/Entry Delays

Exit/Entry Delays

Exit/Entry Delays    

Exit Delay 

  When you arm the system, the system gives you a programmed amount of time to leave through the 

designated exit door and/or certain other zones (if programmed) without setting off an alarm.


  A slow beeping, if programmed, will sound during the exit delay period until the last 10 seconds, which 

then changes to fast beeping. 


  If programmed, the keypad displays a countdown of the number of seconds of exit delay remaining. 


  When exit delay expires, all zones become protected and cause an alarm if opened. 


  Your system may have been programmed such that exit delay remains in effect until a final zone (e.g. 

exit door) has been closed for five seconds. Ask your installer. 

Exit Delay 

••••

  Press the [

∗∗∗∗

] key

 if armed in STAY mode to restart the exit delay timer.


Restart


  This gives you time to open the entry/exit door to let someone in after arming STAY. The system  

(if programmed) 

  automatically re-arms when exit delay expires, which avoids having to disarm the system and then 

re-arm it again.  

  When the system is armed AWAY, reopening and closing the entry/exit door before exit delay time 

expires (e.g., reentering to get a forgotten item) will restart the exit delay time. 

Entry Delay 

  Gives you time to disarm the system when you re-enter through the designated entrance door. You must 

disarm the system before the entry delay period ends, or an alarm will occur.  

NOTE:

 When entry delay is active (ex. opening the entry door), the entry delay time applies to 

all


burglary zones in that partition.  


  See your installer for your delay times.


Partition 1 

Partition 2 

Partition 3 


Delay 1: _______ seconds 

Delay 1: _______ seconds 

Delay 1: _______ seconds 

Delay 2: _______ seconds 

Delay 2: _______ seconds 

Delay 2: _______ seconds


Part. 1: _____ sec  
 
Part. 2: _____ sec  
 
Part. 3: _____ sec


Summary of Contents for Ademco Vista-48 series

Page 1: ...ADEMCO VISTA 48 SERIES Security Systems User Guide This control complies with EN50131 3 2009 and conforms to UL requirements K0750ENV2 5 11 Rev A ...

Page 2: ...Charts of Your System s Features 17 SYSTEM COMPATIBILITY NOTICE Your Honeywell security system is designed for use with devices manufactured or approved by Honeywell for use with your security system Your Honeywell security system is not designed for use with any device that may be attached to your security system s keypad or other communicating bus if Honeywell has not approved such device for us...

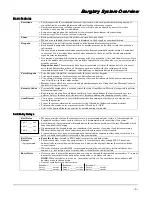
Page 3: ...ode is required to perform most system functions Each security code can have a different authority level which defines the functions each user can perform Refer to the Security Code section for details on adding and changing security codes Arm Disarm You can arm your system in several different modes depending on whether you are staying in or leaving the premises To arm the system simply enter you...

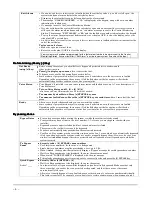
Page 4: ... Status Press STATUS key once To announce faulted zones Press the STATUS key a second time within 5 seconds of the first press Ready All zones are closed or bypassed and you can now arm the system Some systems if programmed may allow arming even if selected zones in the exit route are faulted Depending on the programming these zones if left faulted when exit delay expires will either be automatica...

Page 5: ...arm the system within the entry delay period to avoid sounding an alarm Maximum Security code 4 MAXIMUM Causes same as Away mode arms same as Away mode but entry delay is off Use when arming disarming is being done from the outside e g RF keyfob Step Arming Press designated key A B C or D if programmed once twice or three times depending on the arming mode desired Each key press increases the leve...

Page 6: ... Your system maybe programmed to use special keys to manually activate emergency panic functions Silent Alarm Sends silent alarm signal to monitoring station Causes no audible alarm or change in display indicating that a silent alarm has been initiated Audible Alarm Sends audible alarm signal to monitoring station Causes a loud steady alarm at keypad s and at any external sounders that may be conn...

Page 7: ...Message Center Functions Record a FUNCTION 0 VOICE 1 RECORD red MESSAGE LED lights Message Message remains in memory until a new message is recorded End Recording 1 RECORD red MESSAGE LED flashes indicating message waiting Play a Message FUNCTION 0 VOICE 3 PLAY The recorded message plays and the red MESSAGE LED turns off Adjust the FUNCTION 0 VOICE 2 VOLUME keys Volume then press volume key 3 up o...

Page 8: ... better chance of hearing them Note that only the tones are repeated during the single follow me phone call the dialing is not repeated You can also program one or more 2 second pauses after the phone number which will delay the tones by that amount of time This can help give the listener time to hear the tones E g Adding four pauses will delay the tones until after the phone rings twice To enter ...

Page 9: ... can use this feature only if you were given that authority and you must use an alpha keypad The system arms only if all partitions are ready to arm unless the system is programmed to allow arming with faults in certain zones if any partition is not ready the system does not arm at all You can use the GoTo command to bypass open zones before arming if desired If any partition is already armed when...

Page 10: ...me and days of week Hour 00 23 minute 00 59 Days Position the cursor under the desired days using the key to move forward then press 1 to select the day s Press to continue START SMTWTFS HH MMAM 1000000 8 For events 04 or 05 enter the desired amount of time 01 15 minutes the system should warn of impending arming The system beeps once every 30 seconds to alert users that arming will soon occur Oth...

Page 11: ...n which event occurred time and date of the event s occurrence When the log is full the oldest event is replaced by the logging of any new event Refer to the Event Log Codes Table below for the meanings of the various codes Exit Event Log Press any key other than or Event Log Codes Table NOTE Logging of mandatory events highlighted in bold is required for EN50131 1 compliance Code Definition 110 F...

Page 12: ...tes Refer to the User Setup chart at the back of this manual to keep a record of user programming NOTE Partition Master codes apply only to those user numbers previously assigned by the system master installer to the partition master s partition Add User Code System Partition Master code 8 user no new user s code Users 03 25 41 are preset User 01 installer User 03 partition 1 master to be partitio...

Page 13: ...ust first enable the Installer code before it can be used Once enabled the Installer code remains active until any other user enters their code To enable the Installer code master code 65 In The Event Of Telephone Operational Problems In the event of telephone operational problems disconnect the control from the phone line by removing the plug from the phone wall jack We recommend that your instal...

Page 14: ...may prevent arming or you may need to perform the arming sequence twice to override the condition see your installer If this condition persists for more than one day with AC present CALL FOR SERVICE Tamper If programmed indicates a tamper fault condition e g cover removed 1 device number exists at the device shown LO BAT Indicates that there is a low battery condition in the wireless zone descript...

Page 15: ...ere may still be smoke in the detector Clear it by fanning the detector for about 30 seconds When the problem has been corrected clear the display by entering your code and pressing the OFF key Smoke Detector Reset Depending on the type of smoke detectors in your system it may be necessary to reset the smoke detectors after a fire alarm has been turned off Check with your installer This reset is a...

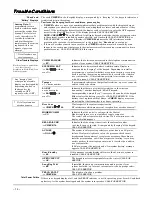
Page 16: ...e cause Disarm System Enter code Press OFF key Also silences sounders Memory of alarm remains until cleared Clear Alarm Memory After disarming enter code again Press OFF key again Keypad beeps rapidly on entry if alarm has occurred while absent Alarm display will remain upon disarming until cleared Duress if active and connected to Central Station Arm or disarm normally but use your 4 digit Duress...

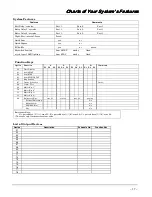
Page 17: ...dy flash Arm STAY steady flash Function Keys Option Function A P1 P2 P3 B P1 P2 P3 C P1 P2 P3 D P1 P2 P3 Comments 02 Time Display 03 Arm AWAY 04 Arm STAY 05 Arm NIGHT STAY 06 Step Arming 07 Device Activation Device 08 Comm Test 09 Macro Key 1 10 Macro Key 2 11 Macro Key 3 12 Macro Key 4 00 Emergency Keys zone 95 zone 99 zone 96 paging Personal Emergency n a Silent Alarm n a Audible Alarm n a Fire ...

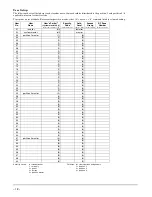
Page 18: ... Number 4 zone no 01 installer all installer 02 system master all master 03 partition 1 master 1 4 04 1 0 05 1 0 06 1 0 07 1 0 08 1 0 09 1 0 10 1 0 11 1 0 12 1 0 13 1 0 14 1 0 15 1 0 16 1 0 17 1 0 18 1 0 19 1 0 20 1 0 21 1 0 22 1 0 23 1 0 24 1 0 25 partition 2 master 2 4 26 2 0 27 2 0 28 2 0 29 2 0 30 2 0 31 2 0 32 2 0 33 2 0 34 2 0 35 2 0 36 2 0 37 2 0 38 2 0 39 2 0 40 2 0 41 partition 3 master 3...

Page 19: ...ist below enter 1 8 enter 1 2 or 3 Day Day 01 02 03 04 05 06 07 08 09 10 11 12 13 14 15 16 17 18 19 20 21 22 23 24 Events 00 remove event 03 child not home report 06 auto disarm 01 device on off 04 STAY arm 07 display reminder 02 user access 05 AWAY arm 08 disarm time window Repeat Options 0 none 1 repeat weekly 2 repeat every other week 3 repeat every third week 4 repeat every fourth week ...

Page 20: ...lephone network EN50136 2 1 1998 Alarm systems Alarm transmission systems and equipment General requirements for alarm transmission equipment EN50136 2 3 1998 Alarm systems Alarm transmission systems and equipment Requirements for equipment used in systems with digital communicators using the public switched telephone network BS8243 2010 Installation and configuration of intruder alarm systems des...

Page 21: ... 21 NOTES ...

Page 22: ... 22 NOTES ...

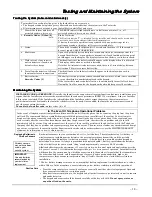
Page 23: ... can only detect intrusion within the designed ranges as diagrammed in their installation manual Passive Infrared Detectors do not provide volumetric area protection They do create multiple beams of protection and intrusion can only be detected in unobstructed areas covered by those beams They cannot detect motion or intrusion that takes place behind walls ceilings floors closed doors glass partit...

Page 24: ...UT OF OR RELATING IN ANY WAY TO THE PRODUCT AND OR FOR BREACH OF THIS OR ANY OTHER WARRANTY OR CONDITION EXPRESS OR IMPLIED OR UPON ANY OTHER BASIS OF LIABILITY WHATSOEVER EVEN IF THE LOSS OR DAMAGE IS CAUSED BY SELLER S OWN NEGLIGENCE OR FAULT AND EVEN IF SELLER HAS BEEN ADVISED OF THE POSSIBILITY OF SUCH LOSSES OR DAMAGES Any product description whether in writing or made orally by Seller or Sel...

Reviews: