Installation Instructions
2-12
Powerline Carrier Devices
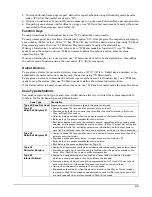
1. Install up to 16 powerline carrier devices (if no relays
are used) according to the instructions included with
each.
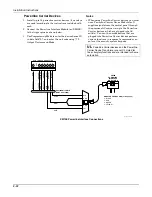
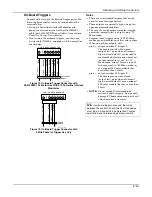
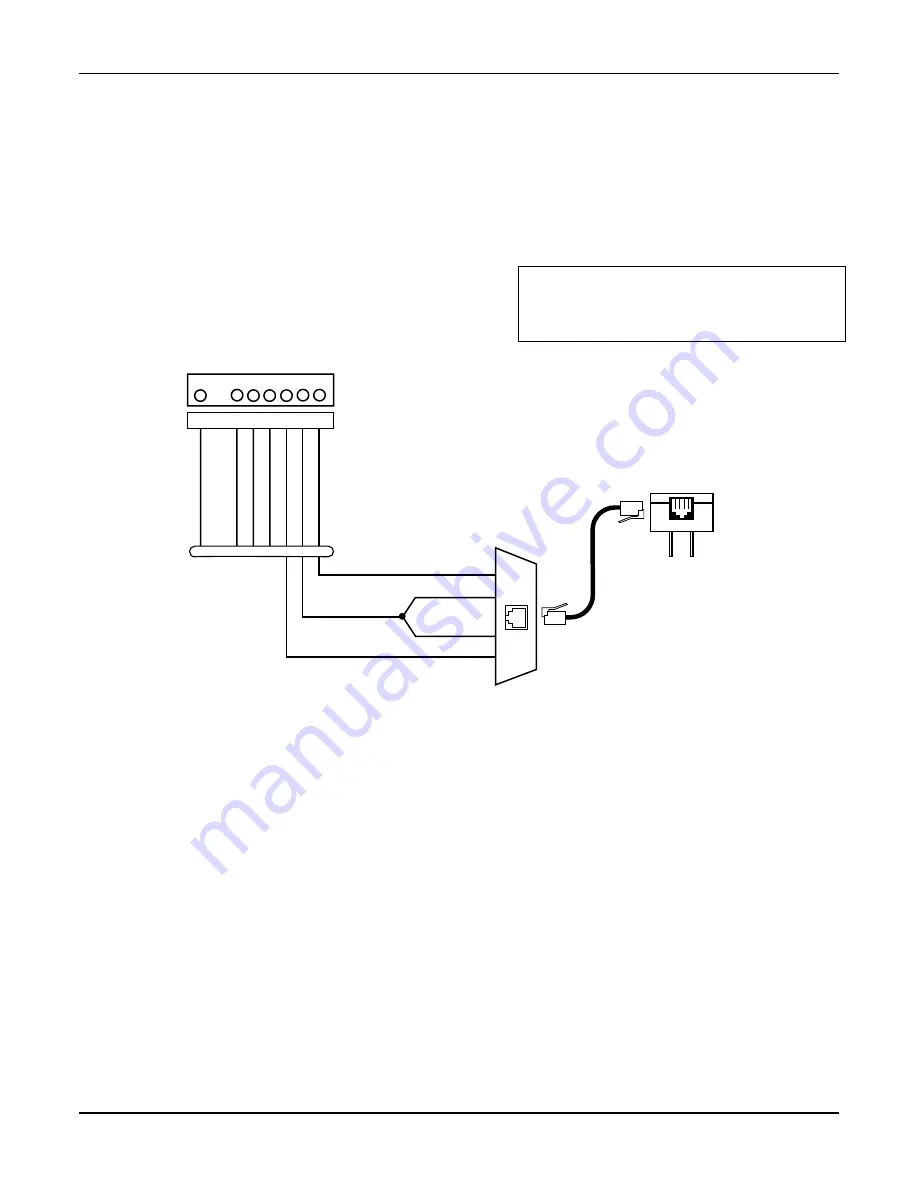
2. Connect the Powerline Interface Modulator (XM10E)
to the trigger pins as shown below.
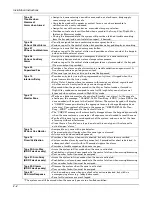
3. Use Programming Mode to enter the device house ID
in data field*27, and enter the unit code using *79
Output Device menu Mode.
Notes
•
When using Powerline Carrier devices, you must
use a Powerline Carrier Device Modulator. It
supplies signals from the control panel through
the premises AC mains wiring to the Powerline
Carrier devices (which are plugged into AC
outlets). You can then make devices that are
plugged into Powerline Carrier devices perform
various functions in response to commands you
enter at the security system keypads.
UL
Powerline Carrier devices and the Powerline
Carrier Device Transformer are not UL Listed for
fire or burglary functions and are intended for home
automation.
1 2 3 4
SA4120XM-1 CABLE
(PART OF 4120TR)
XM10E
POWERLINE
INTERFACE
MODULATOR
YEL
RED
GRN
BLK
MODULAR PHONE CORD (not supplied)
1 - BLACK
2 - RED
3 - GREEN
4 - YELLOW
SYNC
DATA
COM
1
3
4
5
6
7
8
KEY
+12 A
UX.
D
ATA
COM
SYNC
GND (-)
OUTPUT 17
(RED)
OUTPUT 18
(GREEN)
(ORANGE)
(YELLO
W)
(BLUE)
(PURPLE)
(BLA
CK)
00-trigcon-012-V0
8-PIN TRIGGER CONNECTOR
XM10E Powerline Interface Connections
Summary of Contents for ADEMCO VISTA-48D
Page 2: ...ii ...
Page 28: ...Installation Instructions 3 8 ...
Page 42: ...Installation Instructions 4 14 ...

