Installation Instructions
4-4
FIELD
TITLE and DATA ENTRIES
EXPLANATION
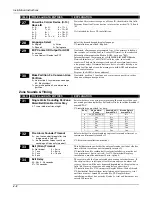
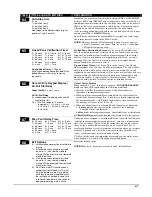
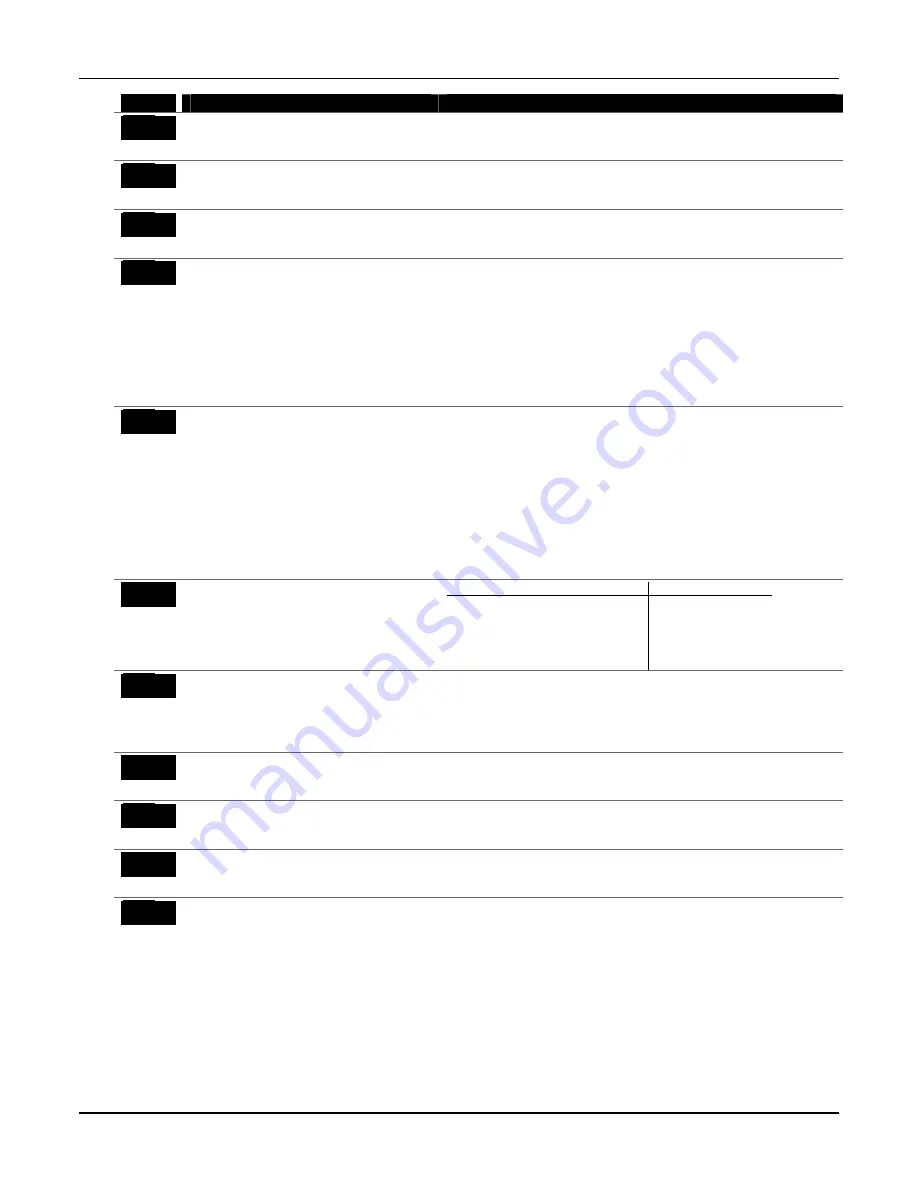
*44
Part. 1 Secondary Subs. Acct. No.
Enter digits 0–9; # + 11 for B, # + 12 for C, #
+ 13 for D, # + 14 for E, # + 15 for F.
Enter up to 10 digits, depending on the report format selected in field
*48. To clear entries from field, press
∗
44
∗
.
*45
Part. 2 Primary Subs. Acct. No.
Enter digits 0–9; # + 11 for B, # + 12 for C, #
+ 13 for D, # + 14 for E, # + 15 for F.
Enter up to 10 digits, depending on the report format selected in field
*48. To clear entries from field, press
∗
45
∗
.
*46
Part. 2 Secondary Subs. Acct. No.
Enter digits 0–9; # + 11 for B, # + 12 for C, #
+ 13 for D, # + 14 for E, # + 15 for F.
Enter up to 10 digits, depending on the report format selected in field
*48. To clear entries from field, press
∗
46
∗
.
*47
Phone System Select/Dialer
Attempts
Phone System Select:
If Central Station Receiver
is
not
on satellite
link: 0 = Decadic Pulse Dial;
1 = Multifrequency Tone Dial
If Central Station Receiver
is
on satellite link:
2 = Decadic Pulse Dial;
3 = Multifrequency Tone Dial
Dialer Attempts:
1 – 10 (for 10, enter #+10)
Phone System Select:
Select the type of telephone service.
Dialer Attempts:
Enter the number of times the system should
attempt to dial the central station, 1 – 10 times (for 10, enter #+10).
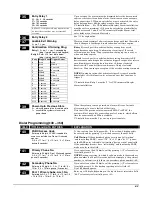
*48
Report Format
(Primary/Secondary)
0 = 3+1, 4+1 ADEMCO L/S STANDARD
1 = 3+1, 4+1 RADIONICS STANDARD
2 = 4+2 ADEMCO L/S STANDARD
3 = 4+2 RADIONICS STANDARD
5 = CID* using 10-digit account number
6 = 4+2 ADEMCO EXPRESS
7 = CID* using 4-digit account number
8 = 3+1, 4+1 ADEMCO L/S EXPANDED
9 = 3+1, 4+1 RADIONICS EXPANDED
10 = ROBOFON 8 (6-digit account number)
11 = ROBOFON Contact ID
Select report format for primary and secondary phone numbers.
* ADEMCO Contact ID format
NOTE:
To enable the audio “beeps” format (Follow-Me feature), refer
to the System Features section later in this manual, and the User
Guide.
*49
Split/Dual Reporting
0 = disable (standard/backup report only).
1 - 5 (see table to right)
To Primary No.
To Secondary No.
1 = alarms, restore, cancel
others
2 = all except open/close, test
open/close, test
3 = alarms, restore, cancel
all
4 = all except open/close, test
all
5 = all
all
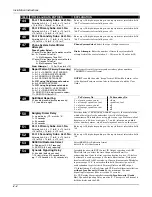
*50
Burglary Dialer Delay
0 = no dial delay (
UL: must be “0”)
1 = 15 seconds
2 = 30 seconds
3 = 45 seconds
Provides delay of “BURGLARY ALARM” report to the central station,
which allows time for the subscriber to avoid a false alarm
transmission. This delay does not apply to zone type 24 alarms (silent
burglary) or to 24-hour zone types 6, 7, and 8 (silent panic, audible
alarm, auxiliary alarm), which are always sent as soon as they occur.
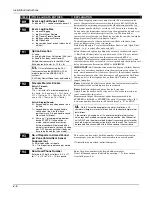
*51
Part. 3 Primary Subs. Acct. No.
Enter digits 0–9; # + 11 for B, # + 12 for C, #
+ 13 for D, # + 14 for E, # + 15 for F.
Enter up to 10 digits, depending on the report format selected in field
*48.
*52
Part. 3 Secondary Subs. Acct. No.
Enter digits 0–9; # + 11 for B, # + 12 for C, #
+ 13 for D, # + 14 for E, # + 15 for F.
Enter up to 10 digits, depending on the report format selected in field
*48.
*53
SESCOA/Radionics Select
0 = Radionics (0-9, B-F reporting)
1 = SESCOA (0-9 only reporting)
Select SESCOA or Radionics format.
Select 0 for all other formats.
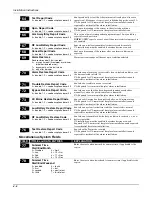
*54
Dynamic Signaling Delay
0 = disabled (both signals sent)
1–15 = entry times a 15-second delay.
e.g., 1 = 15 seconds, 2 = 30 seconds, etc.
Intended for use with ECP Contact ID Output reporting via ACM.
This field lets you select the time the panel should wait for
acknowledgment from the first reporting destination (see
∗
55) before
it attempts to send a message to the second destination. Delays can
be selected from 0 to 225 seconds, in 15-second increments. This delay
is per message. If ”0” is entered in this field, the control panel will
send redundant reports to both Primary Dialer and ECP output.
UL Installations: For Fire Alarm and UL Burglar Alarm installations
without Line Security (Grade A)
, the maximum Dynamic
Signaling Delay must be no more than 15 seconds.
For UL Burglar Alarm installations
with Line Security (Grade
AA)
, Dynamic Signaling Delay must be “0”. The reports will be sent to
both the dialer and the LRR.
Summary of Contents for ADEMCO VISTA-48D
Page 2: ...ii ...
Page 28: ...Installation Instructions 3 8 ...
Page 42: ...Installation Instructions 4 14 ...

