background image

4-1


S E C T I O N   4  


Registration 

• • • • • • • • • • • • • • • • • • • • • • • • • • • • • • • • • • • • • • • • • • • • • • • • •


In This Section 

 Registering the 7845GSM 


• • • • • • • • • • • • • • • • • • • • • • • • • • • • • • • • • • • • • • • • • • • • • • • • •


Registering the 7845GSM 

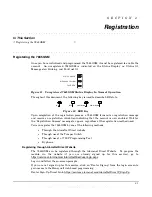
Once you have initialized and programmed the 7845GSM, it must be registered to enable the 
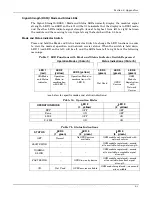
account.  An unregistered 7845GSM is indicated on the Status Display as: Status lit, 
Message slow blinking, and Fault not lit.  


FAULT, RED

MESSAGE, YELLOW

STATUS, GREEN


Figure 11.  Unregistered 7845GSM Status Display In Normal Operation 

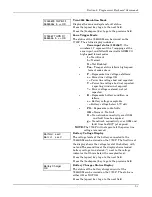
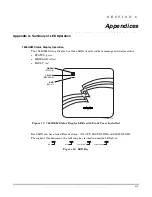
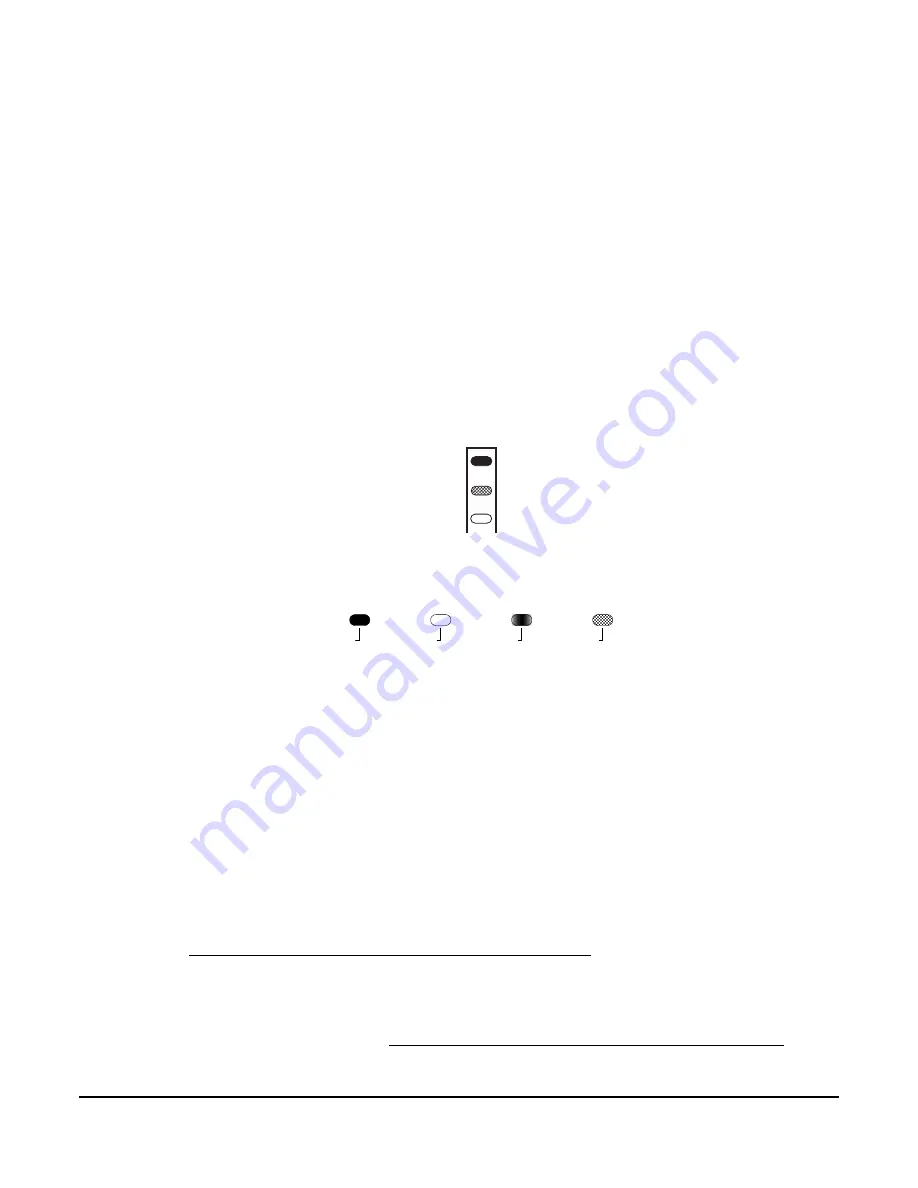
Throughout this document, the following key is used to describe LED state: 

ON

OFF

FAST BLINK

SLOW BLINK


Figure 12.  LED Key 

Upon completion of the registration process, a 7845GSM transmits a registration message 
and receives a registration validation indicating that the account is now enabled. Wait for 
the "Registration Success" message to appear, regardless of the registration method used.  

You can register the 7845GSM by one of the following methods: 


Through the AlarmNet Direct website 


Through use of the Tamper Switch 


Through use of a 7720P Programming Tool 


By phone 

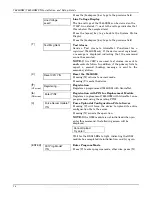
Registering through AlarmNet Direct Website 

The 7845GSM can be registered through the Alarmnet Direct Website.  To program the 
module via the website (if you are already signed up for this service), go to: 


https://services.alarmnet.com/AlarmNetDirect/userlogin.aspx

.   

Log in and follow the on-screen prompts. 

If you are not signed up for this service, click on “Dealer Signup” from the login screen to 
gain access to the Honeywell web-based programming.  

Dealer Sign-Up Direct Link: https://services.alarmnet.com/AlarmNetDirectP_Sign-Up.  

WWW.DIYALARMFORUM.COM 

WWW.DIYALARMFORUM.COM

Summary of Contents for AlarmNet 7845GSM

Page 1: ...S S S S SM M M M M M M M 7 7 7 7 7 7 7 78 8 8 8 8 8 8 84 4 4 4 4 4 4 45 5 5 5 5 5 5 5G G G G G G G GS S S S S S S SM M M M M M M MC C C C C C C CN N N N N N N N D Di ig gi it ta al l C Ce el ll lu ul la ar r C Co om mm mu un ni ic ca at to or r Installation and Setup Guide K14184V1 11 06 Rev A Requires Compass Version 1 5 8 54A or higher for GSM Downloading WWW DIYALARMFORUM COM WWW DIYALARMFORUM ...

Page 2: ...WWW DIYALARMFORUM COM WWW DIYALARMFORUM COM ...

Page 3: ... and Two 4204 Modes 2 2 Wiring for Zone Trigger Mode 2 3 Wiring for Module Fault Relay 2 4 Power Connections and Options 2 5 Backup Battery Connection 2 5 Initial Power Up Sequence 2 6 SECTION 3 Programming the 7845GSM 3 1 General Information 3 1 Using the AlarmNet Direct website 3 1 Using a 7720P Programming Tool 3 2 Using the Control Panel Programming Mode 3 2 Programming Conventions 3 3 ECP Mod...

Page 4: ...ogrammer Keyboard Commands 5 1 Programmer Keyboard Commands 5 1 Module Identification Displays 5 1 GSM Status Displays 5 2 System Status Displays 5 2 SECTION 6 Appendices 6 1 Appendix A Summary of LED Operation 6 1 7845GSM Status Display Operation 6 1 Signal Strength RSSI Mode and Status LEDs 6 3 Mode and Status Indicator Switch 6 3 Appendix B Central Station Messages 6 4 Appendix C GSM Downloadin...

Page 5: ...nformation Honeywell s 7845GSM Cellular Communicator transmits signals to the AlarmNet G network GSM cellular network which uses GPRS to complete these transmissions and forwards them to your central station If your current Central Station is capable of receiving signals from AlarmNet central stations they are capable of receiving signals from the 7845GSM If the GPRS network is unavailable the 784...

Page 6: ...zone inputs plus two optional trigger zones depending on options programmed Two 4204 mode provides up to eight zone inputs depending on options programmed Each 4204 zone can be programmed for delayed reporting and restoral reporting Reports are sent in ADEMCO High Speed format Module Supervision Features The 7845GSM provides the following types of supervision and module fault detection Network com...

Page 7: ...y 500mA peak transmit Fault Relay Output Open collector 12VDC 25W max Input Trigger Levels V 2V 13V V 0V 1V RF Transceiver Type Tri Band GSM GPRS Class 10 Modulation GMSK Antenna Internal GSM quad band antenna 1 3 dBi gain Band Transmission Frequency MHz Transmit Power dBm Receive Frequency MHz Receive Sensitivity dBm Number of Channels Channel Spacing MHz Duplex Separation kHz GSM 850 824 849 33 ...

Page 8: ...7845GSM 7845GSMCN Installation and Setup Guide 1 4 WWW DIYALARMFORUM COM WWW DIYALARMFORUM COM ...

Page 9: ... such that the opening in the case back is aligned with the wire cable access opening in the mounting surface while passing the wires cable through the opening in the case back or through the removable knockouts located on the bottom of the back cover 5 Secure the case back to the mounting surface using four screws supplied 6 When all wiring is completed attach the case front of the 7845GSM to the...

Page 10: ...r the module as they are for keypads and other peripheral devices To wire the module for ECP or 4204 modes see Figure 2 and make the following connections Table 1 Wiring connections for ECP or 4204 modes 7845GSM Control Terminal 3 V 12 V Aux Terminal 4 GND Ground Terminal 5 Data In Data Out Terminal 6 Data Out Data In 7845GSM VISTA CONTROL PANEL 7845GSM 009 V0 GND ECP DATA OUT ECP DATA IN ECP VOLT...

Page 11: ...his range may cause permanent damage to the unit Trigger levels below this range result in unreliable operation To trip a zone on the 7845GSM in V trigger mode the negative triggering voltage must be less than 1 0V NOTE LynxR and LynxR EN have a designated trigger for V trigger Connect a wire from the triggering source bell output voltage trigger etc of the control panel to the zone input of the m...

Page 12: ... Figure 6 Wiring the 7845GSM Zone 1 Input to a LynxR Trigger Output Wiring for Module Fault Relay You may wire and program the module s fault output trigger for fail safe mode see the question FLT REL ON Y N To sense a module fault at the control panel make connections as shown in Figure 7 including the proper EOL resistor required by the control 7845GSM 007 V0 12V AUX GND ZONE IN 2K EOL RESISTOR ...

Page 13: ...tallations TB1 4 GND must be connected to ground GND on the control panel 7845GSM CONTROL PANEL 7845GSM 008 V0 GND 12V AUX GND ECP VOLTAGE 2 1 4 5 3 TB1 TRANSFORMER AC INPUT 2 AC INPUT 1 J1 BATTERY K14139 RAD FLT Z1 Z2 or DATA IN 11 Figure 9 Powering the 7845GSM NOTE When calculating the total load on the auxiliary power output of the control panel budget 10mA for the 7845GSM when using ECP mode B...

Page 14: ...f this document 1 Place the battery inside the case back 2 Snap the right side of the battery clip onto the inside of the case back and secure the left side with the screw provided 1 Do not plug the battery in until after you have powered up the 7845GSM 2 If using a LynxR I do not connect the module s backup battery The LynxR I backup battery will supply backup power in the event of a power outage...

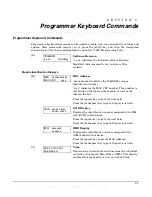
Page 15: ...ool Through a programming mode in the control panel on panels that support this option e g VISTA 128BP and FBP Using the AlarmNet Direct website To program the module via the website if you are already signed up for this service go to https services alarmnet com AlarmNetDirect userlogin aspx If you are not signed up for this service click on Dealer Sign Up Log in and follow the on screen prompts P...

Page 16: ... up programming N Y N Press for NO answer Y Press SHIFT Y for YES answer SHIFT Press before pressing a SHIFT key function Will light SHIFT LED LED goes out once a key is pressed Press again for each SHIFT function desired 1 A 1 For entering the number 1 A For entering letter A 2 B 2 For entering the number 2 B For entering letter B 3 C 3 For entering the number 3 C For entering letter C 4 D 4 For ...

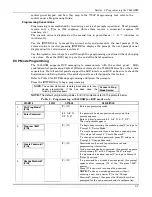
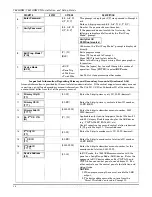
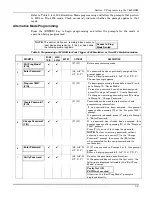
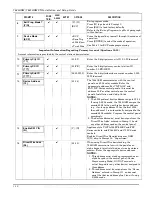
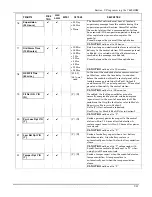
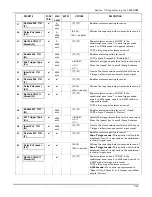
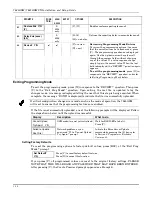
Page 17: ...begin programming NOTE The central station can remotely block access to local device programming If this has been done the following prompt appears Access to Prog Mode Denied NOTE The default programming values for ECP mode are listed in the prompts below Table 3 Programming a 7845GSM for ECP mode only PROMPTS ENTRY OPTIONS DESCRIPTION 1 Strt Prog Mode Y N _ Y N Enters programming mode 2 Enter Pas...

Page 18: ...scriber ID of the secondary account must differ from that of the primary account 10 Primary City ID _ 01 99 Enter the 2 digit primary city ID 01 99 decimal 11 Primary CS ID 01 FE Enter the 2 digit primary central station ID number 01 FE HEX 12 Primary Sub ID 0001 9999 Enter the 4 digit subscriber account number 0001 9999 decimal 13 En 2 nd CS Y N N _ Y N Applicable only if control supports Central...

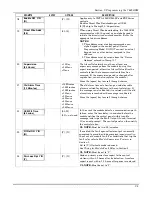
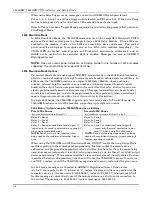
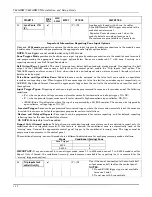
Page 19: ...10 Minutes 15 Minutes 30 Minutes 1 Hour 2 Hours 4 Hours 8 Hours 12 Hours 24 Hours The old alarm time sets how long an undeliverable alarm is retried for delivery to the central station If the message is not validated it is retried until the old alarm time is reached or the message is validated Press the space key to scroll through choices 22 GSM Flt Time 60 mins _ 01 99 00 not used In the event th...

Page 20: ...an Inverted Trigger where the alarm and normal states of the zones are inverted this can serve a fail safe supervisory purpose for certain installations These zone inputs can also be programmed for restore reporting and for delayed reporting which allows time for the user to abort false alarms NOTE Optional hardwire zones report in ADEMCO High Speed format 27 Enable Zn6 Y N N _ Y N Enables alarm r...

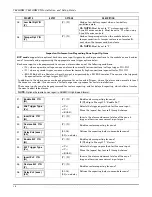
Page 21: ...ost communication with 7845GSM 0880 7845GSM tamper detected cover removed 0005 7845GSM has lost contact with AlarmNet G network 000F 7845GSM is not registered account not activated 0019 7845GSM shutdown 0400 7845GSM power on reset AND the control panel lost communications with 7845GSM 0C80 7845GSM power on reset AND tamper detected 0C8F 7845GSM power on reset AND tamper detected AND not registered...

Page 22: ...s later in this section In single 4204 mode the 7845GSM supports up to four relay zones In Two 4204 mode the 7845GSM functions as two 4204 modules supporting up to eight relay zones 4204 Relay Outputs map to 7845GSM zones as follows First 4204 Zones device address entered in Prompt 13 Second 4204 Zones device address entered in Prompt 13 plus 1 Relay 1 Zone 1 Relay 2 Zone 2 Relay 3 Zone 3 Relay 4 ...

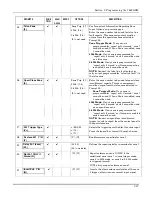
Page 23: ... been assigned press N and go to Prompt 4 Create Password To change an existing password press N and go to Prompt 5 Change Password 4 Create Password Y N _ Y N Passwords can be used to protect account and programming information If no password has been assigned this prompt appears after pressing N at the Program 7845 prompt If a password is desired press Y and go to Prompt 6 Enter Password 5 Chang...

Page 24: ...her controls see the control panel s Installation and Setup Guide NOTES 1 The 4204 protocol limits address range to 01 15 If using 2 4204 mode the 7845GSM assigns the second 4204 to the next higher device address e g if entering address 12 for the first 4204 then address 13 is automatically assigned to the second 4204 module Program the control panel accordingly 2 The device address es must be uni...

Page 25: ...rouble message and trips the Fault Output if used terminal 11 see next question The control panel can then notify the central station UL NOTE Must be two 02 minutes 19 Flt Rel ON Y N N _ Y N If enabled the fault open collector output is normally energized to ground and de energizes open circuit in the event of a module fault For conditions that trip the fault relay refer to Module Supervision Feat...

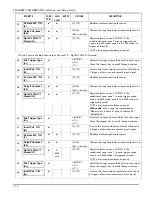
Page 26: ... each zone input can be programmed to cause an alarm under one of the following conditions V where a positive voltage causes an alarm for normally low connections voltage trigger NO NC V where a ground trigger causes an alarm for normally high connections open collector NO NC EOLR End of Line Resistor where the input is supervised by a 2K EOL resistor The zone can be triggered by open collector vo...

Page 27: ...ignment must be unique from the telco zone selected in Prompt 25 Zone Trigger Mode If any zone is programmed for report only if armed zone 7 cannot be used If Lynx Panic is enabled zone 3 cannot be used 4204 Mode If any zone is programmed for report only if armed zone 4 cannot be used as an open close zone 2 4204 Mode If any zone is programmed for report only if armed or if tamper is enabled zone ...

Page 28: ...N _ Y N Reports alarms on zone 3 ONLY if the conditional zone zone 7 in zone trigger mode zone 4 in 4204 mode zone 8 in 2 4204 mode is triggered armed If N always reports alarms on zone 3 4204 mode If any zone is programmed to Report Only if Armed skip to Prompt 50 Enable Zn6 40 Zn4 Trigger Type V _ EOLR V V Selects the triggering method for this zone input Press the space key to scroll through ch...

Page 29: ...n zone 6 ONLY if the conditional zone zone 7 in zone trigger mode zone 4 in 4204 mode zone 8 in 2 4204 mode is triggered armed If N always reports alarms on zone 6 56 Enable Zn7 Y N N _ 4204 only Y N Enables alarm reporting for zone 7 if used If N skip to Prompt 64 Review 57 Zn7 Trigger Type V _ 4204 only EOLR V V Selects the triggering method for this zone input Press the space key to scroll thro...

Page 30: ...layed telling the user that this step is being executed When complete the message DONE is displayed to indicate the file was successfully uploaded If critical configuration changes were made such as the mode of operation the 7845GSM will reset to ensure that the programming features are enabled If the file is not successfully uploaded one of the following prompts will be displayed Follow the steps...

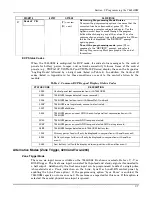
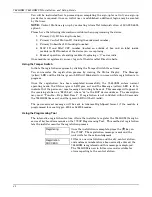
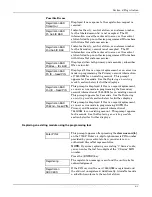
Page 31: ... that the account is now enabled Wait for the Registration Success message to appear regardless of the registration method used You can register the 7845GSM by one of the following methods Through the AlarmNet Direct website Through use of the Tamper Switch Through use of a 7720P Programming Tool By phone Registering through AlarmNet Direct Website The 7845GSM can be registered through the Alarmne...

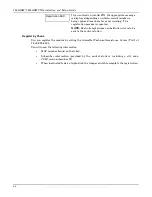
Page 32: ...ion has been completed successfully the 7845GSM enters normal operating mode the Status green LED goes out and the Message yellow LED is lit to indicate that the power on reset message is waiting to be sent This message will appear at the receiving station as E339 8xx where xx is the ECP device address The description may read Trouble Exp Mod Reset If registration is not validated within 90 second...

Page 33: ...d ID Need PIN This prompt is displayed if this is a repair replacement or an error was made in programming the Secondary account information of 7845GSM for an existing account This prompt appears for 2 seconds See the Replacing an existing module section below for further displays Registration BAD Pri 2nd Need PIN This prompt is displayed if this is a repair replacement or an error was made in pro...

Page 34: ...s a substitution alarm to be sent to the central station Register by Phone You can register the module by calling the AlarmNet Technical Assistance Center TAC at 1 800 222 6525 You will need the following information MAC number found on the label Subscriber information provided by the central station including a city code CSID and a subscriber ID When instructed to do so triple click the tamper sw...

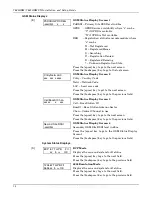
Page 35: ...ber This number is also found on the label on the module as well as the label on the box Press the space key to go to the next field Press the backspace key to go to the previous field SCID xxxxx xxxxx xxxxx xxxxx SCID Display Displays the identification number assigned to the SIM card SCID in this device Press the space key to go to the next field Press the backspace key to go to the previous fie...

Page 36: ...kspace key to go to the previous field Cell BaseSt Chan xxxxx x xxx GSM Status Display Screen 3 Cell Base Station ID BaseSt Base Station Antenna Sector Chan Control Channel in use Press the space key to go to the next screen Press the backspace key to go to the previous field Second Site RSSI xxxdbm GSM Status Display Screen 4 Secondary GSM Site RSSI level in dbm Press the space key to go to the G...

Page 37: ...n as follows Battery voltage acceptable Battery voltage below 5 7V 5 Flt Represents radio faults OK Normal No fault G No network connectivity over GSM and fault time has expired g No network connectivity over GSM and fault time has NOT yet expired NOTE The 7720P will not operate if the power line voltage is removed Bat NLd x xxV Bat Ld x xxV Battery Voltage Display The voltage levels of the batter...

Page 38: ...ssage is sent to the secondary station X Reset CPU Y N Reset the 7845GSM Pressing N returns to normal mode Pressing Y resets the device UP arrow Registering Registration Registers a programmed 7845GSM with AlarmNet DN arrow Enter PIN Registration with PIN for Replacement Module Registers a replacement 7845GSM with AlarmNet once programmed using the existing PIN Force Upload of Configuration File t...

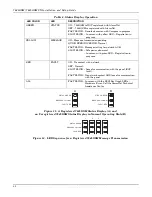
Page 39: ...US green MESSAGE yellow FAULT red 7845i GSM 012 V0 YELLOW MESSAGE RED FAULT GREEN STATUS Figure 13 7845GSM Status Display LEDs with Front Cover Installed Each LED can have four different states ON OFF FAST BLINK and SLOW BLINK Throughout this document the following key is used to describe LED state ON OFF FAST BLINK SLOW BLINK Figure 14 LED Key WWW DIYALARMFORUM COM WWW DIYALARMFORUM COM ...

Page 40: ... green LED Registration in progress RED FAULT ON No contact with network OFF Normal SLOW BLINK Loss of communication with the panel ECP fault FAST BLINK No network contact AND loss of communication with the panel ALL FAST BLINK In unison with the RSSI Bar Graph LEDs Hardware Error Call the AlarmNet Technical Assistance Center FAULT RED MESSAGE YELLOW STATUS GREEN A FAULT RED MESSAGE YELLOW STATUS ...

Page 41: ...tatus Indications Table 7b LED 1 red LED 2 yellow LED 3 yellow LED 4 green LED 5 green LED 6 green Off Mode and Status indicator Operation Mode in combination with LED 3 Operation Mode in combination with LED 2 Not Used GPRS Service GSM Module Registration with Network Carrier see below for specific modes and status indications Table 7a Operation Modes OPERATION MODE LED 2 1 st yellow LED 3 2 nd y...

Page 42: ...51 7 5555 5553 7 Power Loss E337 C08xx R337 C08xx 1555 5555 6 3555 5555 6 Low Battery E338 C08xx R338 C08xx 5155 5555 6 5355 5555 6 Battery Charger Failure E314 C08xx R314 C08xx 5155 5555 1 5355 5555 1 ECP Supervision E355 C0000 R355 C0000 5555 5515 5 5555 5535 5 Communication Path Supervision R350 C0951 5555 5553 5 Swinger Suppression 0D00 0005 0 Telco 5555 5155 6 5555 5355 6 Open Close 2 sent in...

Page 43: ...the 7845GSM must be connected by cable as shown below to the panels listed NOTE This feature is not available if device is set for zone trigger mode 1 2 3 4 5 6 7 8 9 NU VISTA 128BP 250BP FA1660C J8 CONNECTOR VIOLET GREY YELLOW RED GREEN BROWN BLUE BLUE WHITE BLACK I N 2 I N 3 G R O U N D O U T 5 O U T 6 G R O U N D G R O U N D P R I N T E R D T R K4668WH RJ 11 CABLE 7845GSM 026 V0 7845GSM TB 1 6 ...

Page 44: ...the gateway GPRS General Packet Radio Service GSM Global System for Mobile communications which is an international standard for digital mobile phone systems used for cellular communication IMEI International Mobile Equipment Identity number IP Internet Protocol IP Address A unique number consisting of four parts separated by periods sometimes called a dotted quad for example 204 17 29 11 assigned...

Page 45: ...Section 6 Appendices 6 7 Notes WWW DIYALARMFORUM COM WWW DIYALARMFORUM COM ...

Page 46: ...allation However there is no guarantee that interference will not occur in a particular installation If this equipment does cause interference to radio or television reception which can be determined by turning the equipment off and on the user is encouraged to try to correct the interference by one or more of the following measures If using an indoor antenna have a quality outdoor antenna install...

Page 47: ...SSI M0 M1 GPRS IBS RED BLACK BATTERY RED BLK ZONE INPUT Z5 or NOT USED ZONE INPUT Z4 or NOT USED ZONE INPUT Z3 or ECP OUTPUT ZONE INPUT Z1 Z2 or ECP INPUT FAULT OUTPUT ZONE INPUT Z7 or NOT USED ZONE INPUT Z6 or NOT USED GND NOT USED or 12V DC IN AC 2 AC 1 TB1 Wiring for 7845GSM Cellular Communicator TB1 ECP Mode Zone Trigger Mode 4204 Mode 2 x 4204 Mode 1 AC 1 AC 1 AC 1 AC 1 2 AC 2 AC 2 AC 2 AC 2 ...

Page 48: ... IN NO CASE SHALL SELLER BE LIABLE TO ANYONE FOR ANY CONSEQUENTIAL OR INCIDENTAL DAMAGES FOR BREACH OF THIS OR ANY OTHER WARRANTY EXPRESS OR IMPLIED OR UPON ANY OTHER BASIS OF LIABILITY WHATSOEVER EVEN IF THE LOSS OR DAMAGE IS CAUSED BY THE SELLER S OWN NEGLIGENCE OR FAULT Seller does not represent that the product s it sells may not be compromised or circumvented that the product s will prevent a...

Reviews: