GB
23
22
GB
3. Putting into operation
1.
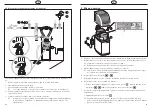
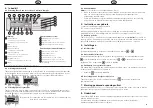
Remove covering cap and salt cover (brine pipe remains closed).
2.
Fill cabinet approx. 3 cm with water and afterwards with 1 bag magnesium salt VC 51-A.
☞
Check if outflow (rear) is closed.
☞
allow the salt to dissolve for about 15.
3.
Set up electrical connection, the display starts flashing.
☞
The mains plug must supply permanent voltage, it must not be coupled with a light
switch or anything similar.
4.
Set the time by means of the arrow keys
and
.
5.
Determine hardness of inflowing water (with the supplied hardness test kit).
6.
Set water hardness (number of drops)
• To do so press
key for 5 seconds, set hardness via arrow keys
and
and store entry by pressing the
key again.
7.
Actuate manual regeneration and set required operating mode (see item 9).
• Briefly press
key.
☞
During the regeneration the flushing takes place via the drain hose. The total time of
all 6 regeneration phases is approx. 45 min (PW 52-A) or 75 min. (PW 52-B).
n
o
p
2.5 Rinsing the pipework and deaerating the device
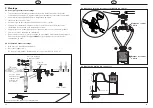
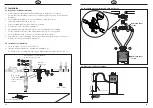
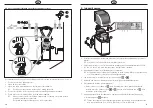
For installing the device and connecting the drain hose proceed according to fig. 2.3 and 2.4.
1.
Set device to bypass position.
2.
Open main water supply.
3.
Open cold water tap and let the water run.
☞
Foreign objects and soldering residues are flushed out of the pipework.
4.
Set device to service position. Slowly move lever down.
5.
As soon as the device is deaerated close cold water tap.
☞
If the device is not deaerated completely, noise may occur during regeneration.
These noises, however, disappear after 2 – 3 regenerations.
n
o
p
q
r


