14
LIGHT KIT INSTALLATION
Switch Housing
Screw
Fitter Plate
Screw
Switch Housing
Cover Screw
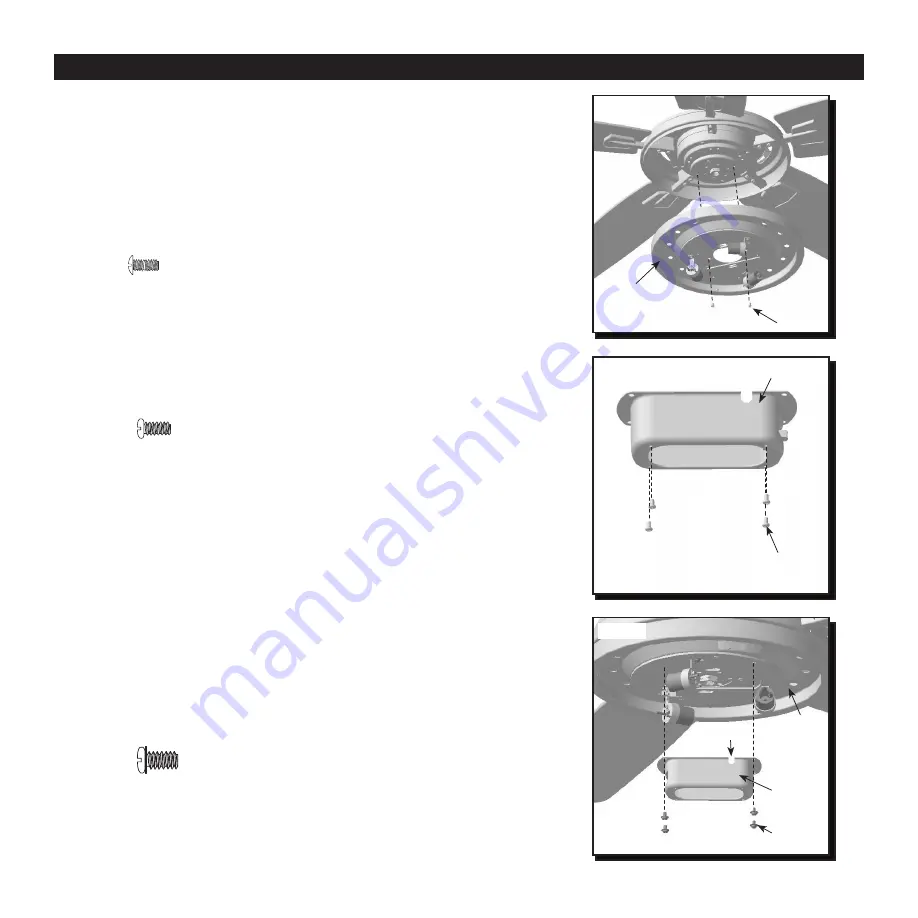
23. Remove the four switch housing screws
preassembled to the light kit. Secure the switch
housing to the light kit by re-installing the switch
housing screws (Fig. 23).
Note:
The switch housing should be oriented so its
notch covers the wiring from the light kit.
22. Remove the four switch housing cover screws
preassembled to the switch housing. Set aside for
later (Fig. 22).
21. Remove two of the four fitter plate screws
located on the underside of the motor assembly
and loosen the other two screws. Align the two
key slots of the light kit with the loosened fitter
plate screws. Rotate the light kit clockwise until
the screw heads engage the key slots. Replace
previously removed fitter plate screws, then tighten
all screws (Fig. 21).
Light Kit
Fitter Plate
Screws
Switch Housing
Cover Screws
Switch Housing
Light
Kit
Notch
Switch
Housing
Switch
Housing
Screw
Fig. 21
Fig. 22
Fig. 23


