background image

3

USE & OPERATION (CONTINUED)

EN

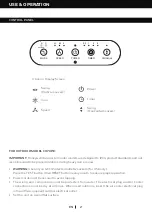
POWER

Press the       button to turn the unit on. The cooler will start automatically at medium speed. After a 
few seconds the speed will switch to low. To turn the unit off, press the button again.

MODE

Press the          button to activate evaporative cooling and/or louver swing modes. 

Press the       button until the “S” indicator light is illuminated on the control panel. The Vertical 
Louvers will begin to move left to right automatically.

Press the       button until the “C” indicator light is illuminated to activate evaporative cooling. The 
water pump will operate and you will feel the cooler air after the Honeycomb Cooling Media is 
completely wet. 

Pressing the       button until both “S” and “C” are illuminated will activate both Swing (Vertical 
Louvers) and Cool modes simultaneously.

Note:

 When the “C” mode is not selected, the unit functions in a fan only mode, without evaporative 

cooling.

FUNCTION BUTTONS

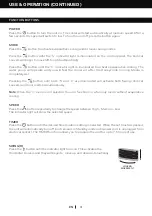
SPEED

Press the         button repeatedly to change the speed between High - Medium - Low.
The indicator light will show the selected speed.

TIMER

Press the       button until the desired time duration setting is selected. When the set time has passed, 
the unit will automatically turn off (unit remains in Standby mode until power cord is unplugged from 
electrical socket). The TIMER function allows you to program the unit for up to 7.5 hours of use.

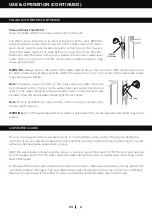
SWING(H)

Press the        button until the indicator light turns on. This activates the 
Horizontal Louvers and they will begin to  move up and down automatically.

LOUVER 

MOVEMENT

Summary of Contents for CL70PE

Page 1: ...Portable Evaporative Air Cooler User Manual Web Read and save these instructions before use Model CL70PE CO70PE ...

Page 2: ... 17 Drain Plug 9 Power Cord Plug PARTS DESCRIPTION EN 4 5 6 7 8 9 3 2 1 15 16 17 10 11 12 13 14 WARNING READ AND SAVE THE AIR COOLER SAFETY MAINTENANCE GUIDE AND USER MANUAL BEFORE USING THIS PRODUCT FAILURE TO FOLLOW THESE INSTRUCTIONS MAY DAMAGE AND OR IMPAIR ITS OPERATION AND VOID THE WARRANTY IN CASE THERE IS ANY INCONSISTENCY OR CONFLICT BETWEEN THE ENGLISH VERSION AND ANY OTHER LANGUAGE VERS...

Page 3: ...rs during heavy rain or snow FOR OUTDOOR MODEL CO70PE WARNING Use only on GFCI Protected outlets sockets for USA only Press the TEST button then RESET button every month to ensure proper operation Power cords must be secured to avoid tripping The wiring and connections must be protected from water The electrical plug and Air Cooler connections must be dry at all times When used outdoors insert the...

Page 4: ...y wet Pressing the button until both S and C are illuminated will activate both Swing Vertical Louvers and Cool modes simultaneously Note When the C mode is not selected the unit functions in a fan only mode without evaporative cooling FUNCTION BUTTONS SPEED Press the button repeatedly to change the speed between High Medium Low The indicator light will show the selected speed TIMER Press the butt...

Page 5: ...E The remote control requires AAA 2 x 1 5V batteries for replacement Open the battery compartment at the back of the remote control and insert the batteries inside Care must be taken to insert the batteries according to the correct polarity markings shown inside the battery compartment Always point the remote control signal transmitter towards the unit when operating Make sure that the signal path...

Page 6: ...o ensure there will be no leaks If there is leakage the hose and the water inlet valve may not be connected properly Try to disconnect replace and tighten the water inlet valve again When the connection is secured turn ON the water supply and the water will flow into the water tank of the cooler The cooler is now set so the water refills automatically When the water tank is full the water inlet va...

Page 7: ...the unit The Water Level Indicator is located at the front of the unit Refill the water tank when water level is low Do not fill water above the Max water level mark to avoid water droplets collecting on the louvers Check the water level in the tank before running the COOL function Make sure that the water in the tank is above the minimum water level mark Running the unit in COOL mode with inadequ...

Page 8: ...loth to remove the dirt and dust from the surface of the unit Never use corrosive elements or chemicals to clean this product When the product is not in use store the unit in a dry place out of direct sunlight If the cooler will not be used for a long period of time please refer to the STORAGE MAINTENANCE GUIDELINES located in the separate Safety Maintenance Guide WARNING Before cleaning the unit ...

Page 9: ...ter The media should be cleaned every two months or sooner depending on your needs For best results allow the Honeycomb Cooling Media to dry after each use by turning off the cool function 15 minutes before turning the unit off Slide out the Washable Mesh Filter and clean with water Remove all the screws from the Rear Grill of the Air Cooler Carefully pull out the rear grill from the cooler Carefu...

Reviews: