25
To install a CN100 Controller
1. Refer to appropriate site location drawings for the specified
controller installation location, controller Device Index (FTE
address) and wiring diagrams.
2. Identify the mounting location on channel and align mounting
holes in IOTA with screw hole locations on the channel.
3.
CAUTION
Do
not
fully tighten the IOTA mounting screws before installing
and tightening the power and ground screws (
24V
and
COM
terminals), which can bend during installation or removal. Follow
instructions carefully.
4. Position the assembled IOTA board at the proper mounting
location.
5. Thread the six mounting screws only half-way to attach the IOTA
board to the channel.
6. With a #2 Phillips Screwdriver, by hand, turn each screw (after it is
engaged with the thread) for three complete clockwise turns in
cross-pattern sequence.
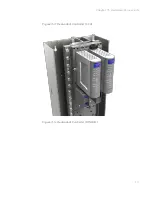
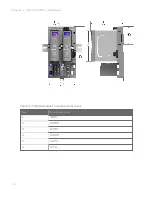
7. Refer to the preceding figure.
l
Insert and tighten the screw to the left side of the IOTA
board that connects to the 24 Vdc bus bar.
l
Insert and tighten the screw to the right side of the IOTA
board that connects to the COM bus bar.
8. Tighten the mounting screws securing the IOTA board to the
channel.
9. Insert the CN100 Controller onto IOTA making sure that the
Controller matches properly with the IOTA connector.
10. Secure the CN100 controller to the IOTA with two screws located
at each side of the metal cover.
11. Insert the NAM onto IOTA making sure that the NAM matches
properly with the IOTA connector.
12. Secure the NAM to the IOTA with clockwise rotary button lock at
right side of the module.
Chapter 4 - CN100 Platform Installation
Summary of Contents for CN100
Page 8: ...8 Chapter 2 Overview ...
Page 16: ...16 Chapter 3 Hardware Components ...
Page 42: ...42 Chapter 5 Maintenance ...
Page 50: ...50 Chapter 6 Diagnostics and Troubleshooting ...

