101
1.
Click
Configure Protocols
>
DNP3 Slave
tab and select the target
Ethernet ports which you want to bind.
2.
In the
Physical Layer
tab, configure the TCP port number. It should
be the same as the DNP3 master.
3.
In the
Data Link Layer
tab, configure corresponding parameters as
required.
It is recommended to select
Never
for
Data Link Confirmation
and
select the value in
Data Link Retries
and
Data Link Retry Timeout
.
Maximum value for data link retries is 255 and maximum value for
retry timeout is 3,600,000ms.
If you select
MultiFrag
or
Always
, ensure that the
Data Link Retries
and
Data Link Retry Timeout
are set.
4.
In the
Application Layer
tab, configure corresponding parameters
as required.
ATTENTION: If you select
Enable DNP3 Time Synchronization
here, you cannot enable Primary Server and Secondary
Server under
Miscellaneous
>
Configure Date/Time
options at
the same time, or else you cannot download your
configuration.
5.
In the
Mapping
tab, and select the required mapping table from
the
Mapping
drop-down list.
If the list is empty, you should add a mapping table first. See
"Adding a DNP3 Slave mapping table" in the
ControlEdge Builder
User's Guide
.
The same mapping table may be selected for use on multiple
ports. For example, this could be used when a SCADA system
communicates through 2 ports in a redundant arrangement.
6.
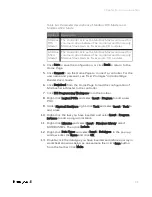
In the
Default Variation
tab, configure the default variation for each
type of DNP3 point. Default variation defines the data format that
is used by the controller to send data to the DNP3 Master, when
the Master does not ask for a specific data variation.
7.
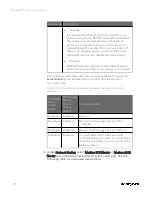
Select
Flash
or
SD card
from the drop-down list besides
Save DNP3
Events to:
.
o
If you want to save DNP3 events to SD card, you must allocate
the space for DNP3 events first. See "Preparing SD card" on
page 1 for more information.
Chapter 6 - Communication
Summary of Contents for ControlEdge 2020 SC-TEPL01
Page 28: ...Figure 3 8 Single star topology 28 Chapter 3 Hardware ...
Page 40: ...40 Chapter 3 Hardware ...
Page 66: ...66 Chapter 4 Software ...
Page 114: ...114 Chapter 6 Communication ...
Page 126: ...126 Notices ...


