background image

Nous vous remercions d'avoir choisi le système
d'alarme Domonial de Honeywell.

Pour  profiter  au  mieux  de  toutes  les
fonctionnalités  de  votre  système,  nous  vous
recommandons de lire attentivement ce manuel.

Ce  système  d'alarme  fonctionne  sur  une  radio
fréquence  autorisée  qui  ne  présente  aucun
risque pour l'utilisateur.

- 17 -

F

R

A

N
Ç

A

I

S

1- INTRODUCTION 

18

2- LES VOYANTS LUMINEUX

19

3- SIGNALISATION SONORE

20

4- COMMENT UTILISER LE CLAVIER RADIO AVEC AFFICHEUR

21

5- COMMENT UTILISER LE CLAVIER SANS FIL AVEC LECTEUR DE BADGE

25

6- COMMENT UTILISER LA TÉLÉCOMMANDE POURVU D’UN VOYANT LED 

28

7- COMMENT UTILISER LA TÉLÉCOMMANDE POURVU DE 3 VOYANTS LED

29

7- COMMENT CONTRÔLER VOTRE SYSTÈME PAR TÉLÉPHONE

31

8- ENTRETIEN ET PRÉCAUTIONS D’EMPLOI

32

Summary of Contents for Domonial

Page 1: ...EKZ008200B 10 2007 2007 Honeywell International Inc Domonial User manual Manuel d utilisation Manual de uso Manuale dell utente Benutzerhandbuch Gebruikershandleiding EKZ r B ...

Page 2: ...WITH 1 LED 12 7 HOW TO USE THE KEYFOB WITH 3 LEDS 13 8 HOW TO CONTROL YOUR SYSTEM OVER THE PHONE 15 9 MAINTENANCE AND RECOMMENDATIONS 16 Congratulations on your purchase of the Honeywell Domonial security system To make the best out of your system we advise you to read this manual carefully This security system is designed to operate on an authorised radio frequency and will in no way endanger the...

Page 3: ...ch detects the vibrations emitted when a door window is opened or closed E N G L I S H Radio Narrow band frequency modulation Identification code for each component no interference between neighbouring systems Protection against attempted jamming Radio monitoring of the system peripherals Electrical Mains supply with battery backup Built in voltage surge protection System supply monitoring Operati...

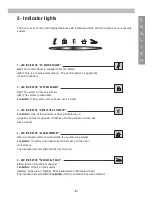
Page 4: ...t or annex set is armed 3 LED INDICATOR DETECTOR ACTIVATED FLASHING One of the window or door protected by a magnetic contact is opened It flashes until the window or door has been closed 4 LED INDICATOR ALARM MEMORY ON An intruder alarm occurred while the system was armed FLASHING An alarm occurred while the part set or annex set was armed The indicator remains ON until the next arming 5 LED INDI...

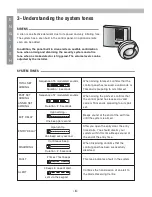
Page 5: ...ode or TAG and is preparing to arm total set When Disarming confirms that the control panel has been successfully disarmed When arming the part set confirms that the control panel has received a valid code or TAG and is preparing to arm part set This tone indicates a fault in the system Confirms the transmission of an alert to the Alarm Receiving Centre After you open the entry door the entry time...

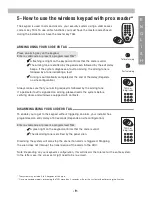
Page 6: ... completed at the end of the delay Depends on site configuration The icon confirms the completion of setting The screen clears after a few seconds For total set arming the keypad s left light indicator is on during the exit delay For part set arming the keypad s right light indicator is flashing during the entire set period DISARMING USING YOUR CODE OR TAG To enable you to get to the keypad withou...

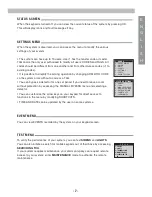
Page 7: ...ration The Alarm Receiving Centre is alerted KEYPAD DISPLAY Your keypad is equipped with a display to ease access to advanced user functions and rich content Menu functions are only accessible when the system is disarmed The display icons provide a quick view of the system status The navigation keys are used to access the menu Press the arrow keys to enter the main menu navigate and view choices i...

Page 8: ...y accessing the MANUAL BYPASS menu and selecting a detector You can customize the arrow keys on your keypad for direct access to functions in the menu by modifying SHORTCUTS TIME AND DATE can be updated by the user on some systems EVENT MENU You can view EVENTS recorded by the system on your keypad screen TEST MENU To verify the performance of your system you can test SIRENS and LIGHTS You can als...

Page 9: ... or off On some systems it is possible to trigger the camera on detectors equipped with one BATTERY REPLACEMENT The battery indicator on the keypad display indicates when to replace the battery Open the battery cover on the back of the keypad and insert a CR123A 3V battery respecting the polarities This function requires an optional X10 extension with X10 modules WARNING There is a risk of explosi...

Page 10: ...gnalled on arming please disarm the system before verifying doors and windows equipped with contacts DISARMING USING YOUR CODE OR TAG To enable you to get to the keypad without triggering an alarm your installer has programmed an entry delay of 30 seconds Depends on site configuration Enter a valid code or present a programmed TAG A green light on the keypad confirms that the code is valid The dis...

Page 11: ...Alarm Receiving Centre is alerted PROGRAMMING YOUR KEYPAD The keypad can have up to 10 users User 1 has the master code or master TAG To enter programming Press on and off control keys simultaneously The red light will flash slowly Enter the master code or present the master TAG To change or set additional user codes Select and enter an existing or new single digit user ID 0 9 Enter the new code f...

Page 12: ...nd the red light will turn off If this occurs you must restart this process from the beginning E N G L I S H 11 Total set arming CODE or TAG Part set arming CODE or TAG Annex set arming CODE or TAG Disarming Enter CODE or present TAG Disarming under duress Enter DURESS CODE CODE 1 Alert Enter programming MASTER CODE OR MASTER TAG Change user code User ID 0 9 enter new CODE enter new CODE again Cha...

Page 13: ...is emitted by the panel siren Disarming will also stop the siren but it does not interrupt the transmission to the Alarm Receiving Centre CALLING FOR ASSISTANCE PERSONAL ATTACK These buttons enable you to call for assistance at any time Press the SOS buttons simultaneously The indicator light on the keyfob comes on briefly when you release the button The siren is triggered depending on the configu...

Page 14: ...ction The disarming tone is emitted by the panel siren Disarming will also stop the siren but it does not interrupt the transmission to the ARC station ARMING AND DISARMING THE ANNEX SET If the system is configured for annex arming To arm Press the Total and Control buttons simultaneously To disarm Press the Disarm and Control buttons simultaneously PERSONAL ATTACK You can send an instant panic al...

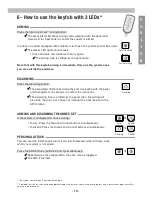
Page 15: ... remain lit for 3 seconds CHECKING THE STATUS OF YOUR SYSTEM Press the control button for one second All the LEDs light several times in succession and then the LED for the current arming status remains lit for 3 seconds CHANGING THE BATTERY When the battery starts to run down instead of remaining fixed the LEDs will fade out gradually Insert a small screwdriver into the space in the back of the c...

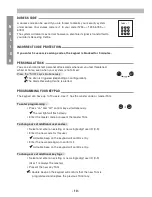
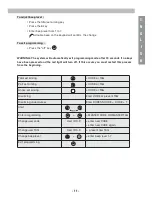
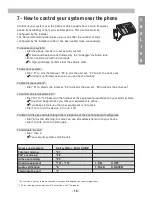
Page 16: ...m the total set 32 to disarm the part set 33 to disarm the annex set To control an electrical device Dial 101 to 112 based on the number of the equipment programmed in your alarm system One short beep informs you that your equipment is active Two beeps inform you that your equipment is not active Dial 1 to turn on the device 0 to turn it off To listen to the site and talk through the microphone of...

Page 17: ...siren the components of your system are suitable for indoor use only Keep them in a clean dry place at ambient temperature Avoid shocks for all the components and especially avoid dropping the keyfob Do not immerse in water Use a dry rag only no detergent to clean the components Dispose of old batteries in containers for this purpose Avoid exposure to prolonged siren emission Do not hide motion de...

Page 18: ... qui ne présente aucun risque pour l utilisateur 17 F R A N Ç A I S 1 INTRODUCTION 18 2 LES VOYANTS LUMINEUX 19 3 SIGNALISATION SONORE 20 4 COMMENT UTILISER LE CLAVIER RADIO AVEC AFFICHEUR 21 5 COMMENT UTILISER LE CLAVIER SANS FIL AVEC LECTEUR DE BADGE 25 6 COMMENT UTILISER LA TÉLÉCOMMANDE POURVU D UN VOYANT LED 28 7 COMMENT UTILISER LA TÉLÉCOMMANDE POURVU DE 3 VOYANTS LED 29 7 COMMENT CONTRÔLER V...

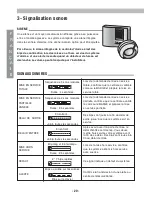
Page 19: ...nêtre porte qui permet de détecter les vibrations lors de la fermeture ou de l ouverture de la fenêtre porte Caractéristiques Radio Radio FM à bande étroite Code d identification pour chaque périphérique aucune interférence entre les systèmes voisins Protection contre le brouillage radio Supervision des périphériques radio du système Caractéristiques Fonctionnelles jusqu à 3 modes de surveillance ...

Page 20: ... par un contact magnétique est ouverte Il clignote jusqu à ce que la fenêtre ou la porte soit fermée 4 TEMOIN ALARME ALLUME Il signifie qu une intrusion s est produite alors que le système était en surveillance totale CLIGNOTANT Il signifie qu une intrusion s est produite alors que le système était en surveillance partielle ou annexe L indicateur reste allumé jusqu à la prochaine mise en service 5...

Page 21: ...é le code ou le BADGE et prépare la mise en service totale Lors de la mise hors service confirme que le système a été mis hors service avec succès Lors de la demande de mise en service partielle confirme que la centrale a validé le code ou le BADGE et prépare la mise en service partielle Ce signal indique un défaut du système Confirme la transmission d une alerte au centre de télésurveillance Aprè...

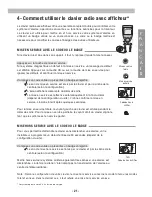
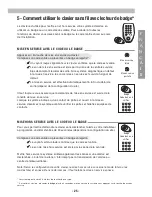
Page 22: ...matiquement à la fin du délai dépend de la configuration du site L icône confirme la mise en service L écran s éteint après quelques secondes Pour la mise en service totale le voyant gauche du clavier est allumé pendant le délai de sortie Pour la mise en service partielle le voyant droit du clavier clignote tant que le système est en service partiel MISE HORS SERVICE AVEC LE CODE OU LE BADGE Pour ...

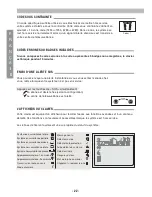
Page 23: ...ce Appuyez sur les touches de SOS simultanément La sirène est déclenchée selon la configuration Le centre de télésurveillance est alerté L AFFICHEUR DU CLAVIER Votre clavier est équipé d un afficheur pour faciliter l accès aux fonctions avancées et à un contenu détaillé Ces fonctions sont seulement accessibles lorsque le système est hors service Les icônes de l écran fournissent une vue rapide du ...

Page 24: ...vice sans code ni badge Vous pouvez isoler un détecteur pendant une période de mise en service pour laisser une pièce sans protection en accédant au menu ISOLER DETECTEUR et en choisissant un détecteur Vous pouvez personnaliser les touches de navigation sur votre clavier pour accéder directement à certaines fonctions du menu en modifiant RACCOURCIS DATE ET HEURE peuvent être mises à jour par l uti...

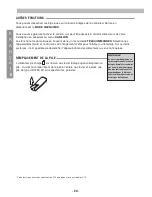
Page 25: ...stèmes il est possible de déclencher l appareil photo des détecteurs qui en sont équipés REMPLACEMENT DE LA PILE L indicateur de charge sur l écran du clavier indique quand remplacer la pile Ouvrez le compartiment de la pile à l arrière du clavier et insérez une pile de type CR123A 3V en respectant les polarités Cette fonction nécessite une extension X10 en option avec des modules X10 24 F R A N Ç...

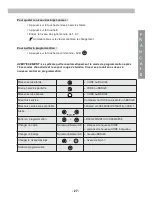
Page 26: ...urer que la demande de mise en service est suivie de la tonalité de mise en service Lorsque le système indique qu un contact de porte est ouvert à la mise en service désarmez le système avant de vérifier les portes et fenêtres équipées de contacts MISE HORS SERVICE AVEC LE CODE OU LE BADGE Pour vous permettre d atteindre le clavier sans déclencher l alarme votre installateur a programmé un délai d...

Page 27: ...veillance est alerté PROGRAMMATION DE VOTRE CLAVIER Le clavier peut avoir jusqu à 10 utilisateurs L utilisateur 1 a le badge et le code maître Pour entrer en programmation Appuyez sur les touches de commande marche et arrêt simultanément Le voyant rouge clignote lentement Composez le code maître ou présentez le badge maître Pour modifier ou ajouter des codes Entrez le numéro d un utilisateur exist...

Page 28: ...a Si ceci se produit vous devez à nouveau rentrer en programmation 27 F R A N Ç A I S Mise en service totale CODE ou BADGE Mise en service partielle CODE ou BADGE Mise en service annexe CODE ou BADGE Mise hors serrvice Composer un CODE ou présenter un BADGE Mise hors service sous contrainte Composer un CODE SOUS CONTRAINTE CODE 1 Alerte Entrer en programmation BADGE MAITRE OU CODE MAÎTRE Changer u...

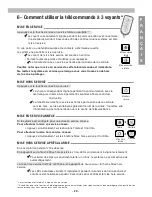
Page 29: ...s sirènes si une alarme est déclenchée mais n interrompt pas la transmission de l alarme au centre de télésurveillance ENVOI D UNE ALERTE SOS Vous pouvez envoyer une alerte instantanée si vous vous sentez menacé chez vous même lorsque votre système n est pas en service Appuyez sur les boutons de SOS simultanément La sirène est déclenchée selon la configuration Le centre de télésurveillance est ale...

Page 30: ... la zone à protéger MISE HORS SERVICE Appuyez sur la touche de mise hors service Le voyant correspondant clignote pendant la communication avec la centrale puis il reste allumé pendant 3 secondes afin de confirmer l instruction La tonalité de mise hors service est émise par la sirène de la centrale La mise hors service entraînera également l arrêt de la sirène toutefois elle n interrompra pas la t...

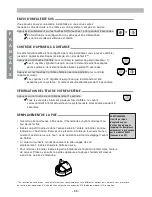
Page 31: ...qu à ce que la demande ait été acceptée par le système ils restent ensuite allumés pendant 3 secondes Appuyer sur les touches Contrôle Mise en service partielle pour contrôler l appareil suivant Les voyants 1 et 2 clignotent jusqu à ce que la demande ait été acceptée par le système ils restent ensuite allumés pendant 3 secondes VÉRIFICATION DE L ÉTAT DE VOTRE SYSTÈME Appuyez sur la touche de contr...

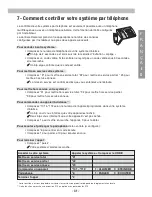
Page 32: ...e votre système Composez 31 pour mettre hors service total 32 pour mettre hors service partiel 33 pour mettre hors service annexe Pour commander un appareil à distance Composez 101 à 112 selon le numéro de l appareil programmé dans votre système d alarme Un bip court vous informe que votre appareil est activé Deux bips vous informent que votre appareil n est pas activé Composez 1 pour mettre en ma...

Page 33: ...ennent pour un usage intérieur seulement Maintenez les dans un endroit propre et sec à température ambiante Evitez les chocs pour tous les composants et plus particulièrement les chutes pour la télécommande Ne pas immerger Utilisez un chiffon sec seulement aucun détergent pour nettoyer les composants Jetez les piles usagées dans les containers prévus à cet effet Evitez une exposition prolongée à l...

Page 34: ...rizada que no presenta ningún peligro para el usuario 33 E S P A N O L 1 INTRODUCCIÓN AL SISTEMA DE SEGURIDAD 34 2 TESTIGOS INDICADORES 35 3 INTERPRETACIÓN DE LOS SONIDOS DEL SISTEMA 36 4 CÓMO UTILIZAR EL TECLADO VÍA RADIO CON PANTALLA LCD 37 5 CÓMO UTILIZAR EL TECLADO VÍA RADIO CON LECTOR DE PROXIMIDAD 37 6 CÓMO UTILIZAR EL MANDO DE 1 LED 44 7 CÓMO UTILIZAR EL MANDO DE 3 LED 45 8 CÓMO CONTROLAR E...

Page 35: ...ciones emitidas cuando se abre o cierra una puerta o ventana E S P A N O L Radio Modulación de banda estrecha Código de identificación para cada componente ninguna interferencia entre los sistemas vecinos Protección contra los intentos de interferencia Supervisión por radio de los sistemas periféricos Alimentación Alimentación principal y batería auxiliar Protección contra las sobretensiones Super...

Page 36: ... PARPADEANTE Significa que una de las puertas o ventanas protegidas por un contacto magnético está abierta Seguirá parpadeando hasta que la ventana o la puerta se hayan cerrado 4 LED MEMORIA ALARMA ON Significa que una alarma intruso se ha disparado con el sistema armado PARPADEANTE Significa que una alarma se ha disparado con el sistema armado en modo parcial o anexo El indicador permanece en ON ...

Page 37: ...ol identificó un código o TAG e inicia el armado total Al desarmar el sistema confirma que el panel de control está debidamente desarmado Al armar en modo parcial confirma que el panel de control identificó un código o TAG e inicia el armado parcial Este sonido indica que se produjo un fallo en el sistema Confirma la transmisión de una alarma al Centro de recepción de alarmas Al abrir la puerta de...

Page 38: ...da depende de la configuración del sitio El icono confirma que se llevó a cabo el armado del modo total La pantalla se borra al cabo de unos segundos Cuando se encuentra armado total el testigo izquierdo del teclado está encendido durante el tiempo de salida Cuando se encuentra armado en modo parcial el testigo derecho del teclado parpadea durante todo el periodo de funcionamiento DESARMADO POR ME...

Page 39: ... el teclado se bloquea durante 5 minutos ENVÍO DE UNA SEÑAL DE PÁNICO Puede mandar una alarma de pánico en cualquier momento si se siente amenazado en su casa incluso con el sistema desarmado Basta con pulsar simultáneamente las teclas SOS Entonces se dispara una sirena en función de la configuración La Central Receptora de Alarmas recibe una alarma PANTALLA LCD DEL TECLADO El teclado está equipad...

Page 40: ... que el sistema pueda armarse sin un código o un TAG Puede anularse un detector durante un periodo fijo si desea dejar una habitación sin protección basta con entrar en ANULADO MANUAL y seleccionar un detector También pueden utilizarse las flechas del teclado para acceder directamente a ciertas funciones del menú basta con entrar en TECLAS RAPIDAS La FECHA Y HORA puede actualizarlas el usuario en ...

Page 41: ...tores de su instalación entrando al menú AVISO Las funciones domóticas se encuentran en un menú especial EQUIPOS REMOTOS Seleccione el dispositivo domótico y enciéndalo o apáguelo En algunos sistemas es posible poner en funcionamiento la cámara de los detectores que están equipados con una de ellas CAMBIO DE BATERÍA El indicador de batería de la pantalla del teclado indica en qué momento se ha de ...

Page 42: ...erciórese de que el armado del sistema sea confirmado por los tonos correspondientes Si durante el armado se señaliza que queda alguna zona abierta por favor desarme el sistema antes de verificar las puertas y las ventanas protegidas DESARMADO POR MEDIO DEL CÓDIGO O DEL TAG Para permitirle llegar al teclado sin que se dispare una alarma el instalador programó un retardo de entrada de 30 segundos d...

Page 43: ... el sistema desarmado Basta con pulsar simultáneamente las teclas SOS Entonces se dispara una sirena en función de la configuración El Centro de recepción de alarmas recibe una alarma PROGRAMACIÓN DEL TECLADO El teclado puede llegar a tener hasta 10 usuarios El usuario 1 tiene el código principal o TAG principal Para empezar la programación Pulse los botones on y off simultáneamente El testigo roj...

Page 44: ... CUIDADO El sistema saldrá automáticamente del modo programación al cabo de 15 segundos si no se pulsó ninguna tecla y el testigo rojo se apagará En caso de que ocurra esto se ha de volver a empezar desde el principio E S P A N O L 43 Armado total CÓDIGO o TAG Armado parcial CÓDIGO o TAG Armado anexo CÓDIGO o TAG Desarmado Introducir CÓDIGO o presentar TAG Desarmar por coacción Introducir CÓDIGO D...

Page 45: ...isión a la Central Receptora de Alarmas ALARMA DE PÁNICO Puede mandar una alarma de pánico en cualquier momento si se siente amenazado en su casa incluso con el sistema desarmado Basta con pulsar simultáneamente las teclas SOS Entonces se dispara una sirena en función de la configuración La Central Receptora de Alarmas recibe una alarma BOTÓN ESPECÍFICO La acción de esta tecla depende de la config...

Page 46: ... salido del área por proteger DESARMADO Pulse el botón de desarmado El LED correspondiente parpadea durante la comunicación con el panel y permanece iluminado durante 3 s para confirmar la instrucción La sirena del panel emite el tono de desarmado El desarmado también detendrá la sirena pero no interrumpe la transmisión a la Central Receptora de Alarmas ARMADO DEL MODO ANEXO Si se ha configurado u...

Page 47: ...olan el siguiente aparato Los LED 1 y 2 parpadean hasta que el sistema acepte la orden a continuación se iluminan durante 3 s VERIFICACIÓN DEL ESTADO DEL SISTEMA Pulse el botón Control durante un segundo Los LED se iluminan varias veces en una sucesión a continuación el LED correspondiente al estado de armado en curso se ilumina durante 3 s CAMBIAR LA BATERÍA Cuando la batería comience a degradars...

Page 48: ...vez que se oye una melodía Para desarmar el sistema Marque 31 para desarmado total 32 para desarmado modo parcial y 33 para desarmado anexo Para controlar un dispositivo eléctrico Marque 101 a 112 en función del número del equipo programado en su sistema de alarma Un bip corto le informa que el equipo está activo Dos bips le informan que su equipo ya no está activo Marque 1 para activar el equipo ...

Page 49: ...el caso de la sirena exterior opcional todos los componentes de su sistema funcionan en el exterior Consérvelos en un lugar limpio y seco y a temperatura ambiente Evite golpear los componentes y en especial el mando No los sumerja Para limpiar los componentes utilice un trapo seco sin detergente Arroje las baterías usadas en los contenedores adecuados Evite exponerse a una emisión prolongada de la...

Page 50: ... non rappresenta nessun pericolo per l utente 49 I T A L I A N O 1 INTRODUZIONE AL SISTEMA DI SICUREZZA 50 2 SPIE LUMINOSE 51 3 DESCRIZIONE DEGLI AVVISI ACUSTICI DEL SISTEMA 52 4 GUIDA ALL USO DELLA TASTIERA WIRELESS CON DISPLAY 53 5 GUIDA ALL USO DELLA TASTIERA WIRELESS CON LETTORE PROXY 57 6 GUIDA ALL USO DEI TELECOMANDI 60 7 COME UTILIZZARE IL TELECOMANDO CON 3 LED 61 7 GUIDA AL CONTROLLO DEL S...

Page 51: ...do la porta o la finestra viene aperta o chiusa Radio Modulazione di frequenza di banda stretta Codice di identificazione per ciascun componente nessuna interferenza fra sistemi vicini Protezione contro tentativi di interferenze intenzionali Radiomonitoring delle periferiche sistema Elettricità Alimentazione di rete con batteria di soccorso Protezione contro le sovratensioni integrata Controllo de...

Page 52: ...re o una delle porte protette da un contatto magnetico è aperta Lampeggia fino alla chiusura della porta o della finestra 4 SPIA LED MEMORIA ALLARMI ON Significa che una segnalazione allarme intrusione è sopravvenuta mentre il sistema era inserito LAMPEGGIANTE Significa che una segnalazione allarme è sopravvenuta mentre il sistema era inserito in modo parziale o annesso La spia rimane attiva fino ...

Page 53: ...ricevuto un codice o identificatore valido e che sta inserendo l impostazione totale Disinserendo conferma che la centrale è stata disinserita con successo Inserendo l impostazione parziale si otterrà conferma che la centrale ha ricevuto un codice o identificatore valido e che sta inserendo con l impostazione parziale Questa tonalità indica un guasto nel sistema Conferma la trasmissione di allarme...

Page 54: ...ficativo programmato La tonalità d inserimento viene emessa dalla tastiera e dalla sirena del pannello se configurata Il display conteggia il tempo rimanente per l uscita L inserimento è completato automaticamente alla fine del tempo in funzione della configurazione locale L icona conferma la fine dell inserimento dell impostazione totale Il display si cancella dopo qualche secondo Per l inserimen...

Page 55: ...icezione allarmi INVIO DI UN SEGNALE DI EMERGENZA Potete inviare un segnale istantaneo di emergenza in caso di emergenza in casa anche se il vostro sistema non è inserito Premere i tasti SOS simultaneamente La sirena può essere attivata in funzione della configurazione Il centro di ricezione allarmi viene immediatamente avvisato Nota il vostro istallatore può programmare i parametri acustici per c...

Page 56: ...ente premendo un tasto relativo al tipo di inserimento È possibile escludere un sensore per un periodo determinato se volete lasciare una stanza senza protezione accedendo al menu ESCLUSIONE e selezionando un sensore È possibile personalizzare i tasti freccia della tastiera per un accesso diretto alle funzioni del menu modificando SCORCIATOIA SHORTCUT DATA ED ORA possono essere regolate dall utent...

Page 57: ...che ne sono attrezzati SOSTITUZIONE DELLA BATTERIA L indicatore di carica della batteria sul display indica quando sostituire la batteria Aprite il coperchio del vano batteria sul lato posteriore della tastiera ed inserite una batteria CR123A da 3V rispettando le polarità Questa funzione richiede un estensione X 10 opzionale per moduli X 10 I T A L I A N O AVVERTENZA Esiste un rischio di esplosion...

Page 58: ... seguita dalla tonalità d inserimento Se un errore di perimetro finestra o porta aperta viene segnalato all inserimento disinserite il sistema prima di verificare le porte e le finestre dotate di contatti DISINSERIMENTO MEDIANTE CODICE O IDENTIFICATIVO Per consentirvi di raggiungere la tastiera senza attivare un segnale d allarme l installatore ha programmato un tempo di entrata di 30 secondi in f...

Page 59: ... il vostro sistema non è inserito Premere i tasti SOS simultaneamente La sirena viene attivata in funzione della configurazione Il centro di ricezione allarmi è avvisato PROGRAMMAZIONE DELLA TASTIERA La tastiera supporta fino a 10 utenti L utente 1 ha il codice principale o l identificativo principale Per programmare Premere i tasti di controllo on e off simultaneamente La spia rossa lampeggia len...

Page 60: ... dal modo programmazione dopo 15 secondi se non sono stati premuti tasti e la spia rossa si spegne Se succede si deve ricominciare la procedura dall inizio 59 I T A L I A N O Inserimento impostazione totale CODICE o TAG IDENTIFICATIVO Inserimento impostazione parziale CODICE o TAG IDENTIFICATIVO Inserimento impostazione annesso CODICE o TAG IDENTIFICATIVO Disinserimento Immettere CODICE o presenta...

Page 61: ...nterrompe la trasmissione al centro di ricezione allarmi ARC ALLARME DI EMERGENZA Potete inviare un segnale istantaneo di emergenza in caso di emergenza a casa anche se il vostro sistema non è inserito Premere i tasti SOS simultaneamente La sirena viene attivata in funzione della configurazione Il centro di ricezione allarmi è avvisato TASTO SPECIFICO L azione del tasto specifico demotica dipende ...

Page 62: ...lla zona da proteggere DISINSERIMENTO Premere il tasto di disinserimento Il LED associato lampeggia durante la comunicazione con la centrale quindi rimane acceso per 3 secondi per confermare l istruzione La tonalità di disinserimento viene emessa dalla sirena della centrale Il disinserimento arresta anche la sirena ma non interrompe la trasmissione al CRA Centro Ricezione Allarmi INSERIMENTO DELLA...

Page 63: ...E LO STATO DEL SISTEMA Premere il tasto di controllo per 1 secondo Tutti i LED si accendono in successione più volte quindi il LED dello stato d inserimento corrente rimane acceso per 3 secondi SOSTITUZIONE DELLA BATTERIA Quando la batteria stà per scaricarsi i LED si spengono gradualmente Inserire un cacciavite piccolo nello spazio sul retro della scatola come illustrato dalla figura Spingere con...

Page 64: ...melodia Per disinserire il sistema Comporre 31 per un disinserimento totale 32 per disinserire il sistema parziale 33 per disinserire l eventuale settore annesso Per controllare un dispositivo elettrico demotico X 10 Comporre da 101 a 112 in funzione del numero di programma dell apparecchio nel sistema di sicurezza Una tonalità breve vi informa che l apparecchio è attivo Due tonalità brevi vi info...

Page 65: ...tema sono progettati unicamente per uso all interno Conservateli in un luogo secco e pulito a temperatura ambiente Evitare gli urti per tutti i componenti e più particolarmente evitate di far cadere il telecomando Non immergere Utilizzare unicamente un panno asciutto senza detergenti per pulire i componenti Deporre le batterie usate nei contenitori previsti a tal fine Evitate di esporvi al suono p...

Page 66: ... Funkfrequenz ausgelegt Jede Gefahr für den Benutzer ist ausgeschlossen 65 D E U T S C H 1 EINFÜHRUNG IN DAS SICHERHEITSSYSTEM 66 2 ANZEIGEN 67 3 AUDIOSIGNALE DER ANLAGE 68 4 EINSATZ DES FUNK BEDIENTEILS MIT ANZEIGE 69 5 EINSATZ DES FUNK BEDIENTEILS MIT PROX LESER 73 6 BEDIENUNG DES SCHLÜSSELANHÄNGERS MIT 1 LED 76 7 BEDIENUNG DES SCHLÜSSELANHÄNGERS MIT 3 LEDS 77 8 TELEFONISCHE STEUERUNG DER ANLAGE...

Page 67: ...entstehen wenn eine Tür oder Fenster geöffnet oder geschlossen wird D E U T S C H Funk Schmale Bandbreite der Frequenzen Identifikationscode für jede Komponente keine Interferenz zwischen nahe gelegenen Anlagen Schutz gegen versuchte Funkstörung Funküberwachung der Bedienteile der Anlage Elektrik Netzteil mit Batteriesicherung Integrierter Überspannungsschutz Überwachung der Stromversorgung der An...

Page 68: ...et 3 LED ANZEIGE MELDER AKTIVIERT BLINKLICHT Eines der Fenster eine der Türen mit Magnetkontakt wurde geöffnet Das Blinklicht bleibt aktiviert bis das Fenster oder die Tür wieder geschlossen wurde 4 LED ANZEIGE ALARMSPEICHER EIN Während der Scharfschaltung der Anlage erfolgte ein Einbruchalarm BLINKLICHT Während der Scharfschaltung des Teilraums bzw der Meldergruppe erfolgte ein Einbruchalarm Die ...

Page 69: ...dass die Funkzentrale durch einen gültigen Code oder Schlüsselanhänger aktiviert wurde und die Scharfschaltung des Teilraums vorbereitet wird Dieses Signal zeigt eine Störung der Anlage an Bestätigt die Übertragung eines Alarms an die Alarmempfangsstelle Nach dem Öffnen der Eingangstüre beginnt die Eingangsverzögerung Innerhalb dieser Zeit sollten Sie Ihre Anlage unscharf schalten Am Ende der Eing...

Page 70: ...eren die Scharfschaltung durch einen Ton Auf der Anzeige läuft ein Countdown der verbleibenden Ausgangsverzögerung Die Scharfschaltung wird automatisch am Ende der Verzögerung aktiviert je nach Standortkonfiguration Das Bildsymbol bestätigt die erfolgreiche Einschaltung des Haupt Gesamtbereichs Der Bildschirm erlöscht nach einigen Sekunden Beim Scharfschalten des Haupt Gesamtbereichs ist die linke...

Page 71: ...ehleingaben bzw Einlesen von 5 nicht erkannten Schlüsselanhängern wird das Bedienteil 5 Minuten lang gesperrt PANIKSIGNAL Sie können einen sofortigen Panikalarm auslösen wenn Sie sich zu Hause bedroht fühlen selbst bei unscharfer Anlage Drücken Sie beide SOS Tasten gleichzeitig Die Sirene wird ausgelöst je nach Konfiguration Die Alarmempfangsstelle wird verständigt ANZEIGE DES BEDIENTEILS Ihr Bedi...

Page 72: ... Anlage ohne Code oder Schlüssel erfolgen Sie können einen Melder für bestimmte Zeit umgehen wenn Sie einen Raum ungesichert lassen müssen Dazu das MELDER GESPERRT Menü aufrufen und einen Melder auswählen Durch Ändern der TASTATURBEFEHLE können Sie die Pfeiltasten auf Ihrer Bedieneinheit individuell programmieren um direkt Menüfunktionen aufzurufen DATUM UND ZEIT können vom Benutzer bei manchen An...

Page 73: ...griff auf das Menü KLANGSIGNAL mit manchen Detektoren Ihrer Anlage verknüpfen lässt Funktionen für die Gerätesteuerung finden Sie in einem eigenen Menü FERNBEDIENTEILE Wählen Sie das elektrische Gerät und schalten Sie es ein oder aus Bei manchen Anlagen besteht die Möglichkeit die auf Meldern montierte Kamera auszulösen BATTERIEWECHSEL Die Batterieanzeige auf dem Bedienteil gibt an wann die Batter...

Page 74: ...ng wird automatisch am Ende der Verzögerung aktiviert je nach Standortkonfiguration Stellen Sie stets sicher dass auf Ihre Scharfschaltungsaufforderung ein Bestätigungssignal folgt Wenn beim Scharfschalten eine Perimeterstörung signalisiert wird muss die Anlage unscharf geschaltet werden um mit Kontakten ausgestattete Türen und Fenster zu überprüfen UNSCHARFSCHALTUNG MIT IHREM CODE ODER SCHLÜSSELA...

Page 75: ...inanderfolgenden Fehleingaben wird das Bedienteil 5 Minuten lang gesperrt PANIKSIGNAL Sie können einen sofortigen Panikalarm auslösen wenn Sie sich zu Hause bedroht fühlen selbst bei unscharfer Anlage Drücken Sie beide SOS Tasten gleichzeitig Die Sirene wird ausgelöst je nach Konfiguration Die Alarmempfangsstelle wird verständigt PROGRAMMIERUNG DES BEDIENTEILS Das Bedienteil kann von bis zu 10 Ben...

Page 76: ...icht aus Taste drücken WARNUNG Nach 15 Sekunden wird der Programmiermodus automatisch beendet wenn keine Taste gedrückt wurde Das rote Licht erlöscht In diesem Fall müssen Sie den Prozess noch einmal von vorne beginnen D E U T S C H 75 Scharfschalten des Haupt Gesamtbereichs CODE oder Schlüssel Scharfschalten des Teilraums CODE oder Schlüssel Meldergruppe scharf CODE oder Schlüssel Unscharfschaltu...

Page 77: ... durch einen Ton bestätigt Die Unscharfschaltung deaktiviert gleichzeitig die Sirene unterbricht jedoch nicht die Übertragung an die Alarmempfangsstelle PANIKALARM Sie können einen sofortigen Panikalarm auslösen wenn Sie sich zu Hause bedroht fühlen selbst bei unscharfer Anlage Drücken Sie beide SOS Tasten gleichzeitig Die Sirene wird ausgelöst je nach Konfiguration Die Alarmempfangsstelle wird ve...

Page 78: ...ht jedoch nicht die Übertragung an die Alarmempfangsstelle SCHARFSCHALTUNG DER MELDERGRUPPE Wenn in der Zentrale eine Meldergruppe eingerichtet ist Gleichzeitig die Tasten Haupt Gesamtbereich und Steuerung drücken um die Meldergruppe scharf zu schalten Gleichzeitig die Tasten Unscharfschalten und Steuerung drücken um die Meldergruppe unscharf zu schalten UNSCHARFSCHALTEN NACH EINEM ALARM Falls ein...

Page 79: ...ÜFUNG DES ANLAGENSTATUS Betätigen Sie die Taste Steuerung eine Sekunde lang Alle LEDs leuchten mehrere Male auf Dann leuchtet die LED für den aktuellen Scharfschaltungsstatus 3 Sekunden lang AUSWECHSELN DER BATTERIE Die Leuchtkraft der LEDs verringert sich zunehmend falls eine schwächer werdende Batterie nicht ersetzt wird Einen kleinen Schraubenzieher wie in der Abbildung dargestellt in die Aussp...

Page 80: ...den Haupt Gesamtbereich unscharf zu schalten 32 für den Teilraum 33 für die Meldergruppe Steuerung eines Elektrogeräts Wählen Sie 101 bis 112 entsprechend der Gerätenummer die in Ihrer Alarmanlage eingespeichert wurde Ein kurzer Summerton informiert Sie dass Ihr Gerät eingeschaltet wurde Zwei Summertöne informieren Sie dass Ihr Gerät ausgeschaltet wurde Wählen Sie 1 um das Gerät einzuschalten und ...

Page 81: ...gt Sie sind an einem sauberen trockenen Ort bei Raumtemperatur unterzubringen Vermeiden Sie Erschütterungen aller Komponenten insbesondere das Fallenlassen von Schlüsselanhängern Nicht in Wasser eintauchen Die Komponenten nur mit einem trockenen Tuch kein Reinigungsmittel reinigen Altbatterien sind in speziellen Containern oder bei Sammelstellen für Altbatterien zu entsorgen Verbrauchte Batterien ...

Page 82: ...houdt geen enkel gevaar in voor de gebruiker 81 N E D E R L A N D S 1 INLEIDING TOT HET BEVEILIGINGSSYSTEEM 82 2 LICHTINDICATOREN 83 3 VERKLARING VAN DE SYSTEEMTONEN 84 4 ZO GEBRUIKT U HET DRAADLOZE BEDIENPANEEL MET DISPLAY 85 5 ZO GEBRUIKT U HET DRAADLOZE BEDIENPANEEL MET PROX LEZER 89 6 DE HANDZENDER MET 1 LED GEBRUIKEN 92 7 DE HANDZENDER MET 3 LED S GEBRUIKEN 93 8 ZO BEDIENT U UW SYSTEEM PER TE...

Page 83: ...eur of raamkozijn welke trillingen detecteert die optreden indien de deur of het raam geforceerd worden N E D E R L A N D S Draadloos Smalbandfrequentiemodulatie Identificatiecode voor elke component geen interferentie tussen aangrenzende systemen Beveiliging tegen stoorsignalen Radiobewaking van de systeemmodules Elektrisch Netvoeding met noodbatterij Ingebouwde spanningspiekbeveiliging Bewaking ...

Page 84: ...CATOR DETECTOR GEACTIVEERD KNIPPEREND Dit betekent dat een van de door een magneetcontact beveiligde vensters of deuren is geopend De LED blijft knipperen totdat het venster of de deur gesloten is 4 LED INDICATOR ALARMGEHEUGEN AAN Dit betekent dat een inbraakalarm is afgegaan terwijl het systeem was ingeschakeld KNIPPEREND Dit betekent dat een alarm is afgegaan terwijl de deelzone of de naburige z...

Page 85: ...g heeft ontvangen en zich gereedmaakt voor de inschakeling van de totale zone Bij uitschakeling bevestigt deze toon dat het beveiligingspaneel werkelijk is uitgeschakeld Bij de inschakeling van een deelzone bevestigt deze toon dat het beveiligingspaneel een geldige code of keytag heeft ontvangen en zich gereedmaakt voor de inschakeling van de deelzone Deze toon wijst op een storing in het systeem ...

Page 86: ...tisch beëindigd na afloop van de vertraging afhankelijk van siteconfiguratie De icoon bevestigt de voltooiing van de inschakeling van de totale zone Na enkele seconden wordt het scherm gewist Voor de inschakeling van de totale zone brandt de linker lichtindicator van het bedienpaneel tijdens de uitgangsvertraging Voor de inschakeling van de deelzone knippert de rechter lichtindicator van het bedie...

Page 87: ...ingend paniekalarm uitzenden wanneer u zich thuis bedreigd voelt zelfs wanneer uw systeem niet is ingeschakeld Druk de SOS toetsen tegelijk in De sirene wordt getriggerd afhankelijk van configuratie De alarmmeldkamer ontvangt een alarmsignaal BEDIENPANEELDISPLAY Uw bedienpaneel is uitgerust met een display voor vlotte toegang tot geavanceerde gebruikersfuncties en tal van mogelijkheden De menufunc...

Page 88: ...t ingeschakeld zonder code of keytag U kunt een detector overbruggen voor één instelperiode als u een kamer moet verlaten zonder beveiliging door naar het menu MANUEEL OVERBR te gaan en een detector te selecteren U kunt de pijltoetsen op uw bedienpaneel aanpassen om direct naar de functies in het menu te kunnen gaan door KOPPELINGEN te wijzigen DATUM EN TIJD kunnen bij sommige systemen door de geb...

Page 89: ...detectoren in uw installatie gekoppeld is door naar het menu BELFUNCTIE te gaan Woningautomatiseringsfuncties staan in een specifiek menu REMOTE CONTACT Selecteer het elektrisch apparaat en schakel het in of uit Bij sommige systemen kan men de camera s waarmee de detectoren uitgerust zijn triggeren BATTERIJ VERVANGEN De batterij indicator op het bedienpaneeldisplay geeft aan wanneer de batterij mo...

Page 90: ...hakelverzoek wordt gevolgd door de inschakeltoon Als bij inschakeling een omtrekfout wordt gemeld dient u het systeem uit te schakelen en daarna de deuren en vensters die uitgerust zijn met contacten te controleren UITSCHAKELING MET UW CODE OF KEYTAG Om naar het bedienpaneel te kunnen gaan zonder een alarm te laten afgaan heeft uw installateur een ingangsvertraging van 30 seconden geprogrammeerd a...

Page 91: ... Druk de SOS toetsen tegelijk in De sirene wordt getriggerd afhankelijk van configuratie De alarmmeldkamer ontvangt een alarmsignaal UW BEDIENPANEEL PROGRAMMEREN Het bedienpaneel kan maximaal 10 gebruikers beheren Gebruiker 1 heeft de mastercode of master keytag Om in programmeermodus te komen Druk de in en uitschakeltoetsen tegelijk in Het rode licht gaat langzaam knipperen Voer de mastercode in ...

Page 92: ...k op de verlichte uitschakeltoets WAARSCHUWING Als geen toetsen worden ingedrukt verlaat het systeem automatisch de programmeermodus na 15 seconden en het rode licht dooft Als dit gebeurt moet u dit proces van voor af aan beginnen N E D E R L A N D S 91 Totale zone inschakelen CODE of KEYTAG Deelzone inschakelen CODE of KEYTAG Naburige zone inschakelen CODE of KEYTAG Uitschakelen Voer CODE in of p...

Page 93: ...d maar de transmissie naar de alarmmeldkamer wordt daardoor niet onderbroken PANIEKALARM U kunt een dringend paniekalarm uitzenden wanneer u zich thuis bedreigd voelt zelfs wanneer uw systeem niet is ingeschakeld Druk de SOS toetsen tegelijk in De sirene wordt getriggerd afhankelijk van configuratie De alarmmeldkamer ontvangt een alarmsignaal SPECIFIEKE TOETS De werking van de specifieke toets is ...

Page 94: ...stilgelegd maar de transmissie naar de alarmmeldkamer wordt daardoor niet onderbroken DE ANNEX ZONE INSCHAKELEN Als het systeem is ingesteld op annexe zone Om de annexe zone in te schakelen drukt u tegelijkertijd op de knoppen Totaal en Controle Om deze uit te schakelen drukt u tegelijkertijd op de knop Uit en op de knop Controle UITSCHAKELEN NA EEN ALARM Indien er een alarm is geweest tijdens uw ...

Page 95: ...lle LED s lichten verschillende keren achtereenvolgens op en de LED voor de huidige inschakelstatus blijft 3 seconden branden DE BATTERIJ VERVANGEN Wanneer de accu langzaam opraakt zullen de LED s niet volop blijven oplichten maar langzaam doven Gebruik een smalle schroevendraaier in de ruimte aan de achterkant van de behuizing zoals u ziet in de afbeelding Oefen druk uit op de schroevendraaier en...

Page 96: ...ale zone uit te schakelen 32 om de deelzone uit te schakelen 33 om de naburige zone uit te schakelen Om een elektrisch apparaat te bedienen Toets 101 tot 112 naargelang van het nummer van het apparaat dat in uw alarmsysteem is geprogrammeerd Eén korte pieptoon betekent dat uw apparaat geactiveerd is Twee pieptonen betekent dat uw apparaat niet geactiveerd is Toets 1 om het apparaat in te schakelen...

Page 97: ...de optionele externe sirene zijn alleen geschikt voor gebruik binnenshuis Houd ze in een schone en droge plaats op omgevingstemperatuur Vermijd schokken voor alle componenten en laat vooral de handzender niet vallen Dompel niet in vloeistof Maak de componenten alleen schoon met een droge doek geen reinigingsmiddel Gooi oude batterijen in daartoe bestemde verzamelbakken Vermijd blootstelling van uz...

Reviews: