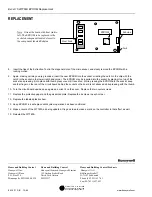
Excel 15 W7760A
EPROM REPLACEMENT
DESCRIPTION
5. Remove galvanized plate. Place on adjacent work
This EPROM Replacement procedure outlines the
surface in the orientation as it was removed
process to upgrade the Excel 15 W7760A Controller to
the latest firmware release.
Firmware replacement kit: Part # 32004159-002
Plate
Procedure will apply to future firmware as released.
Work Surface
Material Needed
1. Replacement EPROM. Programmed with new Firmware
Side View
2. #10 Tork Driver (preferred), or 3/16" thin flat-blade
screwdriver
6. Set aside paper protective sheet, then remove 2 screws
that secure board to cover.
3. Extraction Tool: AMP PLCC Extraction Tool 821903-50
00, AMP 822154-1 00, or small diameter probe/object
(i.e. paper clip)
Procedure
1. Discharge static electricity form body by touching known
earth ground.
7. Making certain you are grounded. Remove the circuit
2. Remove W7760A from wiring subbase. Place controller
board and place it component side up, pin side down on
on work surface with pins and label side up.
top of the galvanized plate. Extend pins over the edge
on each side of the galvanized plate.
3. Remove plastic, anti-static sheet. (This sheet contains
device information) – Set aside.
Caution: Do not tear plastic protective sheet at
corners.
Board
Plate
4. Using the #10 Tork Driver or flat-bladed screwdriver
remove the four screws around perimeter. Put the
screws aside in a secure place for later re-assembly.
Work Surface
Side View
®U.S. Registered Trademark
Copyright © 1999 Honeywell Inc. • All Rights Reserved
95- 7631


