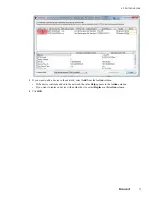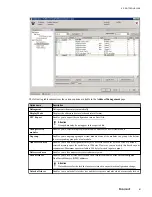
The
Address Management
page appears.
4. Click
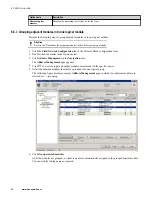
to view the input and output modules associated with the specific device.
5. Select the grouped modules that must be ungrouped.
6. Click
Ungroup
.
After the modules are ungrouped, the virtual name disappears and the actual names of the modules are
reverted.
7. Click
OK
to close the
Address Management
page.
8. Click
OK
to close the
Field Network Configuration
tab.
6.6.5 Adding reserved memory area to the devices
Perform the following steps to group adjacent modules in to one logical module.
1. Click the
Field Network Configuration
tab of the Protocol Block configuration form.
2. Double-click the master in the Network view.
3. Click
Address Management
in the
Navigation
area.
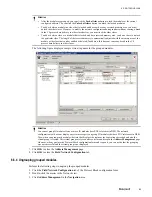
The
Address Management
page appears.
4. Click
to view the input and output modules associated with the specific device.
5. Select the module/device for which you want to add reserved memory area.
6. Click
Add reserved area
.
• An empty row with the text
Reserved
in the
Device/Module name
column appears.
In addition, for each slave a reserved memory space size of 128 bytes is added in the
Length
column.
• Every time you click the
Add reserved area
button, the
Add reserved area
button changes to
Del
reserved area
button and vice versa. You can click the
Del reserved area
button to remove the
unnecessary reserved memory area.
Attention
Maximum space available for a configured module is 244 bytes for an input or an output. When 244 bytes are
configured and if you try to add reserved memory space, an error message appears indicating that no reserved
memory can be added.
Modify the length of the reserved memory as required in the
Length
column.
7. Click
Defragment
.
8. Click
Apply
.
Attention
If you want to cancel adding reserved memory area, you can click
Cancel
in the
Address Management
page and
click
No
in the
Question
dialog box. However, when you open the
Address Management
page after canceling,
the addresses of the other devices changes to 0. You must click the
Defragment
button again to restore the
addresses. However, when you close and open
Field Network Configuration
tab, the addresses are restored.
9. Click
OK
to close the
Address Management
page.
10. Click
OK
to close the
Field Network Configuration
tab.
6.6.6 Defragmenting memory area
Perform the following steps to defragment the memory area.
1. Click the
Field Network Configuration
tab of the Protocol Block configuration form.
2. Double-click the master in the Network view.
3. Click
Address Management
in the
Navigation
area.
4. Click
Defragment
.
6 PROTOCOL BLOCK
84
www.honeywell.com
Summary of Contents for Experion PKS
Page 1: ...Experion PKS PROFIBUS Gateway Module User s Guide EPDOC XX88 en 431E June 2018 Release 431 ...
Page 8: ...CONTENTS 8 www honeywell com ...
Page 10: ...1 ABOUT THIS GUIDE 10 www honeywell com ...
Page 32: ...4 PROFIBUS GATEWAY MODULE PGM INSTALLATION 32 www honeywell com ...
Page 58: ...5 PROFIBUS GATEWAY MODULE PGM BLOCK 58 www honeywell com ...
Page 69: ...6 PROTOCOL BLOCK 69 ...
Page 103: ...5 Click OK 6 PROTOCOL BLOCK 103 ...
Page 110: ...6 PROTOCOL BLOCK 110 www honeywell com ...
Page 183: ...PDC Details tab Figure 6 Detail Display of PDC Details tab 7 DEVICE SUPPORT BLOCK DSB 183 ...
Page 186: ...7 DEVICE SUPPORT BLOCK DSB 186 www honeywell com ...
Page 231: ...9 PROFIBUS I O MODULE PIOMB FUNCTION BLOCK 231 ...
Page 232: ...9 PROFIBUS I O MODULE PIOMB FUNCTION BLOCK 232 www honeywell com ...
Page 236: ...10 PROFIBUS GATEWAY MODULE PGM CONFIGURATION EXAMPLE 236 www honeywell com ...
Page 264: ...13 PROFIBUS GATEWAY MODULE PGM TROUBLESHOOTING 264 www honeywell com ...


