2
3
ABOUT CERAMIC TECHNOLOGY
SET UP
MOVING THE HEATER
10.
Warning
– This appliance has a polarized plug
(one blade is wider than the other). To reduce
the risk of electric shock, this plug is intended
to fit in a polarized outlet only one way. If the
plug does not fit fully in the outlet, reverse the
plug. If it still does not fit, contact a qualified
electrician.
DO NOT
attempt to defeat this
safety feature.
11.
Warning
–
This heater draws 12.5 amps
during operation. To prevent overloading a
circuit, do not plug the heater into a circuit that
already has other appliances working.
12.
Warning
–
It is normal for the plug to feel
warm to the touch; however, a loose fit
between the AC outlet (receptacle) and plug
may cause overheating and distortion of the
plug. Contact a qualified electrician to replace
loose or worn outlet.
13.
Warning
–
To disconnect the heater, first turn
off the product, then grip the plug body and
pull it from the wall outlet. Never pull by the
cord.
14.
Warning
–
DO NOT
insert or allow foreign
objects to enter any ventilation or exhaust
opening as this may cause an electric shock
or fire, or damage the heater.
15.
Warning
–
To prevent a possible fire,
do not
block air intakes or exhaust in any manner.
DO NOT
use on soft surfaces, like a bed, or
where openings may become blocked.
16.
Warning
–
A heater has hot and arcing or
sparking parts inside.
DO NOT
use it in areas
where gasoline, paint or flammable liquids are
used or stored.
17.
Warning
–
Use this heater only as described in
this manual. Any other use not recommended
by the manufacturer may cause fire, electric
shock, or injury to persons.
18.
Warning
–
Always plug heater directly into
a wall outlet/receptacle. Never use with an
extension cord or relocatable power tap
(outlet/power strip).
19.
Warning
–
Never tamper with this product
or attempt to fix it. Any tampering with, or
modification of this product can result in
serious injury, death, or fire. Risk of electric
shock.
DO NOT
open. There are no user
serviceable parts inside.
20.
Warning
–
DO NOT
remove product labels
that contain warnings or safety instruction.
21.
Caution
–
The output of this heater may vary
and its temperature may become intense
enough to burn exposed skin. Use of this
heater is not recommended for persons with
reduced sensitivity to heat or an inability to
react to avoid burns.
22. Caution
–
Before cleaning, or storage, or when
not in use, turn the product’s controls to the
OFF position and unplug the heater from the
electrical outlet and allow to cool.
23. Caution
–
Place the heater on a firm, level,
open surface free from obstructions and at
least 3 feet (0.9 m) away from any combustible
materials.
DO NOT
use on an unstable surface
such as bedding or deep carpeting. Be sure
the heater is not in a position where it may be
tripped over by small children or pets.
24. Caution
–
If your home has aluminum
wiring have a licensed electrician check your
receptacle’s connections. When using a 1500
watt heater, aluminum wire connections can
cause a safety issue.
25.
SAVE THESE
INSTRUCTIONS
• Ceramic heaters generate heat by passing electricity through heating wires embedded in ceramic plates.
• In the Honeywell Ceramic Digital Tower Heater, air is drawn into the back of the heater by a fan, through the ceramic element
and out the front of the heater to gently introduce warm air into the room.
• This type of heating technology provides consistent, even heating.
• For best results, place heater on the floor and allow heater to run for 5-10 minutes to reach maximum heat output.
• The Honeywell Ceramic Digital Tower Heater requires no assembly. Simply unpack heater and save all packaging materials for
off-season storage.
• Place the heater on a firm, level, open surface free from obstructions and at least 3 feet (0.9m) away from any wall or
combustible material.
•
DO NOT
use on an unstable surface such as bedding or deep carpeting.
• BE SURE THE HEATER IS NOT IN A POSITION WHERE IT MAY BE TRIPPED OVER BY CHILDREN OR PETS.
• This heater is equipped with a Cool Touch handle for your convenience.
• Turn off the heater.
• Allow it to cool for ten minutes.
• Unplug heater and move.
OPERATION
• NOTE: NEVER LEAVE AN OPERATING UNIT UNATTENDED
• With heater in the OFF position ( ), plug the heater into
a polarized 120V outlet.
DO NOT FORCE THE POLARIZED
PLUG INTO THE OUTLET;
it will only fit one way.
• With 80° oscillation, the Honeywell Ceramic Digital Tower
Heater is versatile and designed to be placed in the center
of the room or closer to the wall (at least 3 feet way) for
maximum convection room heating.
• Turn heater on by pressing the Power Button ( ).The Power
Indicator will light and the heater will start in the Constant On
HI Level Setting ( ).
• The heater has two operational modes – constant heating or
heating with a thermostat setting.
• To set a Constant Heat Setting, press ( ):
- Choose Low ( ) to use 900 watts of power
- Choose High ( ) to use 1500 watts of power
NOTE:
Because the Low setting does not require as much electricity to operate, it is more energy efficient and may be a better
option if you are concerned about saving energy.
• In the constant heat mode, make sure to manually turn the heater OFF when done using this appliance.
• To set the Thermostat, press the Thermostat Control Buttons (
) and choose your Desired Temperature. The Desired
Temperature will flash five times and then the Current Temperature in the room will display as a steady red.
NOTE:
if the Current Temperature is higher than your Desired Temperature, the heater will be off until the room temperature falls
below this setting or until the Desired Temperature is changed.
• Press the Timer Button ( ) to select 1, 2, 4, or 8 hour setting. The heater will run for that chosen period in the selected mode,
counting down the hours and automatically shut off after the desired time has passed.
• Press the Oscillate Button ( ) to turn on or off 80° oscillation.
• To shut the heater off, press the Power Button ( ) and the heater will begin Powering Down. The heater will shut off after counting
down 6 seconds in the Temperature Display to cool down the internal components.
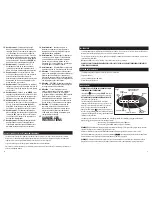
Oscillate Button
Fig. 1
Power
Button
Timer
Thermostat
Control Buttons
Current Temperature/
Desired Temperature Display
Heat Level Settings
Power
Indicator
Summary of Contents for HCE311 Series
Page 11: ...PN 31IMHCE3190 050814 ...

