HE105, HE205 WHOLE HOME BYPASS HUMIDIFIER
33-00229EF—01
4
7.
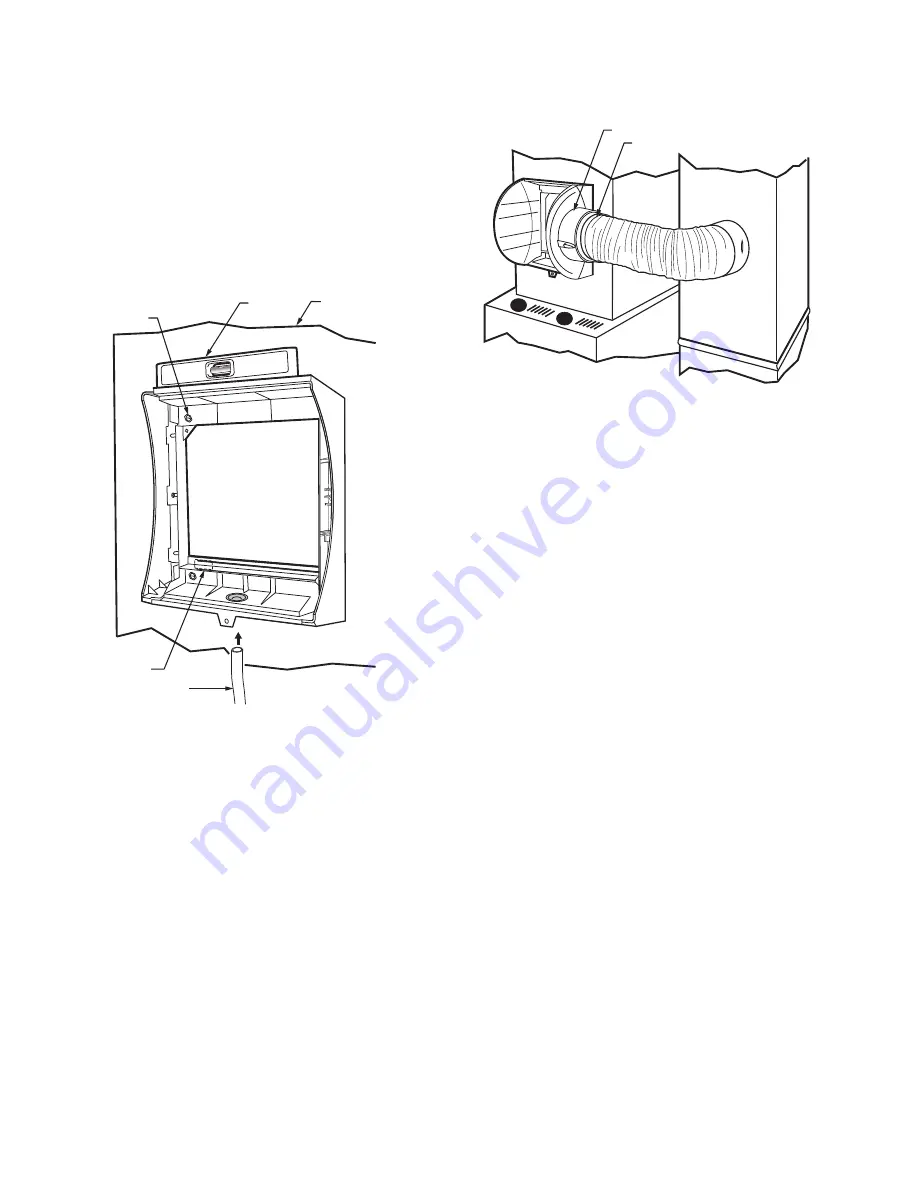
Make sure the humidifier housing is level, then posi-
tion it in the opening so the plastic tabs are in place
on the
lower sheet metal edge
of the opening. Use
pliers, as necessary, to flatten cut edges. See Fig. 5.
8.
Secure the humidifier housing to the opening at the
top and bottom using sheet metal screws.
9.
Reassemble humidifier side plates to customize the
orientation for your specific install. The side plate
with the humidifier port needs to be on the side of
the humidifier that is closest to the bypass ducting.
Be sure to open the bypass flap for use and close it
when the humidifier is not used. See Fig. 6.
Fig. 5. Installing humidifier on duct.
10.
Slide bypass duct over the humidifier port on the
HE105/HE205, making sure that the flex duct
advances past the raised plastic tabs on the port.
These tabs will help to hold the flex duct in place.
Verify that the damper blade has adequate clear-
ance to move back and forth between the closed and
open positions. Secure the flex duct in place with the
plastic connector strap.
11.
Seal the duct connections with foil tape. Seal both
1) the connection between the starter collar end of
the flex duct and the home's duct work and
2) the end of the flex duct to the humidifier over the
top of the connector strap.
12.
Reinstall the humidifier pad assembly in the humidi-
fier housing.
13.
Hinge the cover in place and secure with the thumb-
screw located at the bottom of the cover.
Fig. 6. Connecting bypass ducting.
Connecting the Plumbing
1.
Hot or cold water, either hard or softened, can be
used in the humidifier. Cut the water line so it
reaches from the humidifier to the main water
supply tap.
2.
Turn off water supply and tap into a water line.
• Consult local codes for proper plumbing.
• Use an approved saddle valve or a T-fitting and
manual shutoff valve to tap into the water line.
• Refer to the literature included with the valve you
chose and the local plumbing codes. Use proper
technique for the valve.
• Connect the other end of the humidifier water line
to the water valve.
• Use 1/4 in. O.D. copper tubing and connect to
inlet side of solenoid valve via a compression
fitting or Honeywell Quick Connect fitting.
• Place brass compression nut over copper tubing.
NOTE:
Do not over tighten compression nut.
• Moderate tightness prevents leaking.
• Slide the brass ferrule over the tubing.
• Insert tubing into solenoid valve fitting and
support the valve while tightening the
compression nut.
3.
Connect a water drain line.
• Consult and follow local plumbing codes for
drain pipe size and flow requirement.
• The ideal installation is directly to the main
floor drain using a rubber drain hose.
a. Slide a drain clamp over the tubing.
b. Push the tubing over the drain nipple on the
humidifier.
c. Route the drain hose to the floor drain. The hose
must have a continuous downward slope.
d. Direct the hose outlet into the floor drain. Secure
the hose to reduce the risk of water pooling or
splashing as it drains from the humidifier. See
Fig. 7.
DUCT
LEVEL
S
HEET METAL
S
CREW
S
(4)
PLA
S
TIC
TAB
S
(2)
DRAIN TUBIN
G
M36295
OPENIN
G
TO AIR DUCT
M36298
HUMIDIFIER PORT
CONNECTOR
S
TRAP


