NVR Configurations | 89
800-18160 - B - 07/2014
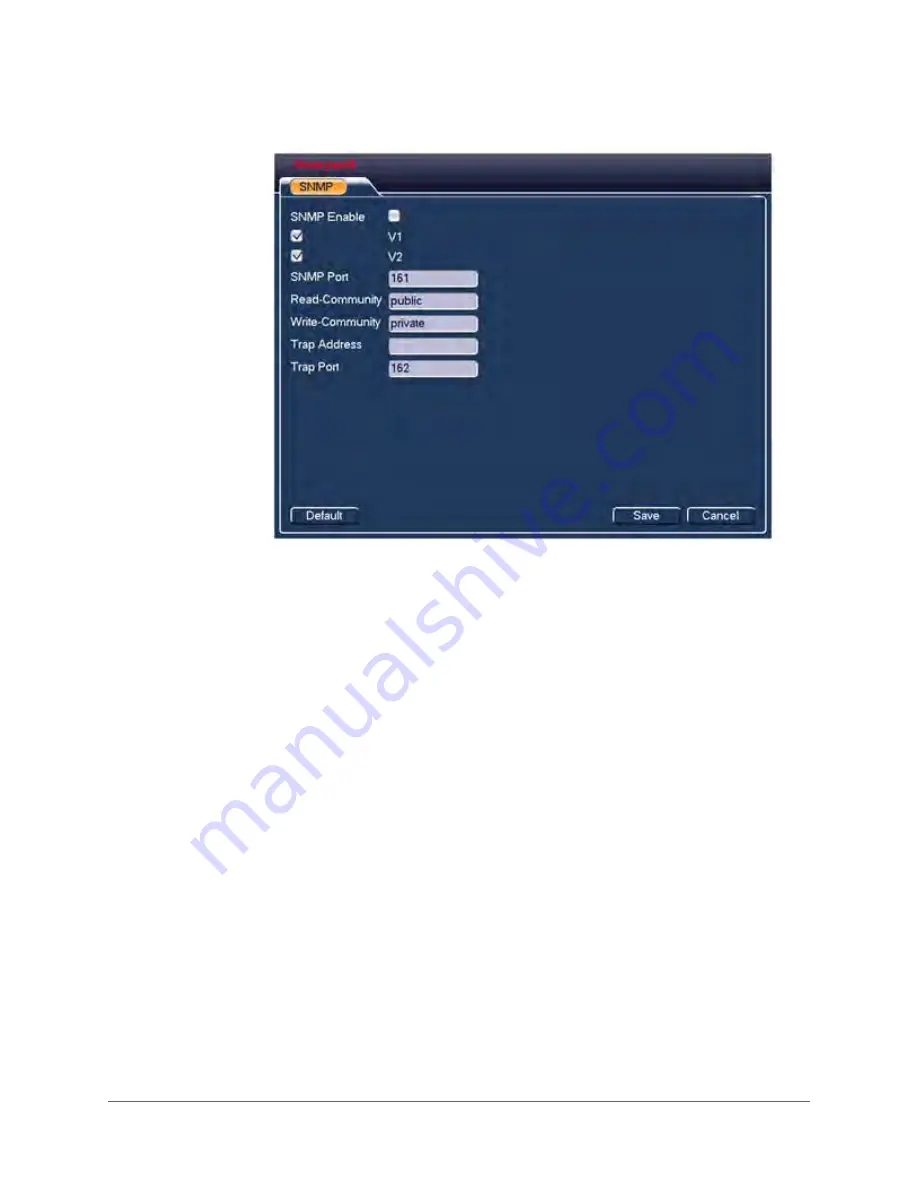
Figure 3-45
SNMP Configuration Interface
2.
Click to enable
SNMP
.
3.
Enter in the
Trap Address
field the IP address for the PC that is running the software.
You can use the default settings for the other items.
4.
Compile the two MIB files. See the note on
.
5.
Run the
MG-SOFT MIB Browser
to load the files through the software MIB Builder.
6.
Enter the IP for the device you want to manage in the MG-SOFT MIB Browser. Make a note
for your future reference.
7.
Open the tree list in the
MG-SOFT MIB Browser
where you can get the device
configuration. You can see the following information for the device: the number of video
channels, the number of audio channels, the version number, for example.
Configuring Auto Register Settings
The
Auto Register
function allows the device to automatically register to the proxy that you have
specified. This means that you can use the client-end to access the NVR through the proxy. The
proxy has a switch function. The device supports server either IPv4 or domain server addresses.
Follow these steps to set the proxy server address, the port, and the sub-device name at the
device end.
1.
Double-click
Auto Register
in the
Network Setting
configuration window. The
Auto
Register
configuration interface appears.
Summary of Contents for HEN04101(X)
Page 2: ......
Page 3: ...User Guide ...
Page 18: ...www honeywell com security 18 Performance Series Network Video Recorder User Guide ...
Page 24: ...www honeywell com security 24 Performance Series Network Video Recorder User Guide ...
Page 138: ...www honeywell com security 138 Performance Series Network Video Recorder User Guide ...
Page 210: ...www honeywell com security 210 Performance Series Network Video Recorder User Guide ...
Page 222: ...www honeywell com security 222 Performance Series Network Video Recorder User Guide ...
Page 238: ...www honeywell com security 238 Performance Series Network Video Recorder User Guide ...
Page 239: ......


